Setup privileged identities
Privileged Identities is an insight designating entitlements and identities that are privileged. This insight highlights risky entitlements and identities worth additional attention and is configured by an Administrator. Identities are considered to be privileged based on the connections/permissions that they are entitled to.
Privileged Identities are configured for each application integration individually from the Integrations page.
Follow the following steps to setup privileged identities:
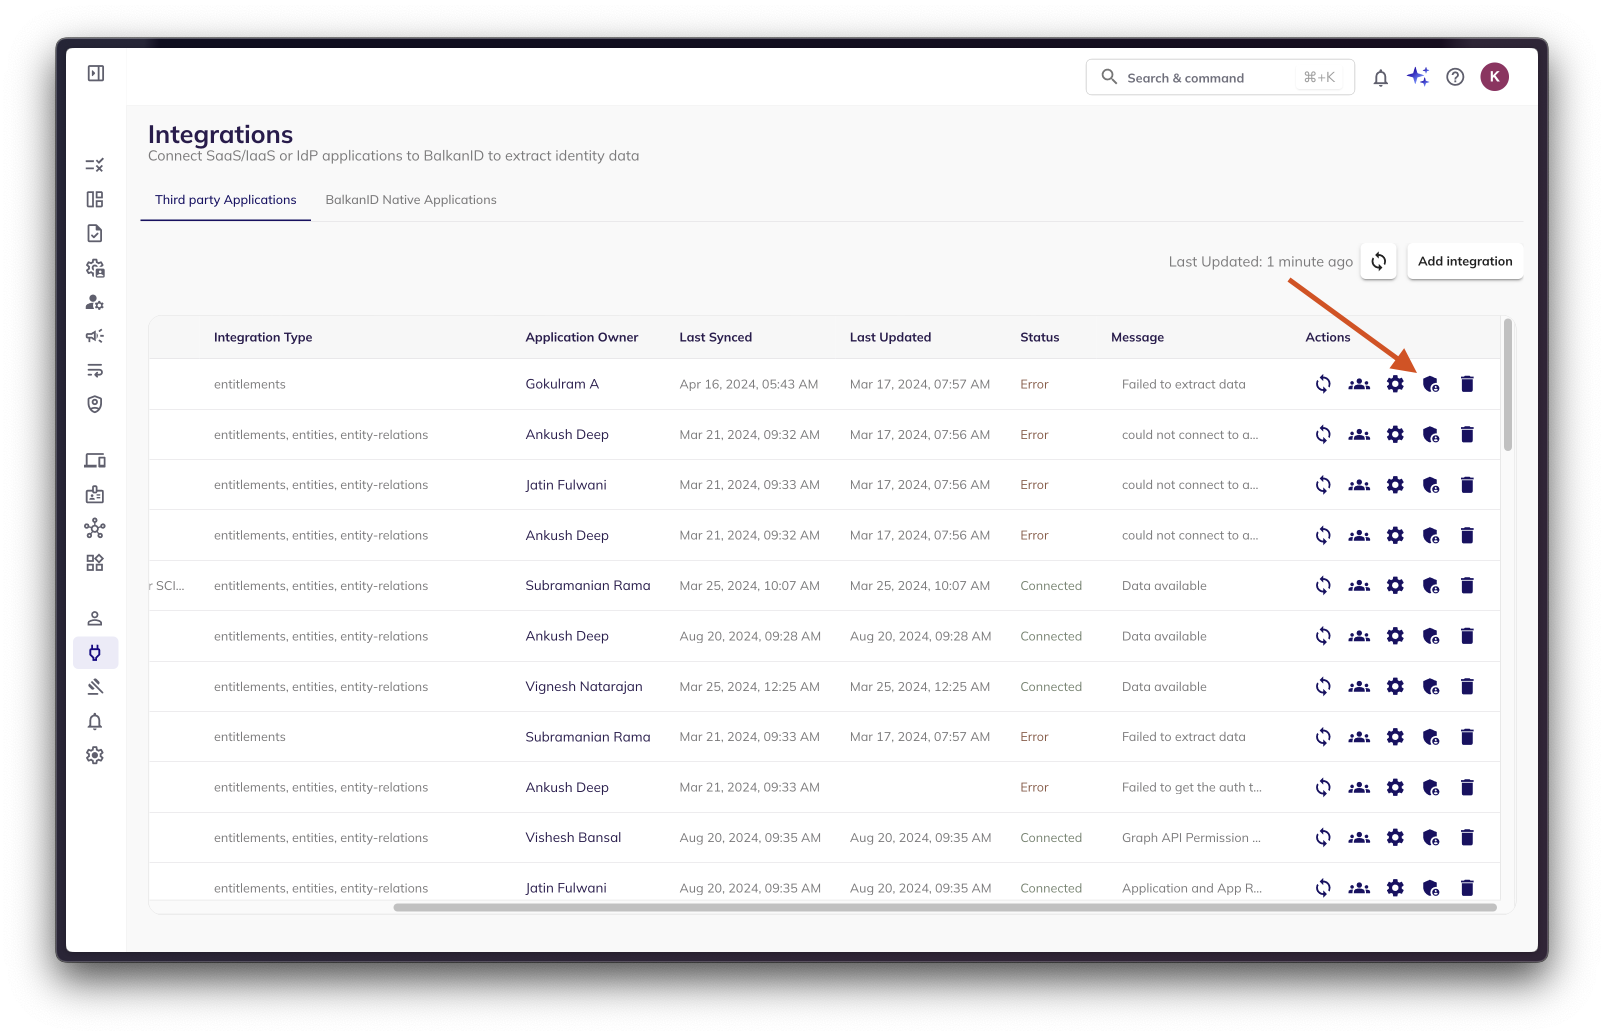
1. Select an application integration and select the Setup Privileged Identities action from the Actions menu.

Some application integrations may not have the Setup Privileged Identities action available, which will be indicated by the action being disabled.

This may happen when there is no data available for the integration. Once the application integration has Status of Connected and the message of Data available, the Setup Privileged Identities action will become available.
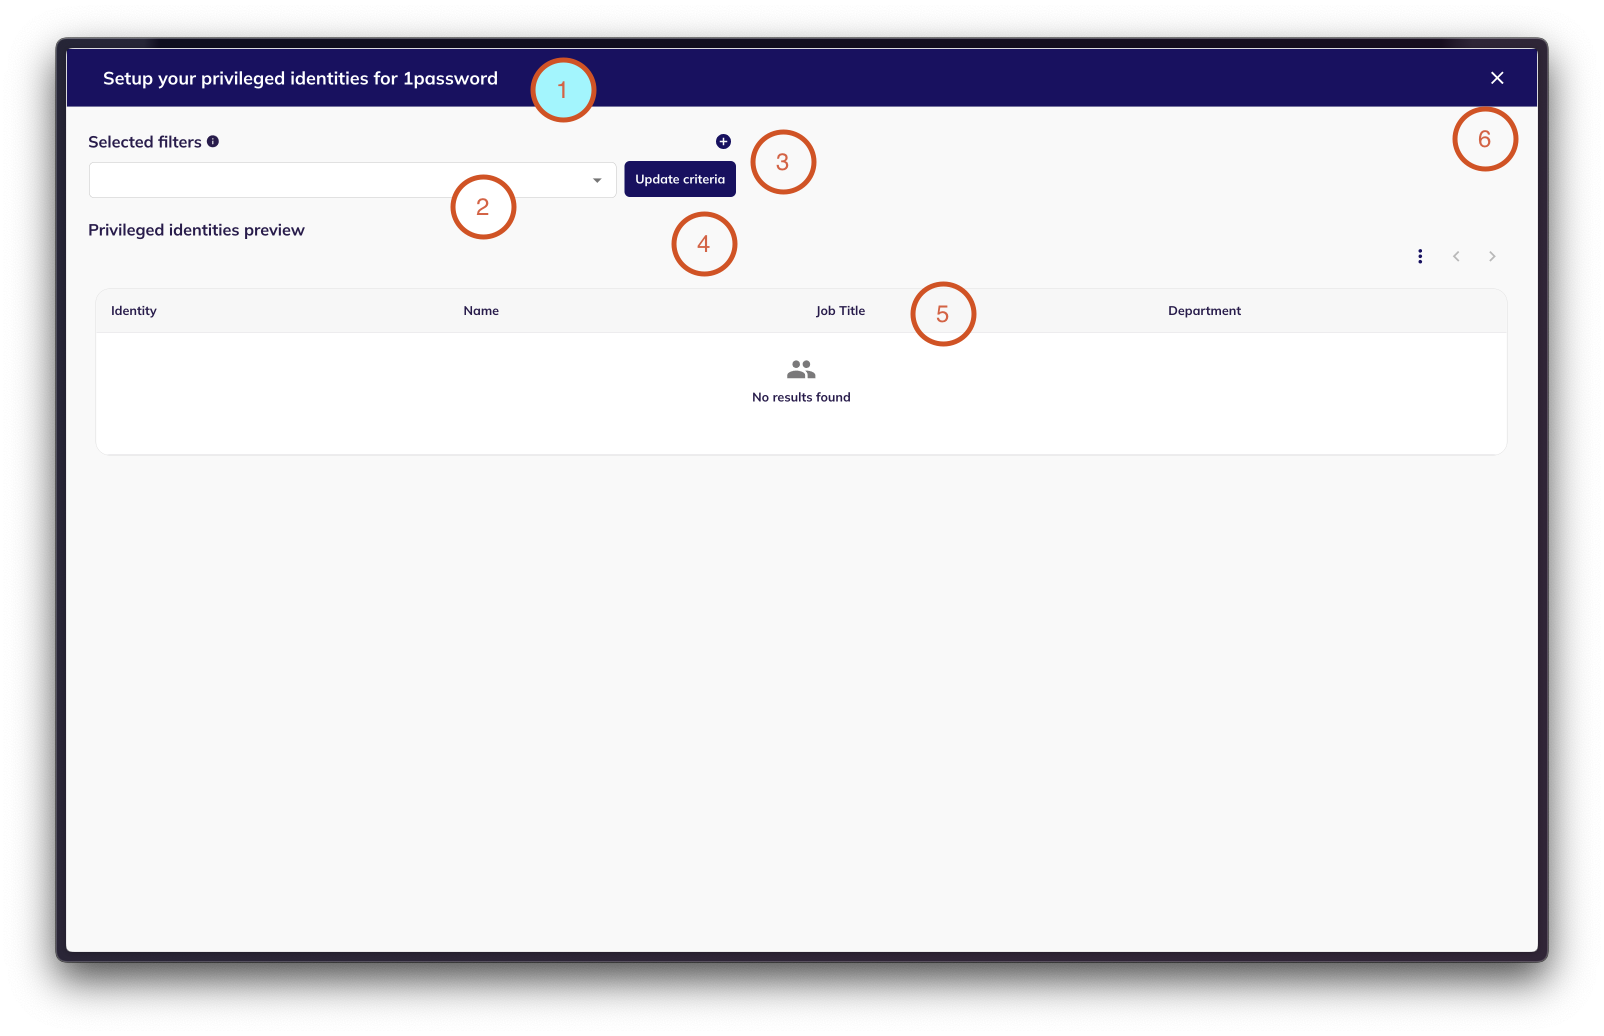
2. You will see the below tab on opening. The Setup Privileged Identities page has six sections.

The Title section shows the type of the application integration for which privileged identities are being setup.
The Selected Filters dropdown is where Administrator selects Saved Filters to use for designated Privileged Identities.
If there are no Saved Filters available, the Selected Filters dropdown will indicate so:

If Saved Filters are available, they can be selected from the dropdown:

Once selected, they’ll appear in the selection window and the Update Criteria button will become available indicating that there are changes that can be saved:

Administrators can select multiple filters as part of the Privileged Identities criteria.
To see a list of all previously saved Privileged Filters, go to Settings > Saved Filters.
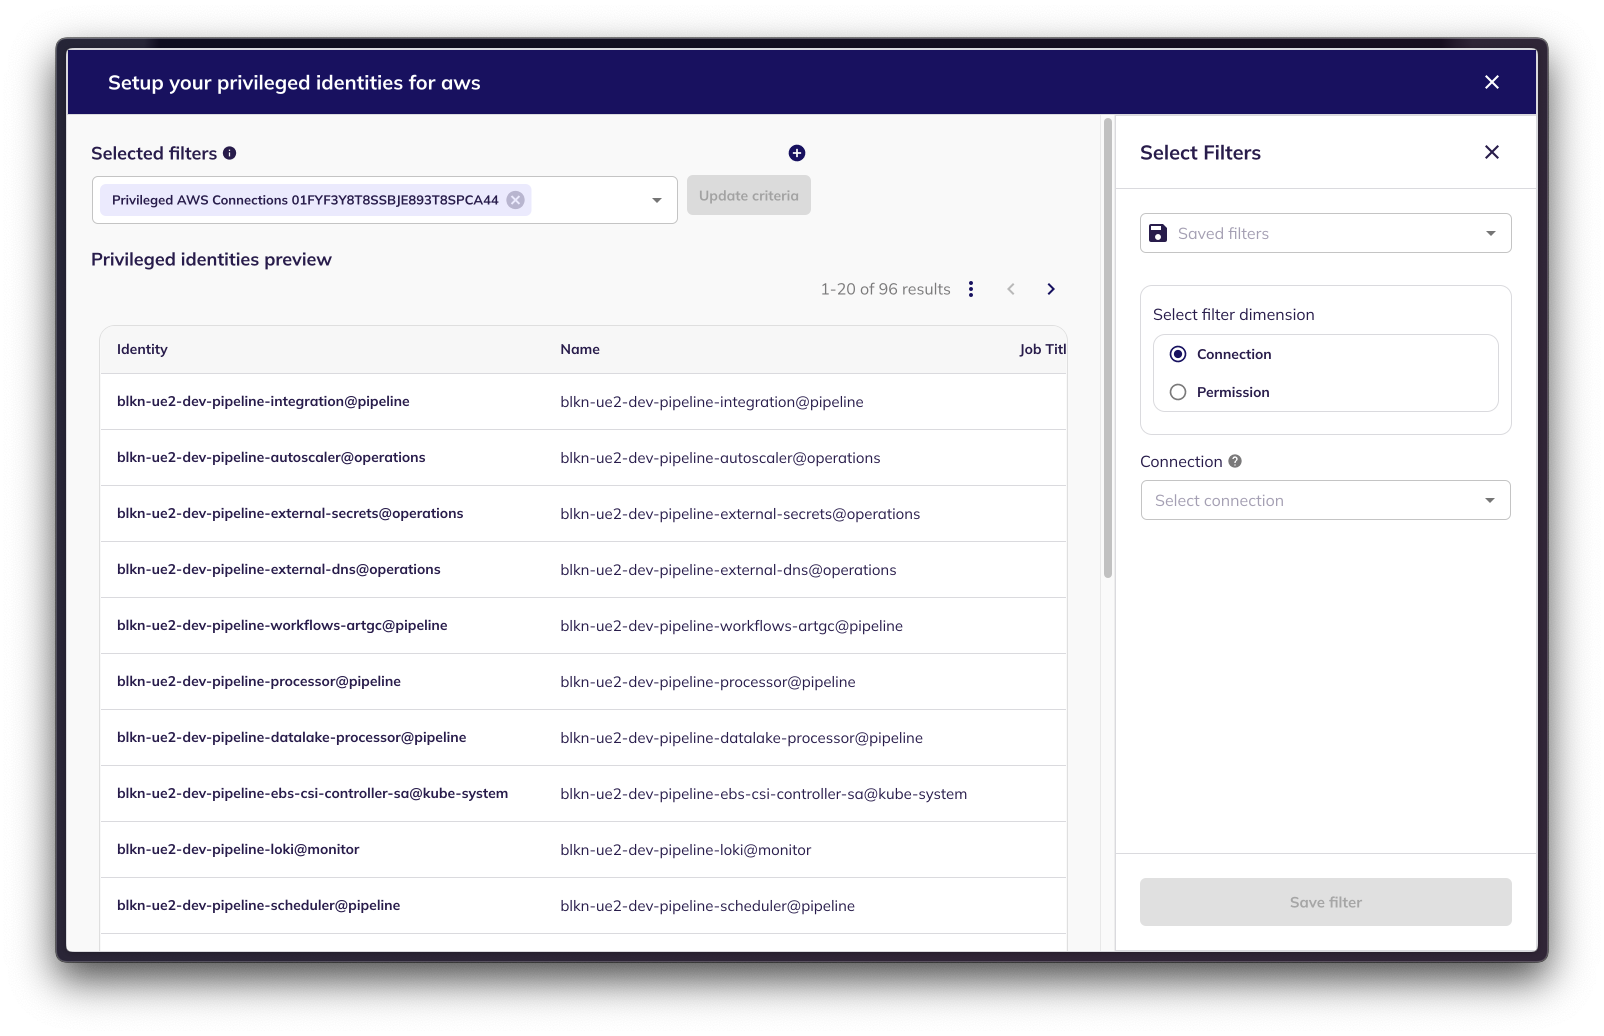
The Add Filter button enables the Administrator to create a new Saved Filter without leaving the Setup Privileged Identities page.Clicking the Add Filter button opens the Filter menu and populates the Privileged Identities Preview with currently filtered identity results:

Here, the Administrator can create a new Saved Filter and then include it in the Selected Filters dropdown to designate desired Privileged Identities.
Privileged Identities are normally identities with administrative roles (connections) or administrative permissions . For example, in some companies, for AWS, the identities with system administrator roles (connection) can be considered privileged . Setting up privileged is completely company specific. Note: The filter of type "Privileged" has some restrictions. A filter for Privileged can have only "Connections" or "Permissions" in one filter. You can apply multiple filters for an application to set the Privileged Identities (the filters will follow an OR condition). We recommend the following convention while naming your filters for setting up Privileged identities - "Privileged <app-name> <Connections/Permissions> <integration-id>".
The Update Criteria button saves the Privileged Identities configuration for the application integration. Otherwise, exiting the Setup Privileged Identities page results in abandoning any changes.
The Privileged Identities Preview is a live preview showing the identities that will be designated as privileged based on the Selected Filters.
The Exit button exits the Setup Privileged Identities page without updating privileged criteria.
3. The privileged identities saved filters also show up on the saved filters page as type Privileged. In addition to following the steps above to setup privileged identities for each application, you can always modify the privileged settings by editing the respective saved privileged filter for the application on the Privileged page.
Was this helpful?

