

New SCIM access request
Enable SCIM for your application
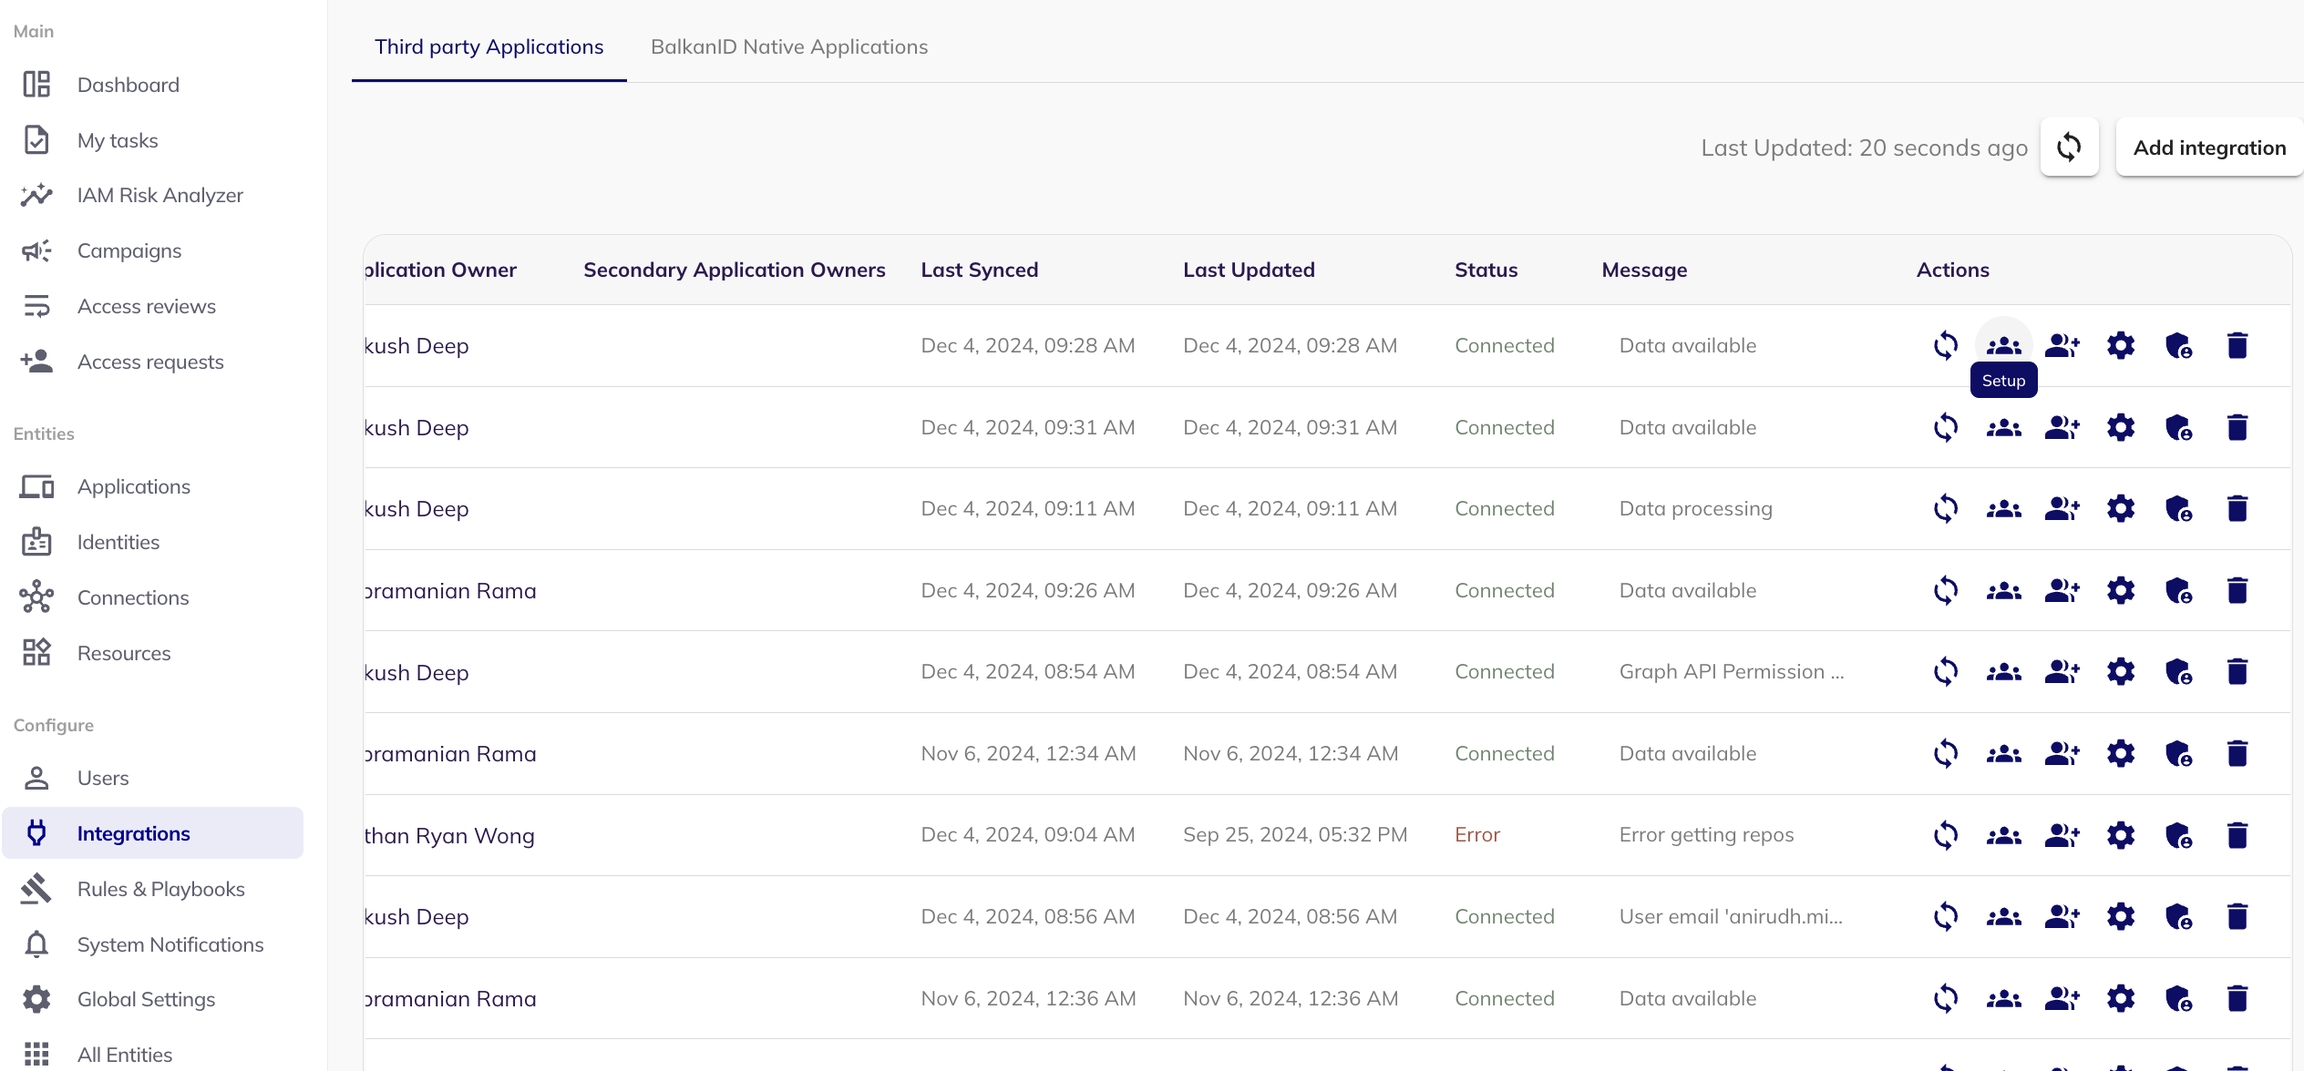
In the Integrations section, click on the Setup icon for the application you want to set up SCIM.
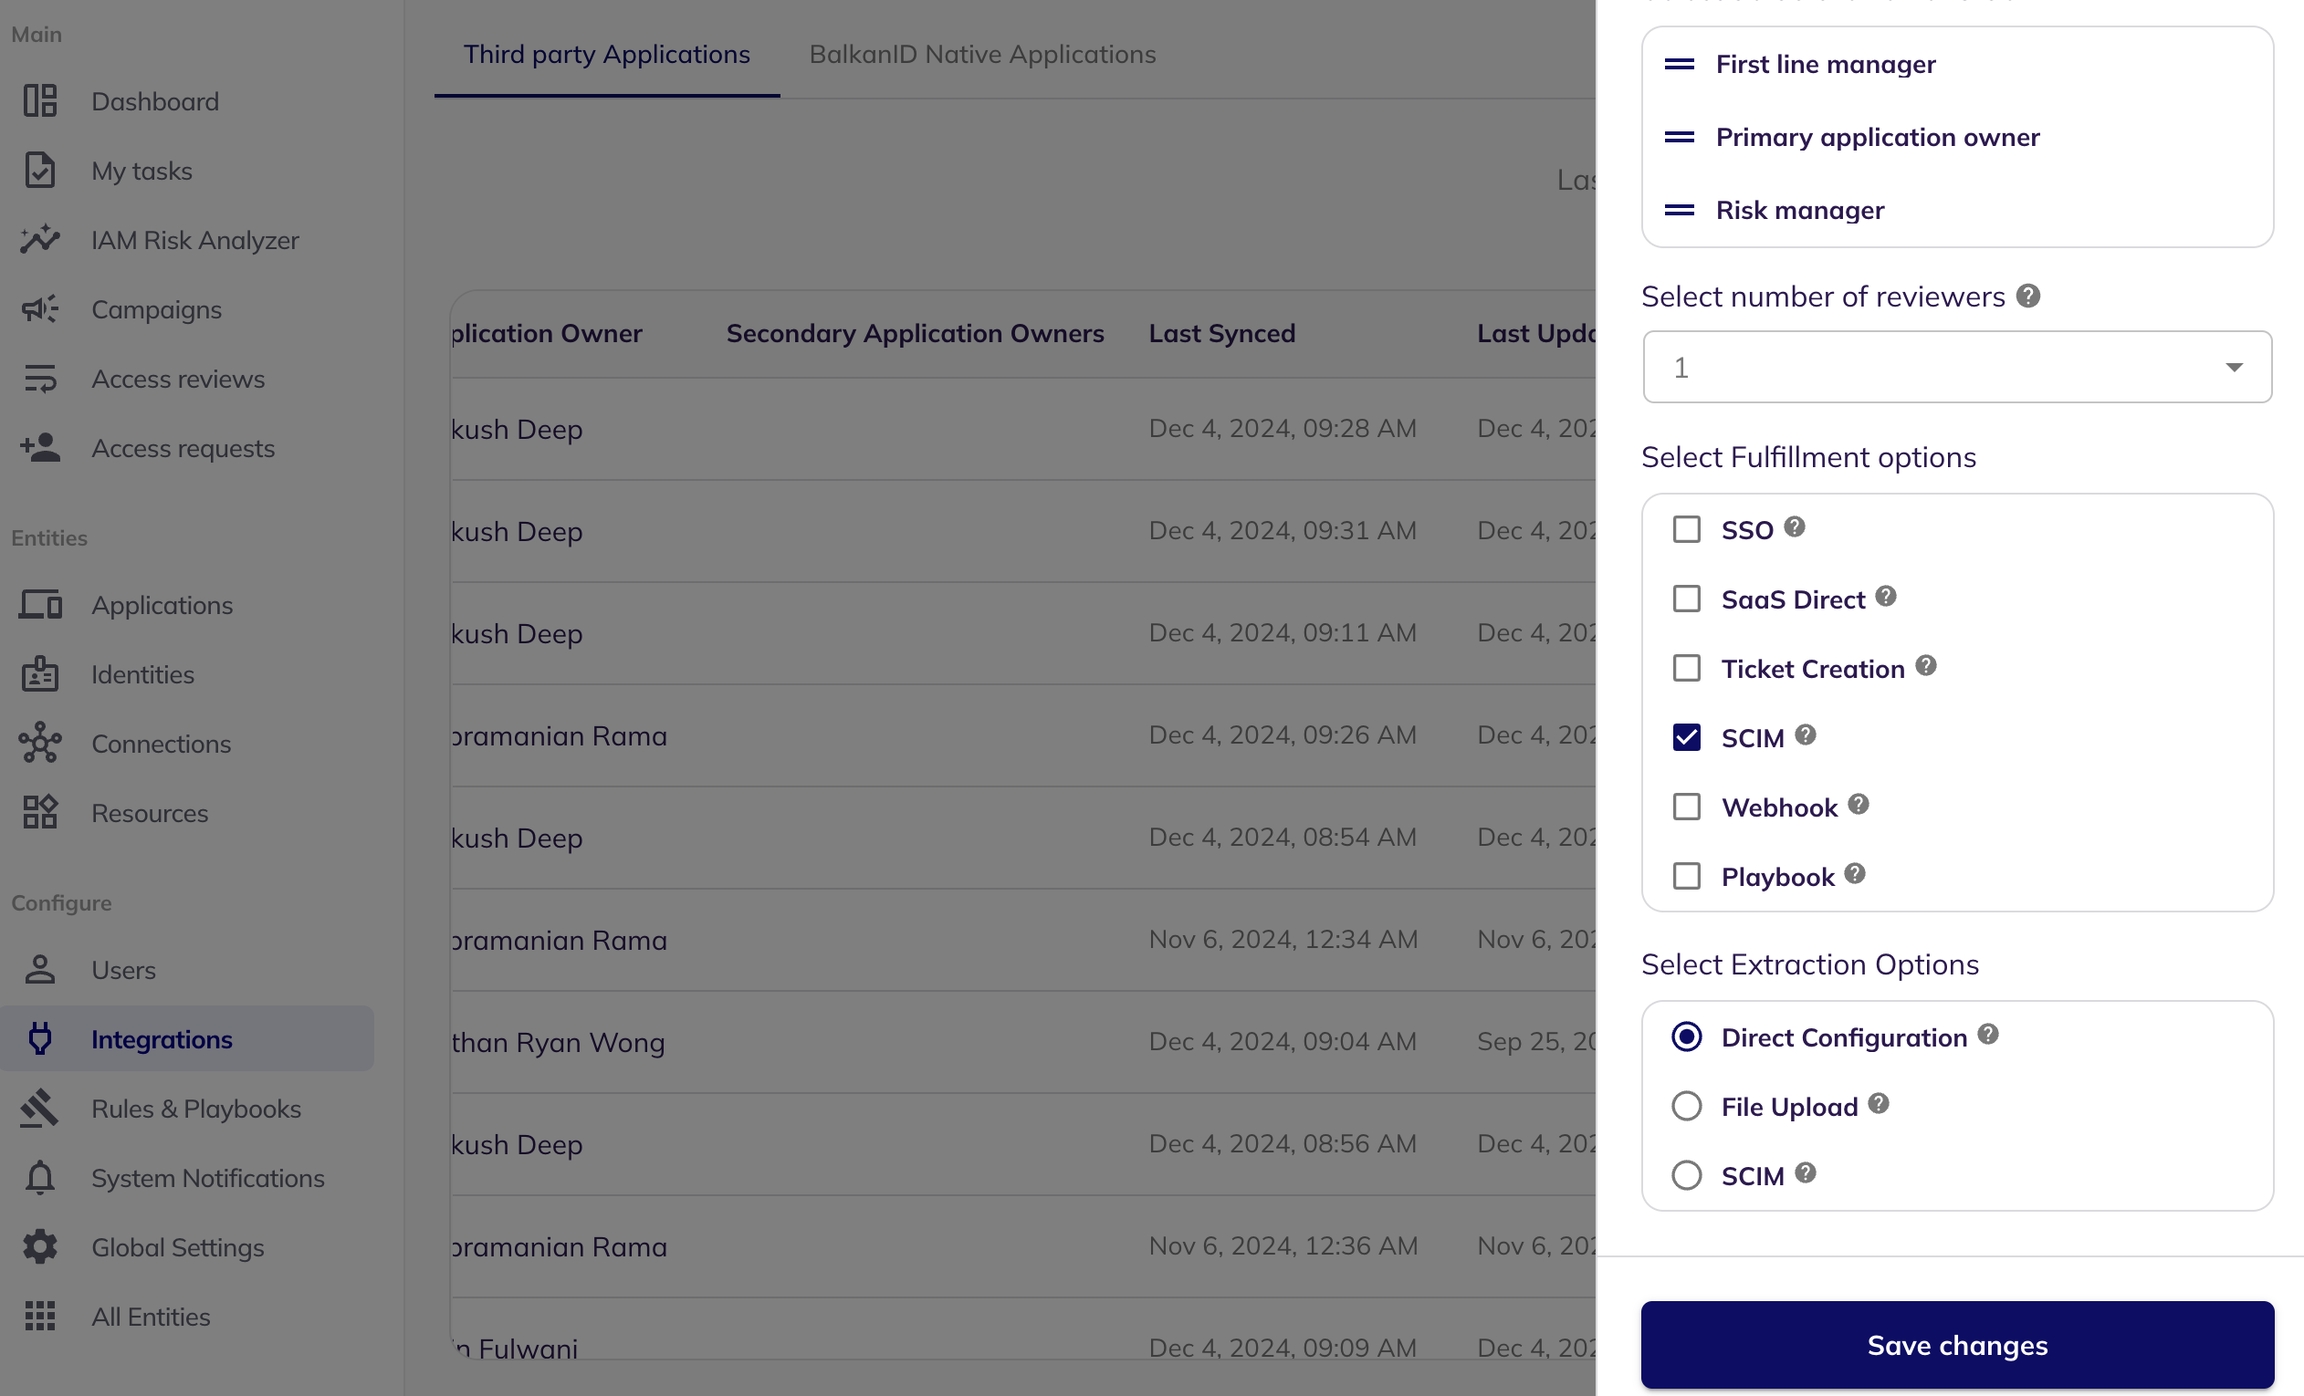
In the Fulfillment Options, select "SCIM" and save the changes.
Once saved, the SCIM will be enabled for the particular application. You can now perform SCIM access requests.
The New SCIM Access Request encompasses three core functionalities:
Entity Creation
Entity Assignment
Entity Deletion
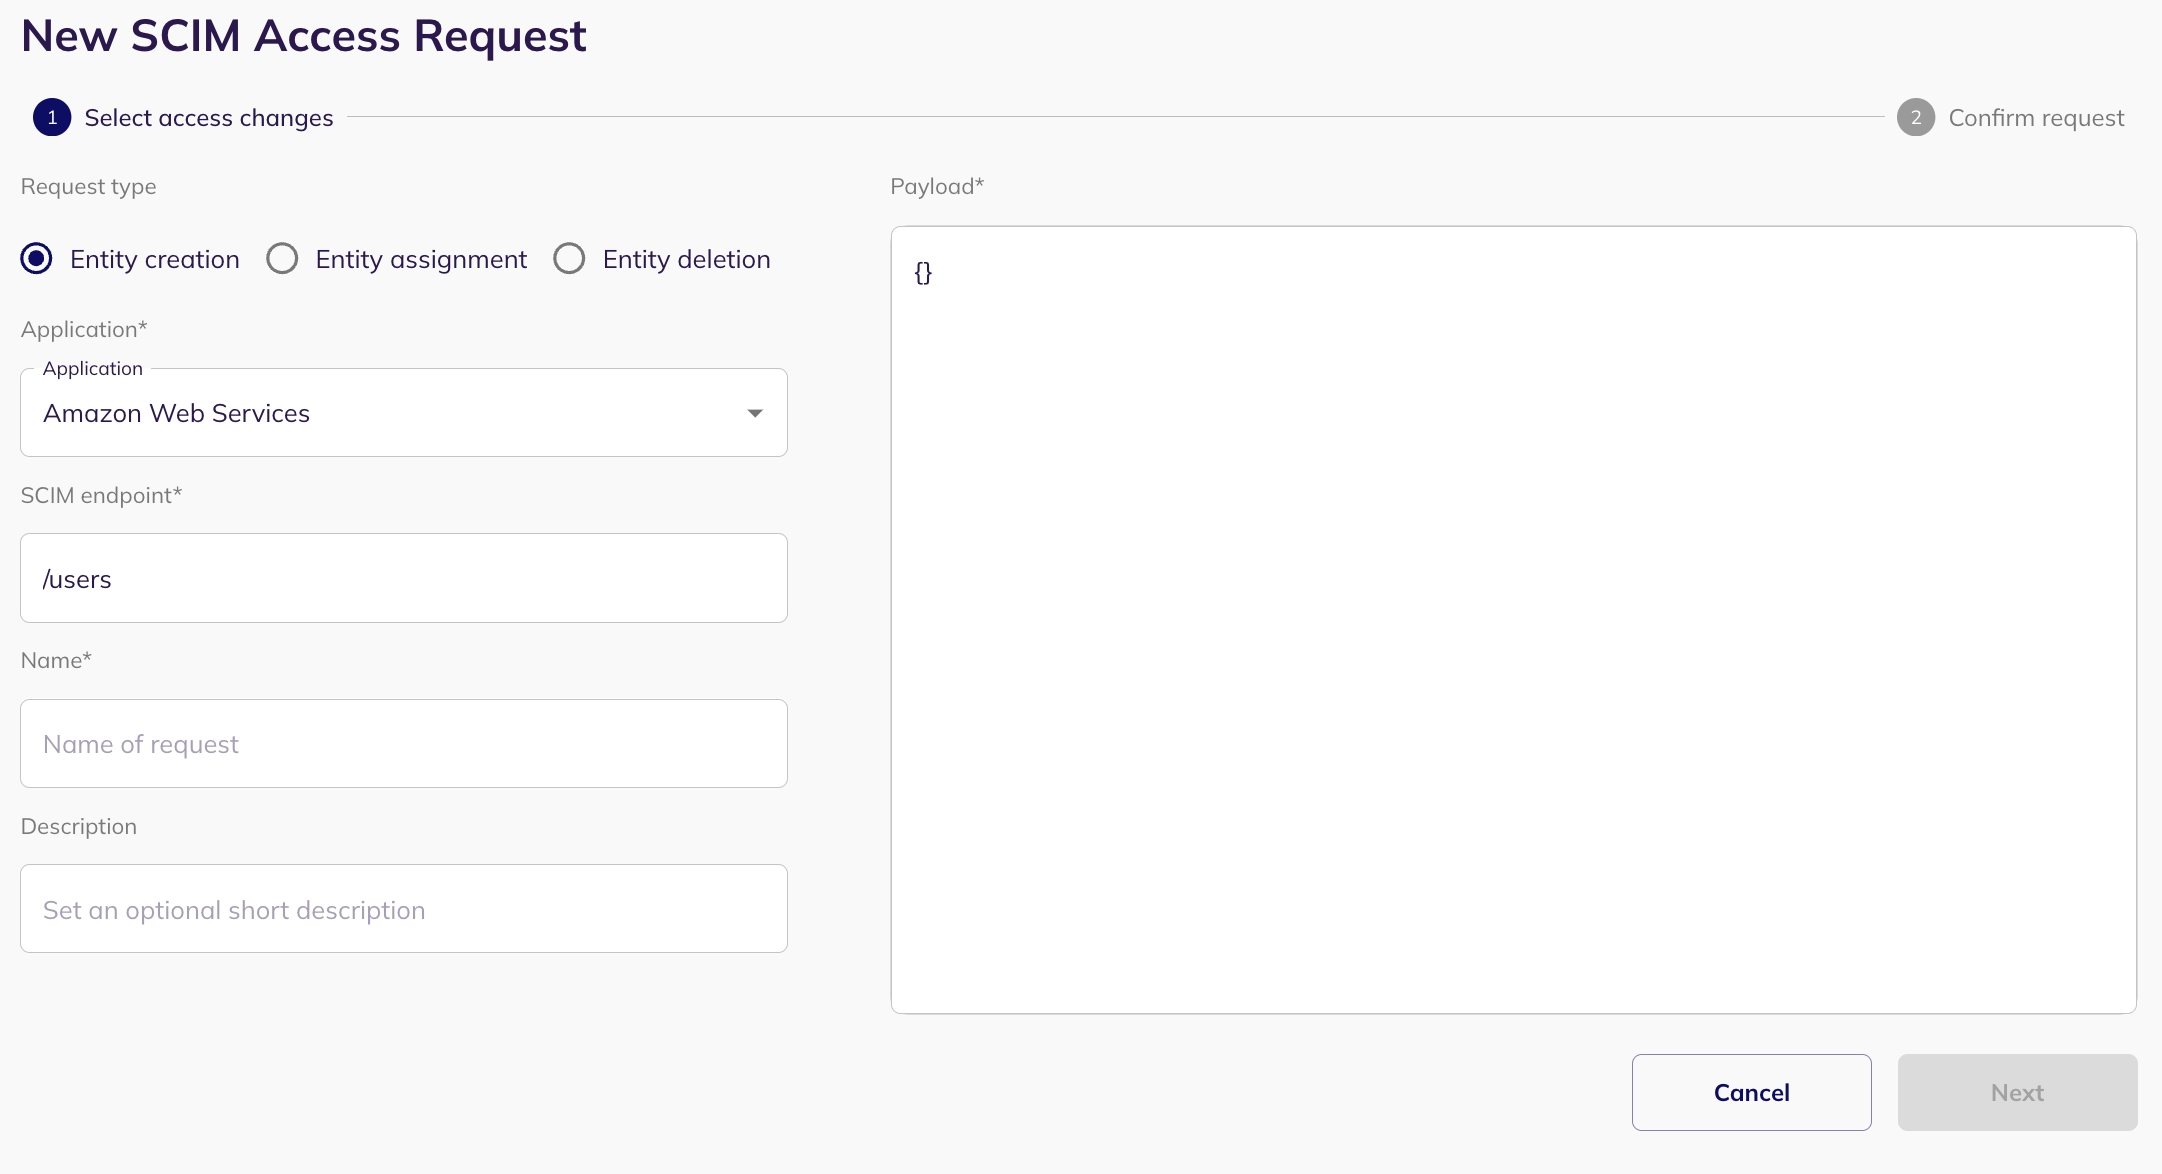
Entity Creation
Entity Creation allows you to create new entities (such as identities - for example, users, service accounts, connections - for example, groups, and resources - for example, application) within your system via SCIM access requests. This is typically used when a new user needs to be added, or a new group/resource needs to be created, within the application that supports SCIM integration.
Select an application: Select the application for which you want to create a new entity (only applications with SCIM enabled).
Put the SCIM Endpoint: When setting up the creation request, specify the appropriate endpoint. For example, in the case of creating a user, the endpoint might be '/users' or '/groups' for creating a group. Base URL should not be included in the SCIM endpoint.
For example: Base URL: https://your-api.example.com/scim/v2/ Endpoint for creating a user: /users
Configure Payload: A json form will be presented for configuring the payload. This lets you define the types of connections or resources (e.g., identities, groups, roles, policies for connections, resources and users) and their respective names.
Preview and Create Request: Preview your SCIM entity creation request and submit it by clicking on "Create Request". The request will be visible in the my task page of the reviewer.
Approval and Update: Following approval (from the my task page of reviewer), the SCIM permissions within the application will be updated accordingly.
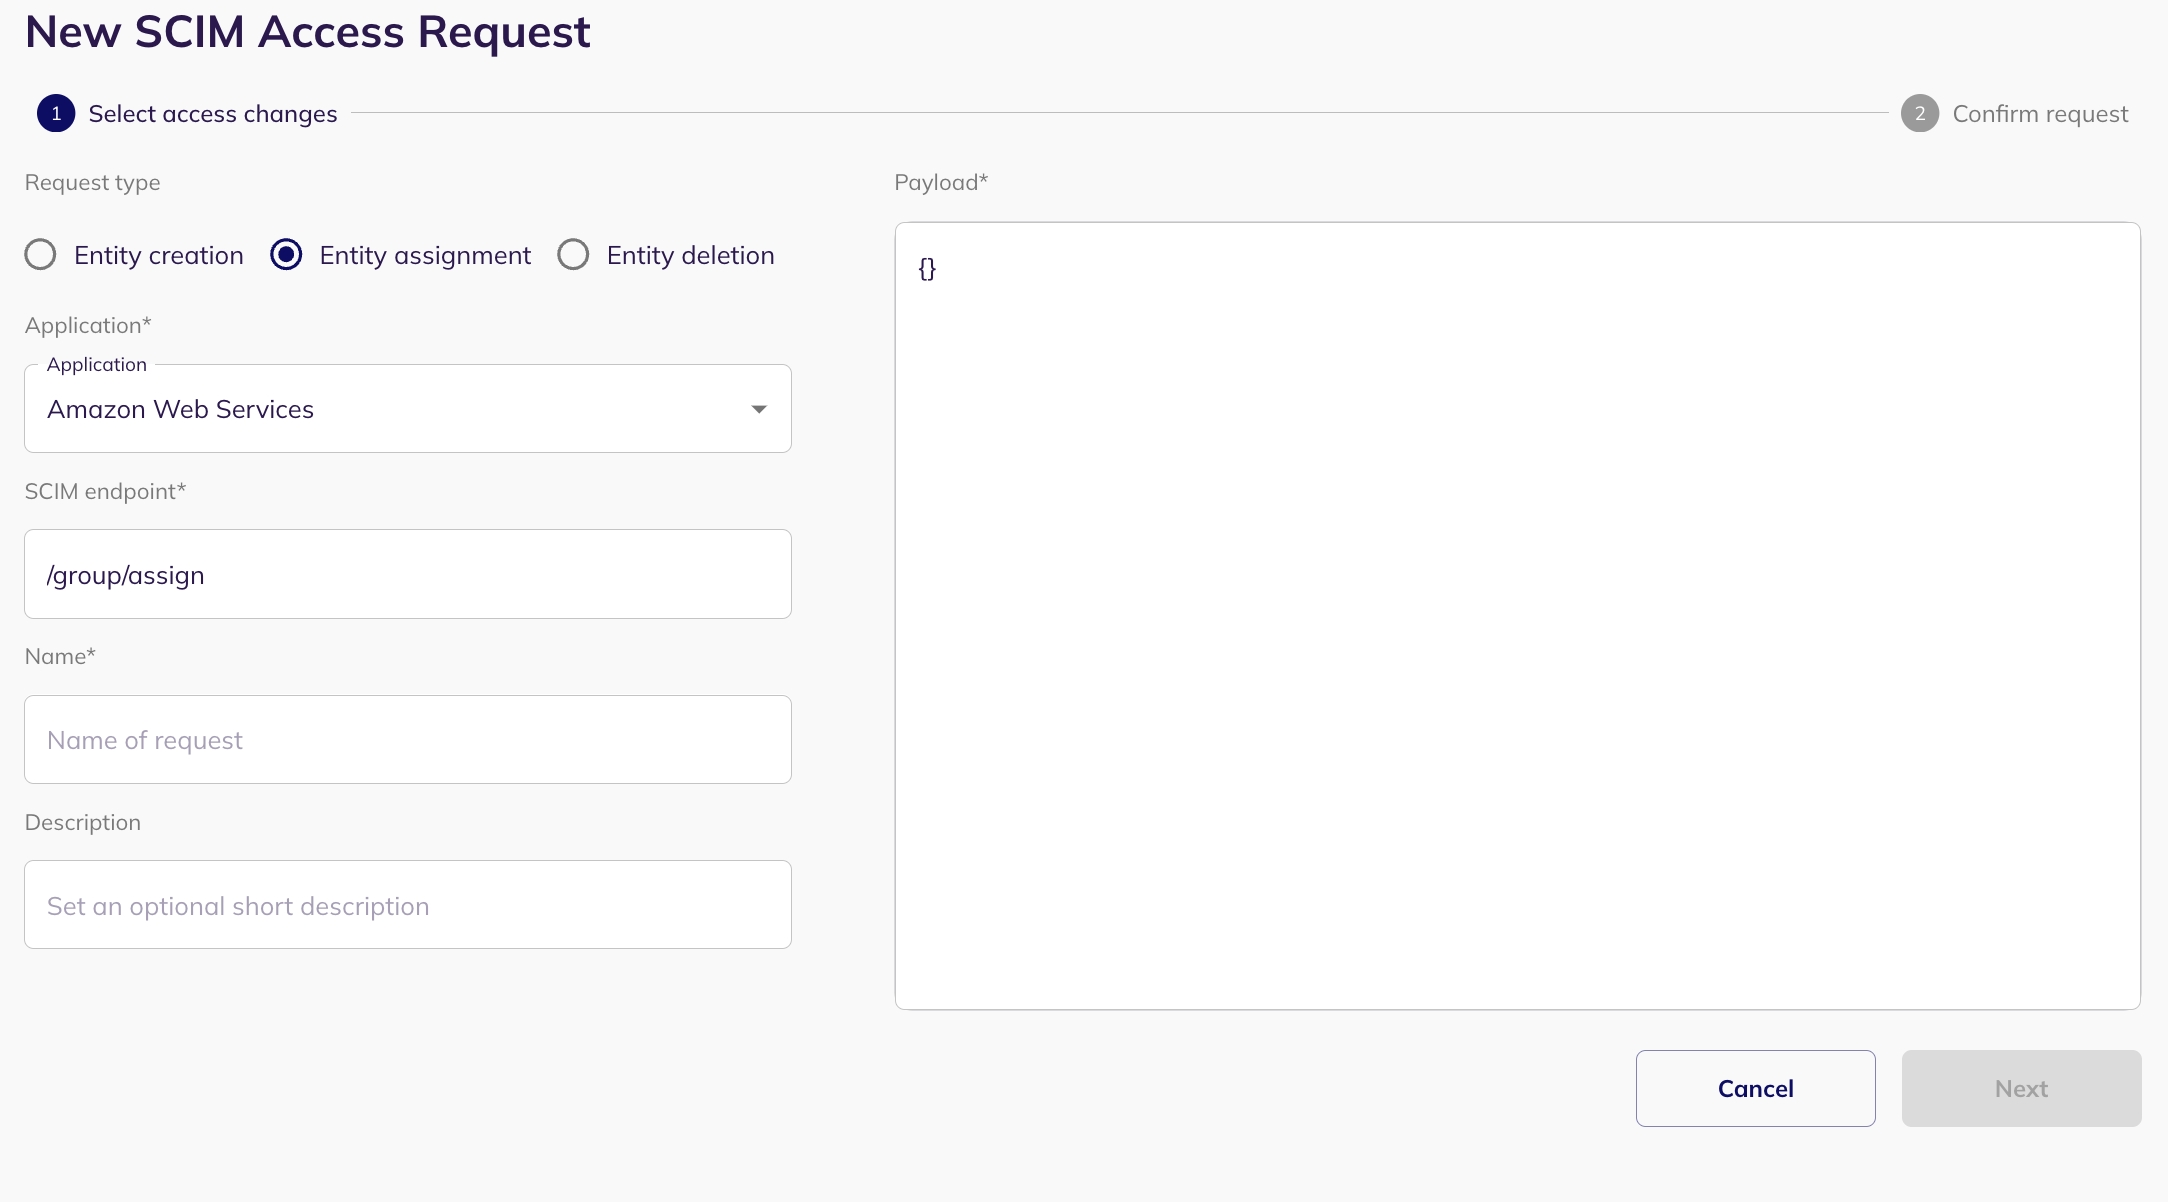
Entity Assignment
Entity Assignment allows you to assign entities (such as identities - for example, users, service accounts, connections - for example, groups, and resources - for example, application) within your system via SCIM access requests.
Select an application: Select the application for which you want to create a new entity (only applications with SCIM enabled).
Put the SCIM Endpoint: When setting up the assignment request, specify the appropriate endpoint. For example, in the case of creating a user, the endpoint might be '/group/assign' to assign user to a group. Base URL should not be included in the SCIM endpoint.
Configure Payload: A json form will be presented for configuring the payload. This lets you define the types of connections or resources (e.g., identities, groups, roles, policies for connections, resources and users) and their respective names.
Preview and Create Request: Preview your SCIM assignment request and submit it by clicking on "Create Request". The request will be visible in the my task page of the reviewer.
Approval and Update: Following approval(from the my task page of reviewer), the SCIM permissions within the application will be updated accordingly.
Entity Deletion
Entity Deletion allows you to remove or delete an entity (such as identities - for example, users, service accounts, connections - for example, groups, and resources - for example, application) within your system via SCIM access requests.
Select an application: Select the application for which you want to create a new entity (only applications with SCIM enabled).
Put the SCIM Endpoint: When setting up the deletion request, specify the appropriate endpoint. For example, in the case of deleting a user, the endpoint might be '/group/delete'. Base URL should not be included in the SCIM endpoint.
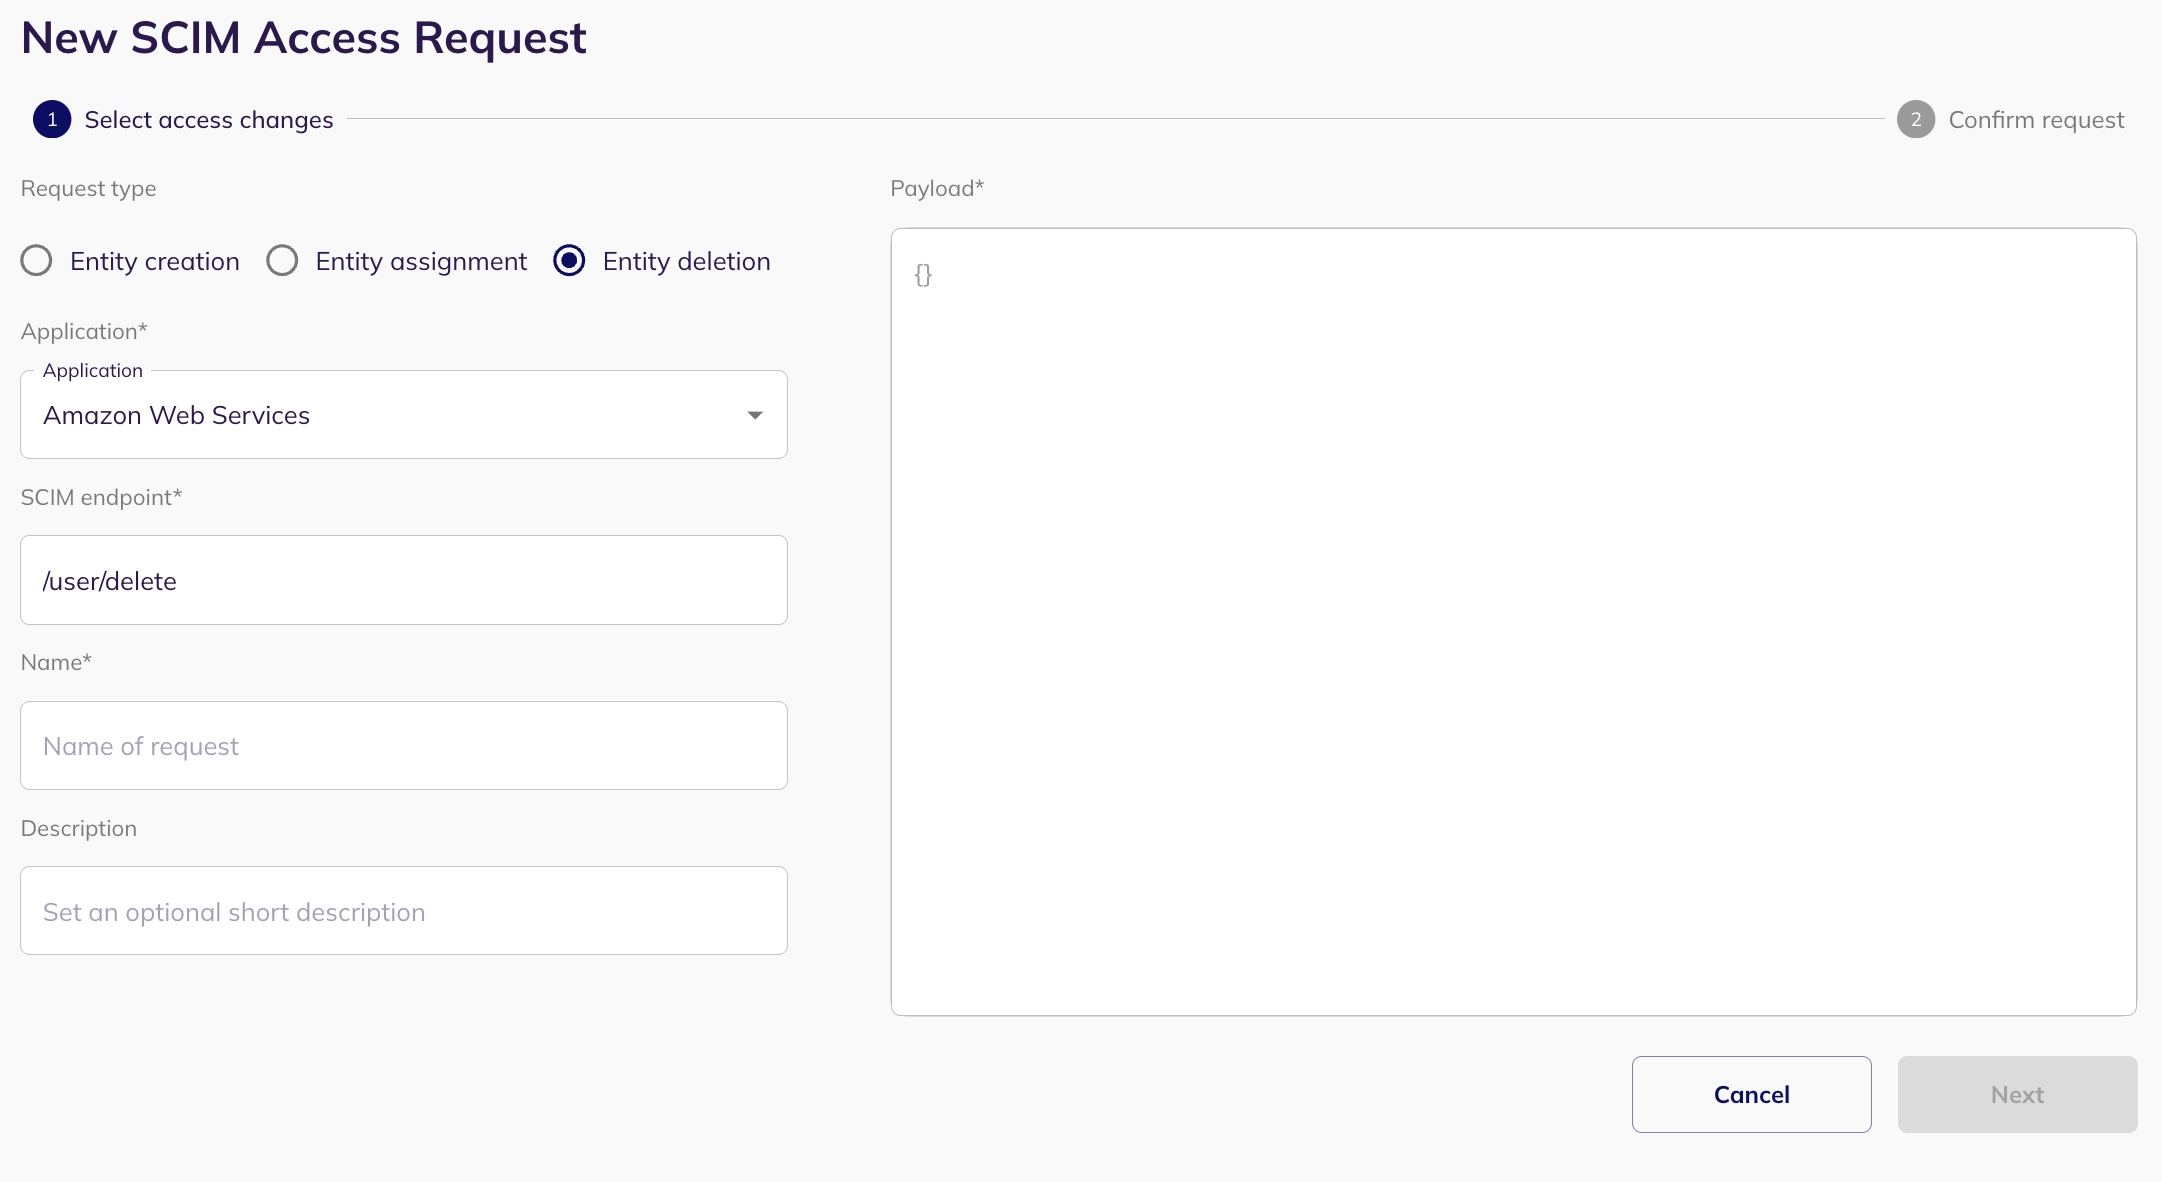
Preview and Create Request: Preview your SCIM deletion request and submit it by clicking on "Create Request". The request will be visible in the my task page of the reviewer.
Approval and Update: Following approval(from the my task page of reviewer), the SCIM permissions within the application will be updated accordingly.
Was this helpful?