> For the complete documentation index, see [llms.txt](https://docs.balkan.id/llms.txt). Markdown versions of documentation pages are available by appending `.md` to page URLs; this page is available as [Markdown](https://docs.balkan.id/getting-started/setting-up-your-tenant/user-role-management.md).
# User role management
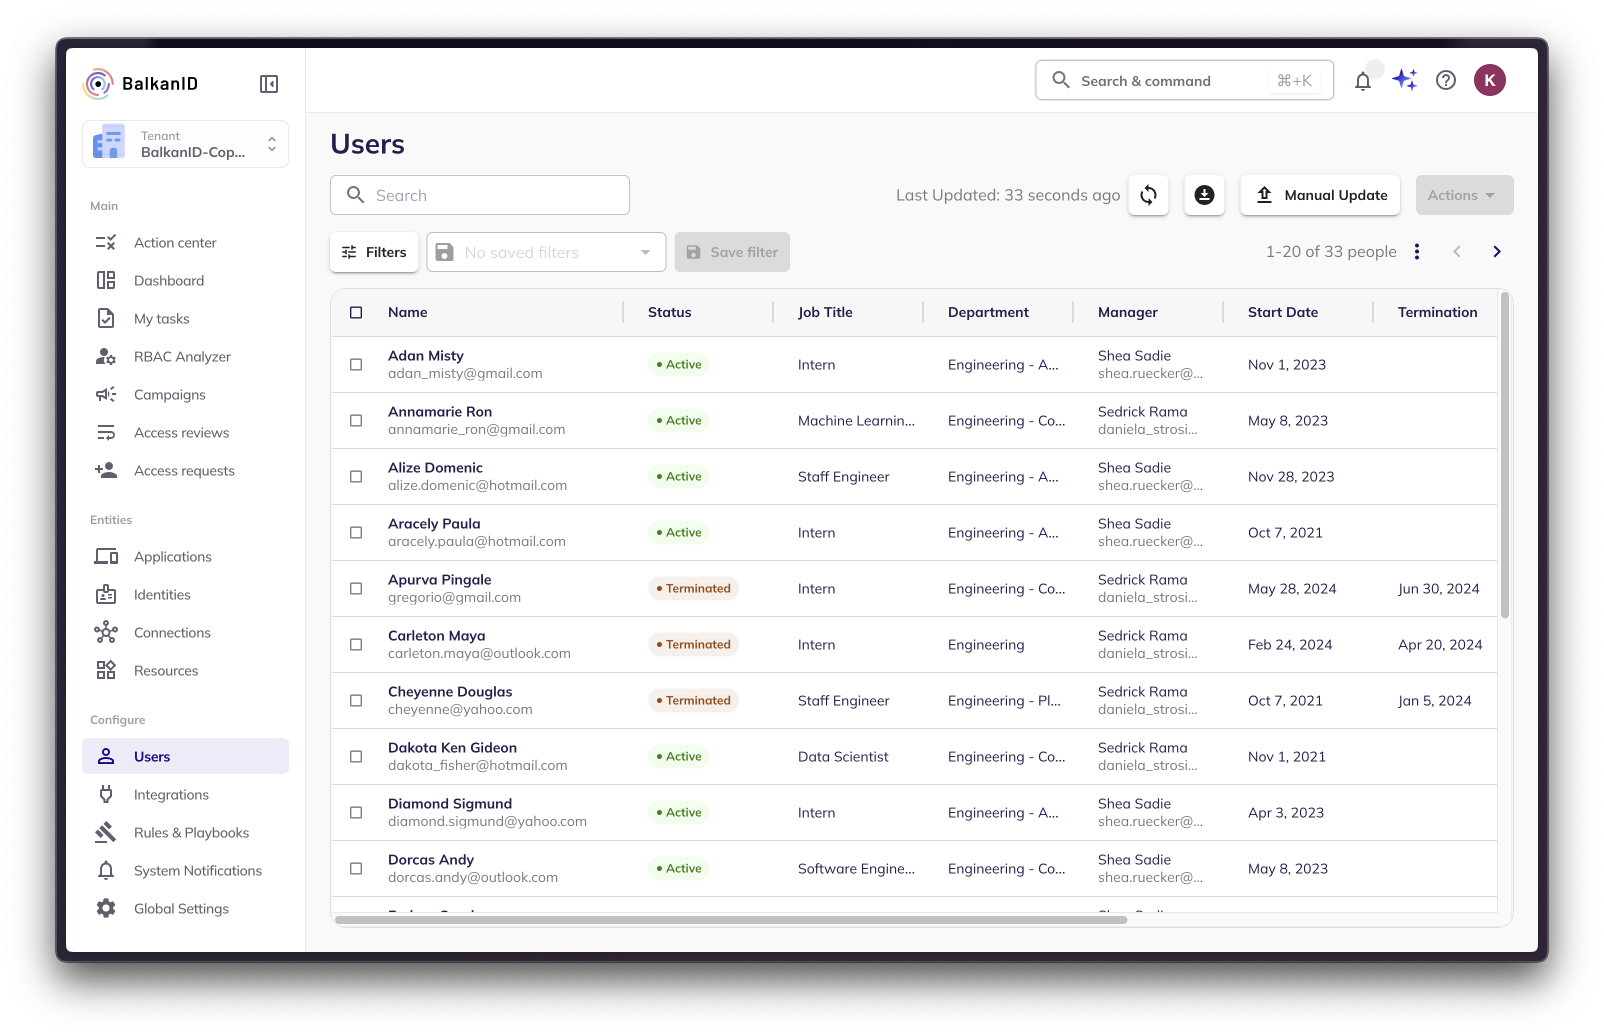
Administrators in BalkanID can manage user accounts on the Users page. To start, log into BalkanID and navigate to the Users page as seen below. This page lists all employees at your company (typically fed via your direct HRIS Integration). To do this, refer to - [Integrating Employee Data](https://docs.balkan.id/getting-started/setting-up-your-tenant/integrate-employee-data/integration-with-hris-system.md).
### User roles in BalkanID
We support three roles with the following capabilities:
* **Reviewers:** Users with this role can view the **My Tasks**, **Access Requests**, **Profile, Preferences**, and **Help** menus. Reviewers are primarily responsible for reviewing access reviews and requests, and performing tasks assigned to them by other roles.
* **Risk Managers:** This role includes all the permissions of a Reviewer, plus access to the **Entities**, **Summary**, **Campaigns**, and **Access Reviews** menus. Risk Managers can discover application, people, connection, and identity entitlements, view various campaigns, and perform comprehensive access reviews.
* **Administrators:** This is the highest level of access, encompassing all the menus and capabilities of a Risk Manager. Additionally, Administrators can access the **Configure** section, allowing them to control system-wide configurations. This includes adding employee data, integrating applications, managing rules and saved filters, and configuring system notifications.
### Steps to edit user roles:
To manage user roles, navigate to the **Users** page under the **Configure** section. There are two methods for editing user roles:
#### Edit a Single User's Role
1. Locate the user you wish to edit in the table.
2. Navigate to the rightmost **Actions** column and click the **Edit** button (represented by a pencil icon).
3. The option to edit the user and their respective role will appear, allowing you to select one or more roles for that specific user, as shown below.
In **Edit user** you can also update the user's profile, including **Department** and **Team**. **Team** suggests existing teams, or you can type a new one.
{% hint style="info" %}
To remove a user's team, empty **Team** and save. This is the only way to clear a team in the app. A sync or CSV upload with a blank team keeps the stored team. A non-empty team replaces it.
{% endhint %}
#### Edit Multiple Users' Roles
1. Select the users whose roles you want to edit by checking the box next to their names.
2. Click on the **Actions** dropdown menu and select **"Bulk Edit Roles."**
3. A sidebar will open, providing the option to edit the roles for all the selected users, as shown below.
### Set a delegate for a user
Administrators can assign a delegate for another user, for example when that user is on leave. The delegate receives the user's new access review and request tasks during the delegation period.
1. Navigate to the **Users** page under the **Configure** section.
2. Locate the user and click the **Edit** button (pencil icon) in the **Actions** column.
3. In the **Delegation** section, select a **Delegate User**. To pick the user's manager quickly, click **Delegate to Manager**.
Setting a delegate for another user
4. Optionally, add a **Reason**, such as "On leave".
5. Choose a start and end date. Turn on **Start Now** to begin immediately, or **No End Date** for continuous delegation.
6. Check the **Result** line to confirm who will receive the user's reviews, then save.
{% hint style="info" %}
If the user has nominated their own delegate from their **Preferences**, theirs applies instead of yours. To make your choice apply, turn on **Override the user's own delegate**. Turn it on without selecting a delegate to keep all tasks with the user.
{% endhint %}
The **Delegate** column on the **Users** page shows each user's current delegate. Click it to see the details.
---
# Agent Instructions
This documentation is published with GitBook. GitBook is the documentation platform designed so that both humans and AI agents can read, navigate, and reason over technical content effectively. Learn more at gitbook.com.
## Querying This Documentation
If you need additional information that is not directly available in this page, you can query the documentation by asking a question.
Perform an HTTP GET request on the following URL with the `ask` and `goal` query parameters:
```
GET https://docs.balkan.id/getting-started/setting-up-your-tenant/user-role-management.md?ask=&goal=
```
`ask` is the immediate question: it should be specific, self-contained, and written in natural language.
`goal` is what the user is ultimately trying to achieve, the reason they need the answer. Sharing it helps GitBook give you a better, more relevant answer. A goal is most helpful when it describes the outcome the user wants rather than restating the question. For example, with `ask=how do I create an API token`, a goal like `automate deployments from our CI pipeline` lets GitBook tailor the answer to that use case.
The response will contain a direct answer to the question and relevant excerpts and sources from the documentation.
Use this mechanism when the answer is not explicitly present in the current page, you need clarification or additional context, or you want to retrieve related documentation sections.