Bitbucket Integration Setup
Getting Started
BalkanID recommends creating a separate service account for the purposes of this integration, instead of using personal or employee named accounts.
Two extra configuration fields were introduced recently namely,Bitbucket App Password
and Bitbucket Account Username
, which utilizes v1 APIs and requires different credentials, steps have been mentioned below.
Workspace access token needs new additional scopes namely, Projects > Admin, and Repositories > Admin.
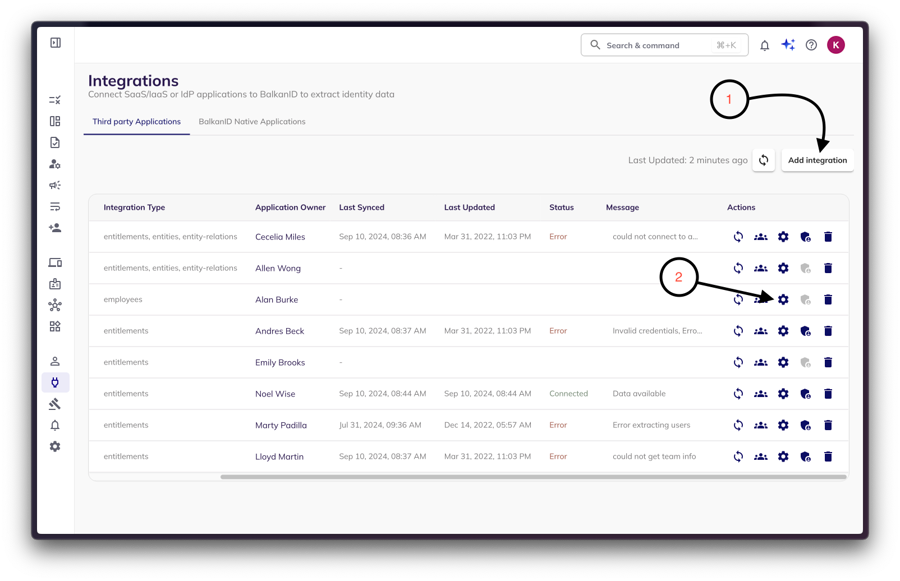
Since these are breaking changes to the integration, if you already have an existing Bitbucket integration, you would need to delete the current Bitbucket integration and add a new app Integration for Bitbucket.
Requirements:
Bitbucket Access token of Workspace (Organization)
Bitbucket API Url (example: “https://api.bucket.org”)
Username of Workspace ID (example: “myworkspace”)
Bitbucket Account Username (example: "janesmith")
BitBucket App Password
Get Access Token of Workspace
On the Bitbucket Workspace Page, navigate to Settings.
Go To Access Tokens.
Click on Create Workspace Access Token.
Give the following Perms
Accounts > Read
,Repositories > Read
andProjects > Read
.Copy the Workspace Access Token.
Store the generated Access Token securely.
Get Workspace ID
Go to the Workspace settings.
Copy the Workspace ID.
Store the Workspace ID in a secure location.
Get Bitbucket Account Username
This is your account username, You can go to https://bitbucket.org/account/settings/ and copy your username under Bitbucket Profile Settings
Get Bitbucket Account App Password
Go to https://bitbucket.org/account/settings/app-passwords/ or Settings > Bitbucket Personal Settings > Access Management > App Password
Click on Create App Password and give the respective permissions.
Copy the App Password somewhere securely
Get Bitbucket URL

To configure your integration, paste the URL in the following format: https://api.your_bitbucket_domain.org
.
Simply replace your_bitbucket_domain.org
with the actual domain URL of your Bitbucket instance as shown in the image.
Configure Bitbucket within your BalkanID tenant
Login to the BalkanID application and switch to the tenant you would like to add your integration to.
Head to Integrations > Add Integration, select Bitbucket.
Set up the Primary Application owner (mandatory) and the Description, if any. Set up Secondary Application Owner(s), if any.
Select the Extraction Type. From here, you can configure your application using one of the following methods:
Direct integration - Provide your Bitbucket Access Token, URL, Workspace, Account Username and Account App Password obtained above to set up a direct connection with BalkanID.
SCIM integration - Provide SCIM server credentials to set up a SCIM connection with BalkanID.
Manual file upload - Upload Entity and Entity Relations through a .CSV file upload. Contact the team for assistance with this.
Automated upload using API - You can upload data using our Bulk APIs with the help of an API key which will be provided to you. Please refer to the entity and entity relation upload docs for specific instructions on uploading your data through the API.
Click on next to move onto Optional Configuration.
Fill Optional configuration, if required.
Once you filled in the information, click Save. Your integration is now configured and you will see the status of the integration displayed alongside other integrations on the Integrations page. When data is available, the integration Status column will read Connected and the integration Message will read Data available.
Last updated
Was this helpful?