

Netsuite Application Integration Setup
Getting Started
BalkanID recommends creating a separate service account for the purposes of this integration, instead of using personal or employee named accounts.
Requirements:
Account IDAccount URLConsumer KeyConsumer SecretToken IDToken Secret
Additionally, you will be asked to:
Enable
REST Web ServicesEnable
Token Based AuthenticationCreate an integration
Create a role
Assign the created role to a user
Create a token
Let's get started.
Enable token based authentication and REST
Within Netsuite, search for
page: enable featuresand click View on the result.Click SuiteCloud sub tab.
Enable
REST Web ServicesunderSuiteTalk (Web Services)section.Enable
Token Based Authentication.Save the changes.
Get Account ID
It is usually the first part of the NetSuite URL (ex: https://ACCOUNT_ID.app.netsuite.com/)
If not, follow these steps:
Within Netsuite, search for
page: Web Services Preferencesand click "View" on the resultCopy the
ACCOUNT IDfrom the resulting page, this is the Account ID needed to configure BalkanID.
Get Account URL
Within Netsuite, search for
page: Company Information.Click sub tab Company URLs.
Copy the
SUITETALK (SOAP AND REST WEB SERVICES)URL. This is the Account URL needed to configure BalkanID.
Create BalkanID integration
Within Netsuite, search
page:Manage Integrationsand click View" on the result.Create a new integration:
Name:
BalkanIDEnable
Token-Based AuthenticationDisable
TBA: Authorization FlowDisable
Oauth: Authorization Code GrantHit Save
Copy
Consumer KeyandConsumer Secret, these are the Consumer Key and Consumer Secret needed to configure BalkanID.
Create a role
Within Netsuite, search for
page:New Roleand click View on the New Role result.Enter name -
BalkanID.Center type -
Classic Center.Navigate to Permissions > Setup (sub tab at bottom of page) and add the following permissions:
REST Web Services: FullLog in using Access Tokens: FullBulk Manage Roles: Full
Navigate to Permissions > Reports (sub tab at bottom of page) and add the following permissions:
SuiteAnalytics Workbook
Navigate to Permissions > Lists (sub tab at bottom of page) and add the following permissions:
Employee Record: ViewEmployees: ViewPerform Search: View
Save the changes
Assign role to user
Within Netsuite, search for
page:employees.Edit your employee record.
Navigate to Access > Roles (sub tab at bottom of page).
Add the
BalkanIDrole previously created.Save the changes.
Create a token
Within Netsuite, search for
page: New Access TokenApplication name:
BalkanID(previously created)User:
<your user>Role:
BalkanID(previously created)
Save the changes.
Copy
Token IDandToken Secret, these are the Token ID and Token Secret that are required to configure BalkanID.
Configure Netsuite within your BalkanID tenant
Login to the BalkanID application and switch to the tenant you would like to add your integration to.
Head to Integrations > Third Party Applications and click Add Integration, select Netsuite. Set up the Primary Application owner and the Description, if any.

Netsuite would have been added to the list of applications. Click on the Configure and Integrate button beside the integration name, and configure the fields with the values that were noted prior. It should look like this:
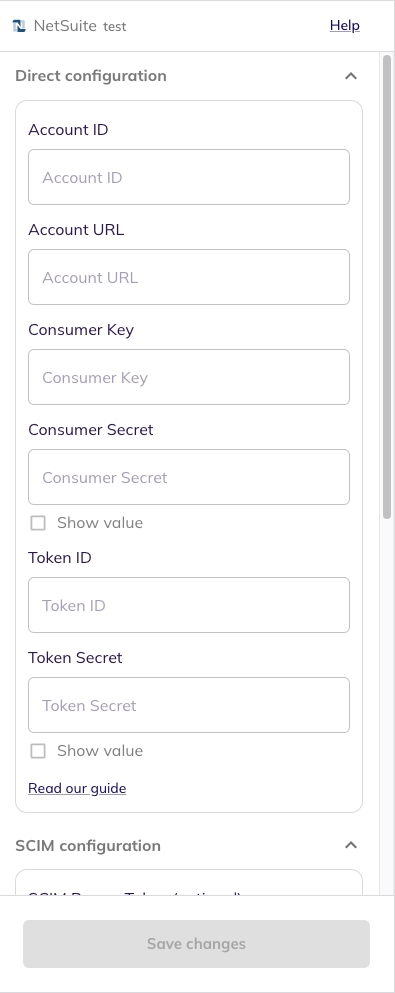
Once you filled in the information, click Save changes. Your integration is now configured and you will see the status of the integration displayed alongside other integrations on the Integrations page. Integrations are synced daily. When data is available, the integration Status column will read Connected and the integration Message will read Data available.
Was this helpful?