> This is part 1 of 5 of the full documentation (pages 1–100 of 435).
> The content is paginated: fetch every part to see all of it.
> Next part: https://docs.balkan.id/llms-full.txt/1
> Page index: https://docs.balkan.id/llms.txt
# Welcome
Welcome to the BalkanID documentation page. Here, you will find detailed information about BalkanID's capabilities, as well as release notes on the latest platform features.
### What is BalkanID?
BalkanID is an identity governance platform that provides the following capabilities:
1. Preemptive discovery, analysis and remediation of identity-related risks.
2. Correlation and visualization of IdP, SaaS, IaaS and on-prem application identities and related entitlements.
3. User access review (UAR) workflow and campaign management.
4. Application entitlement lifecycle management.
### **Platform Demo**
{% embed url="" %}
# User onboarding
Embarking on the BalkanID journey begins with a seamless onboarding experience. This section is designed to guide new users through the essential initial steps, ensuring a smooth and secure setup of their account. From establishing fundamental access to preparing for uninterrupted workflow, these foundational configurations are crucial for maximising the value of BalkanID.
This section will walk through the initial steps after signing in to BalkanID. You'll learn about the different **authentication methods** which can be used to access the platform, how to **configure authentication settings**, and the various **roles** the administrator can assign to a user which determine their access level and capabilities within BalkanID. The following subsections are included:
1. [BalkanID Onboarding ](/getting-started/user-onboarding/balkanid-onboarding): This part of the documentation walks new users through the essential steps to get started with BalkanID. It covers the process of signing in for the first time and configuring one's user account to ensure a smooth and secure experience. Understanding the available authentication methods and the roles assigned by an administrator are key to navigating and utilizing BalkanID effectively.
2. [SSO Integrations](broken://pages/ftbZUs7IEY60Z5eVJNm3): Streamlining the login process is vital for efficient operations. This section provides comprehensive instructions on how to configure Single Sign-On (SSO) for a user's account. Enabling SSO allows for convenient and secure access to BalkanID, leveraging existing organizational credentials and reducing login friction.
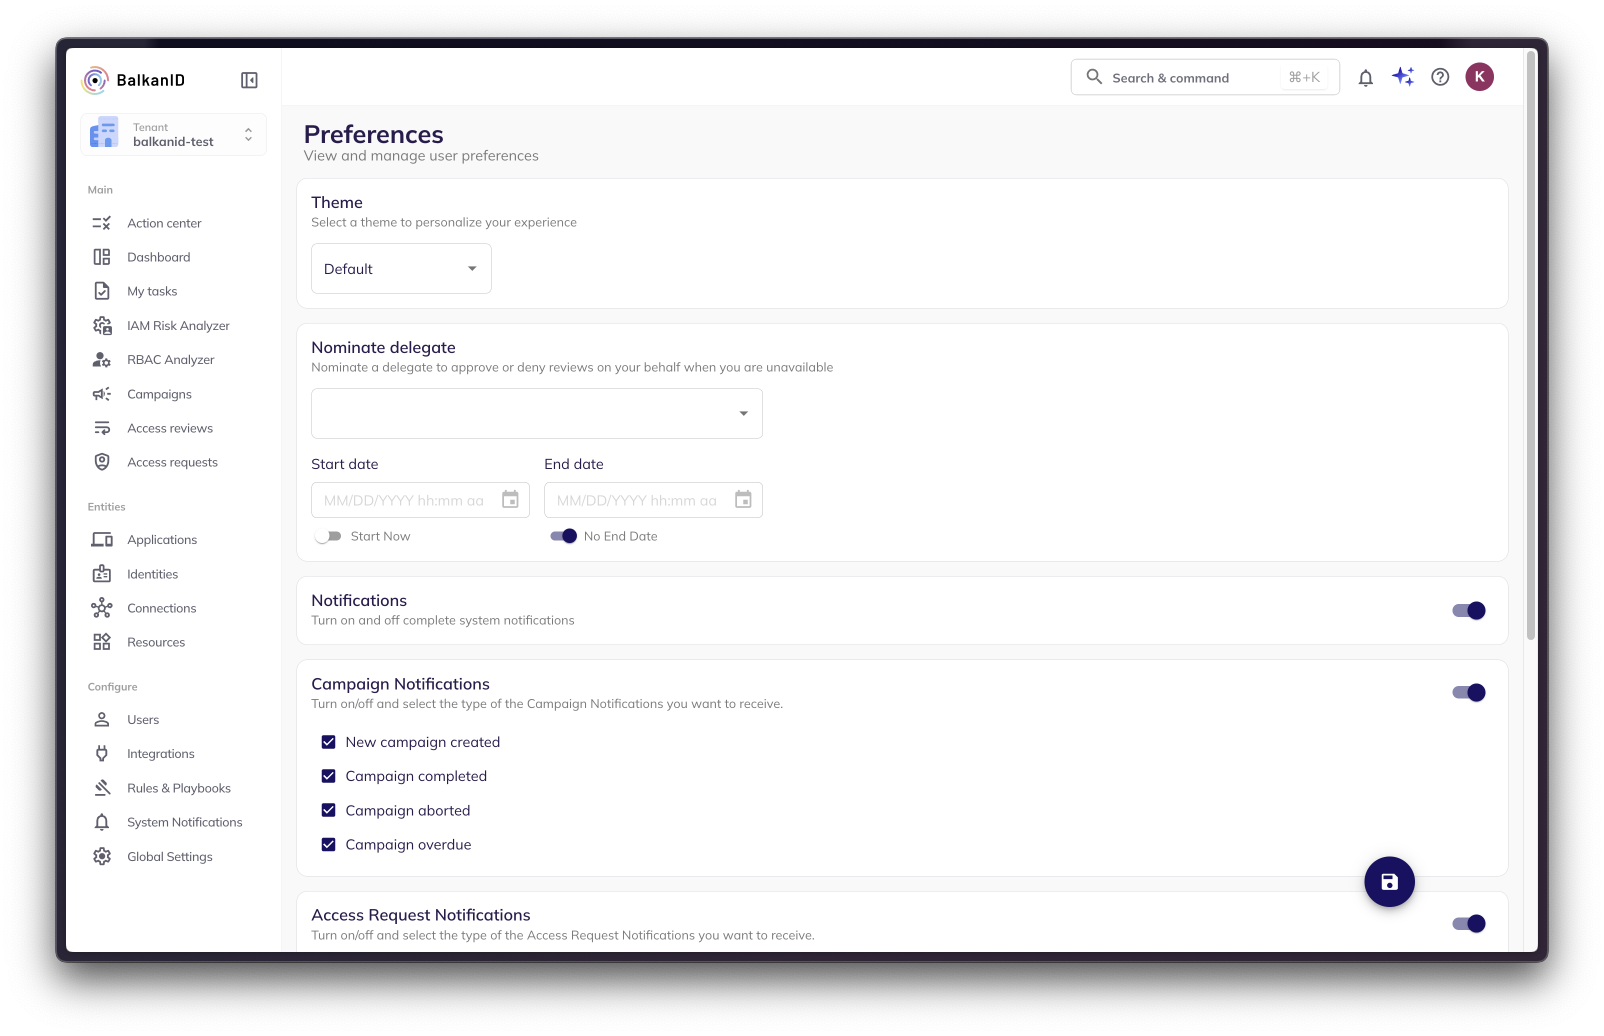
3. [User preferences](/getting-started/user-onboarding/user-preferences):
This section empowers users to tailor their BalkanID environment to suit individual needs and preferences. It covers settings that enhance daily interaction and ensure seamless workflow:
* **Theme Selection:** Customize the visual theme of the application to match personal comfort or organizational branding.
* **Nominate Delegate: Delegate Responsibilities:** Ensuring continuity of operations is paramount, especially when key personnel are unavailable. This feature allows a user to assign their responsibilities within the application to another designated user for a specific period, ensuring that all required actions and duties within BalkanID can be managed effectively, even in one's absence.
* **Notification Settings:** Configure the types of notifications received at a user level, ensuring relevant alerts are delivered without overwhelming the user.
# BalkanID onboarding
1. **Enter organization name:**
1. Navigate to **app.balkan.id**.
2. Enter the organization name as configured in BalkanID.
3. The system redirects to the organization’s **Login / Sign-up** page.
{% hint style="info" %}
If the organization name is unknown, contact the organization's BalkanID administrator or the BalkanID support team.
{% endhint %}
2. **Signing into BalkanID:**\
There are two ways to sign into BalkanID depending on how your admin has configured the environment. They are :
1. Use your SSO provider to login (Okta, Microsoft, Ping etc.) for a seamless experience by using an existing Identity Provider (IdP).
2. Sign up using social providers (such as Google) or magic link on the BalkanID Application (if a social provider hasn't been set up on your tenant yet).
3. **Role-based access**
Once your account has been verified, your admin will assign a role to you in BalkanID. We have 3 primary roles used on our application which have been listed below. Depending on the role assigned to you, the following tabs will be visible:
1. **Reviewers**: A users with this role will be able to view the *My tasks*, *Access Requests*, *Account* and *Help* menus. Reviewers will be able to review Access requests and perform the tasks assigned to them by the other roles.
2. **Risk managers**: A user with this role will be able to view the *Entities*, *Summary*, *Campaigns*, *Access Reviews* and all other menus that a Reviewer has access too. Risk Managers will be able to discover application, people, connection and identity entitlements as a reviewer. They can view the various campaigns and perform access reviews as a part of this role. In addition they can perform all the tasks a Reviewer can perform as well.
3. **Administrators**: A user with this role will be able to view the Settings and all the other menus that a Risk Manager has access too. Administrators will be able to control the settings. This includes adding user employee data, integrating applications, viewing all application entitlements in one place, manage rules and saved filters and finally configure system notifications.
4.
For specific assignment of roles based on your business needs, please refer to the following help link: [User Role Management](/getting-started/setting-up-your-tenant/user-role-management).
# User preferences
## Account preferences: Nominate delegate & Notification settings
At BalkanID, we understand that efficient management of responsibilities and personalized communication are key to maintaining productivity. The **Account Preferences** tab empowers users to tailor their experience, ensuring that tasks are managed seamlessly and information is received just how they like it.
***
## Nominate delegate
#### **What is the "Nominate Delegate" option?**
The "Nominate Delegate" option enables you to assign a delegate who will automatically receive any new reviews created via campaigns or access requests. This ensures that even in your absence, your reviews are promptly attended to, maintaining the flow of work without interruption. This feature is especially useful during periods of high workload or when you are away from the office.
#### **How to use the "Nominate Delegate" option in your account preferences?**
At BalkanID, we understand that efficient management of responsibilities is key to maintaining productivity. To help streamline your workflow, we offer the "Nominate Delegate" feature within the Account Preferences tab. When you are unavailable, this feature allows you to delegate the management of reviews created via campaigns or access requests to a designated person of your choice. Here’s how it works and how you can set it up.
#### **How it works?**
The delegation works in two key scenarios:
* **New Reviews Created:** Any new review generated through access requests or campaigns will automatically be assigned to your nominated delegate instead of coming to you.
* **Reassigned Reviews:** If any review initially assigned to you is reassigned, it will directly go to your nominated delegate if you have activated this option.
### **Setting up your delegate**
To use, follow these simple steps:
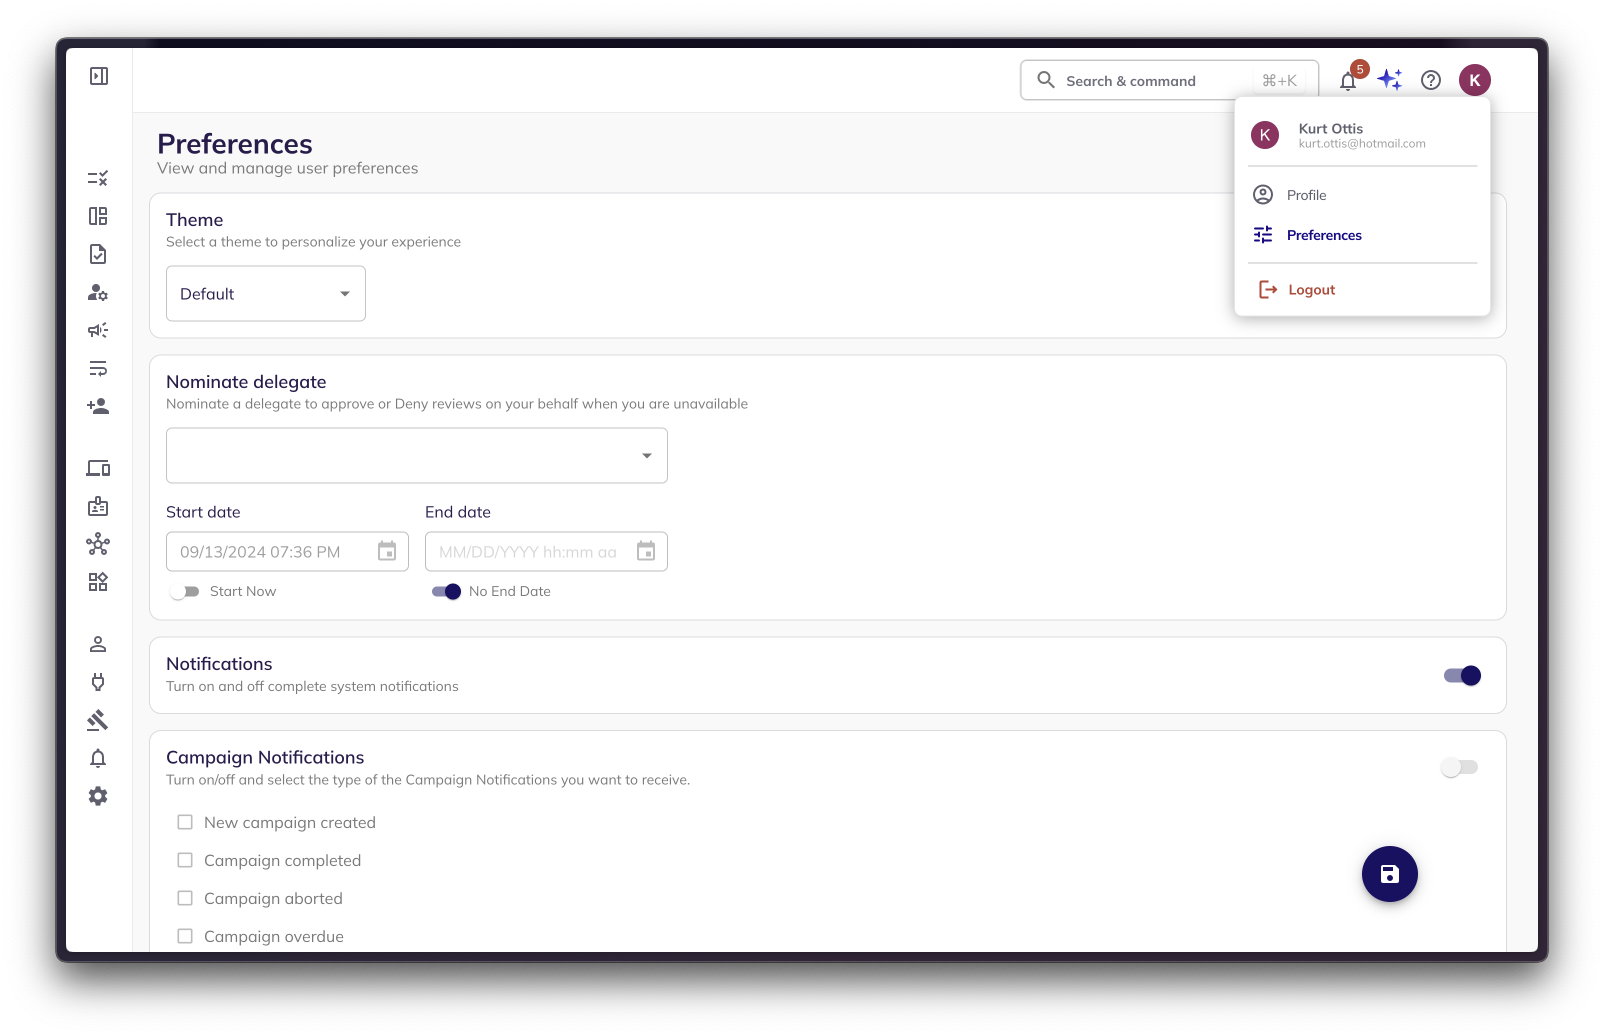
1. **Navigate to preferences:** Click on the profile icon on the top right of the page > Preferences tab from the dropdown.
2. **Select nominate delegate:** Here, you can choose a delegate from a list of your colleagues.
3. **Choose start and end date:** Select a **start and end date** for the delegation. You have flexibility to:
* Choose **specific dates** for the delegation period.
* Select **'Start Now'** for immediate activation (often a checkbox or default).
* Choose **'No End Date'** for continuous delegation.
4. **Save your settings:** After selecting your delegate, make sure to save your preferences to ensure that the changes take effect immediately.
***
## Notification preferences
BalkanID allows individual users to personalize their notification settings, giving them control over how and when they receive important updates.
#### Where to Find Notification Settings
1. **Account (Profile Icon) → Preferences** dropdown
#### Key Features of Notification Preferences
* **Opt-In/Opt-Out:** Users have the flexibility to choose whether to receive any notifications from BalkanID.
* **Select Notification Types:** Users can precisely pick which types of notifications they wish to receive. This allows for a tailored experience, ensuring that only relevant alerts are delivered while minimizing unnecessary noise. The available notification categories include:
* **Campaigns:** Updates related to the lifecycle and status of access review campaigns.
* **Access Requests:** Notifications regarding the status or action required for access requests.
* **Access Reviews:** Alerts specific to individual access reviews assigned to the user or that require their attention.
* **Integrations:** Status updates or issues related to integrated applications.
* **Access Provisioning:** Confirmations or alerts about successful access provisioning actions.
* **Access De-provisioning:** Confirmations or alerts about successful access de-provisioning actions.
* **Findings:** Notifications related to security findings or anomalies detected by BalkanID.
Users can select which of these categories are essential for their role and choose to receive alerts only for those, subject to any restrictions imposed by the tenant administrator (especially if the "Allow user override" option is disabled at the tenant level).
#### How to Configure User-Level Preferences
1. **Navigate to Preferences:**
* Go to **Account → Preferences** dropdown.
2. **Set Notification Preferences:**
* Within this section, you can easily **opt-in or opt-out** of receiving notifications and select the specific types of alerts relevant to your role from the detailed list provided.
# Setting up your tenant
This section is designed specifically for **BalkanID Administrators**, providing a comprehensive guide to setting up and configuring your tenant for optimal security and access management. You will learn how to:
1. [**Add Users:**](/getting-started/setting-up-your-tenant/integrate-employee-data) Integrate user data into your tenant to ensure accurate user profiles and streamlined identity management.
2. [**Manage User Roles**](/getting-started/setting-up-your-tenant/user-role-management)**:** Assign appropriate roles to each user, understanding the capabilities and access levels associated with each role.
3. [**Integrate Applications**](/getting-started/setting-up-your-tenant/application-integrations)**:** Connect, integrate and configure your applications with BalkanID to extract critical access and entitlement data.
4. [**Define Business Owners**](/getting-started/setting-up-your-tenant/business-owners-for-application-integrations)**:** Establish clear ownership for resources/connections within each integrated application, facilitating efficient governance and review processes.
By following these steps, you'll establish a robust foundation for managing identities and access across your organization with BalkanID.
# Integrate employee data
## Getting started
BalkanID relies on specific HRIS data to effectively manage Identity Lifecycle and Governance activities. Essential data fields include names, emails, manager details, start and termination dates and department information. Uploading your employee data to BalkanID allows you to [map](https://docs.balkan.id/configurations-and-integrations/manual-uploads/mapping-identities-to-employees) accounts across your systems to employees for entitlement discovery, assigning access reviews and creating access requests. There are three ways to integrate your users to BalkanID -
* Direct Integration to your HR system
* Manual flat file (.CSV) upload
* Bulk API upload
This article will briefly cover the process for all three. They are given below:
1. [**Direct HRIS Integration**](/getting-started/setting-up-your-tenant/integrate-employee-data/integration-with-hris-system)**:**\
Merge, our trusted integration partner, seamlessly connects your HRIS systems with BalkanID to ensure real-time accuracy of user data.
2. Adding users from the UI:\
BalkanID provides a straightforward way to add individual user accounts directly through the user interface. This method is ideal for quickly onboarding a single user, performing tests, or when a full HRIS/IDP sync isn't immediately available for a new hire.
3. [**Manual .CSV Upload**](/getting-started/setting-up-your-tenant/integrate-employee-data/manual-user-data-upload)**:**\
You can manually upload user data to integrate it into the BalkanID tenant.
4. [**Bulk API Upload**](https://developer.balkan.id/bulk-employees-upload-api-early-access-12828093e0)**:**\
With BalkanID Bulk API (Early Access), administrators can automatically upload user data from their HRIS or Identity Provider. Bulk API (Early Access) is the most flexible way to integrate a custom application, HRIS, or Identity Provider with BalkanID that works with any customer specific business process, security constraint, or integration need. Customer is in full control of *application credentials*, *data extracted*, and *the schedule to update these integrations*.
# Integration with HRIS system
This page details how to connect and synchronize BalkanID with your Human Resource Information System (HRIS). By configuring these integrations with your HRIS, you ensure seamless data exchange, enabling efficient management of employee information, access permissions, and identity updates within BalkanID.
BalkanID securely integrates with various HRIS systems via our integration partners.
***
### Integrating Your HRIS System
1. Within BalkanID, navigate to the [Integrations page under Configure](https://app.balkan.id/configure/integrations/apps), and click **Add Integration**.
2. From the list of available integrations, search and select your required integration. If you do not find your integration in the list, then search for **Merge** which is the path to integrate other HRIS integrations.
3. In the description field, add a description which indicates that this is an integration with your specific HRIS system. Select a **Primary** **Application Owner** and **Secondary Application Owners (optional)** for this integration.
4. Select **Direct Configuration** and select **Get Access Token**.
5. Select or search for your integrations from the list of integrations, pick the one you need to connect with, and follow the steps.
6. You will be intimated regarding the status of the sync in the `Integrations` page while the BalkanID environment ingests your data and updates your tenant.
After your employee data has been extracted and synced, you'll be able to view all of the integrated data from the **Users** tab under the **Configure** section in BalkanID. If you encounter any issues during this process, please don't hesitate to contact the BalkanID team for assistance!
***
### Supported HRIS Integrations
BalkanID securely integrates with a wide array of HRIS systems, including:
{% hint style="info" %}
Refer to the following guide to authenticate your HRIS system - [here](https://help.merge.dev/collections/8711975283-hris)
{% endhint %}
* 7Shifts
* Access People HR
* ADP
* AlexisHR
* AllianceHCM
* Altera
* Bamboo HR
* Breathe
* Ceridian Dayforce
* Cezanne
* Charlie
* ChartHop
* Clay HR
* CyberArk
* Darwinbox
* Dayforce
* Deel
* Employment Hero
* Factorial
* Freshteam
* Google Workspace
* GreytHR
* Gusto
* Hailey
* HeavenHR
* HiBob
* HRCloud
* HRPartner
* Humaans
* Humi
* Insperity
* Intelli HR
* Iris Cascade
* Jumpcloud
* Justworks
* Kallidus
* Keka
* Kenjo
* Kiwi HR
* Lano
* Lucca
* Microsoft Entra ID
* Namely HR
* Nmbrs by Visma
* Officient
* Okta
* Onelogin
* Oracle HCM Cloud
* [Oracle PeopleSoft](/getting-started/setting-up-your-tenant/integrate-employee-data/integration-with-hris-system/oracle-peoplesoft-integration)
* Oyster
* PayCaptain
* Paychex Flex
* Paycom
* Paycor
* PayFit
* Paylocity
* Peoplestrong
* Personio
* Ping Identity
* Planday
* Proliant
* QuickBooks Online Payroll
* RazorpayX Payroll
* Remote
* Rippling
* Run Powered by ADP
* Sage HR
* Sage People
* Sapling
* SAP SuccessFactors
* Sequoia One
* Sesame
* Square Payroll
* TriNet
* UltiPro (UKG Pro)
* UKG Ready
* Wave
* Workday
* Zelt
* Zenefits
* Zoho People
* Zwayam
* ADP Decidium
* ADP Next Gen
* CoolCare
* Folks HR
* Fourth
* Generic SFTP
* Harvest
* HRWorks
* Indeed SCIM
* iSolved
* iTrent
* Leapsome
* OmniHR
* PeopleForce
* PrismHR
* Repute
* Revolut People
* Shapes
* Simployer
* TriNet HR Platform
* Twilio SCIM
* UKG Pro Workforce Management
# Zoho People Integration
#### Setting up the Zoho People Integration on BalkanID
* Login to \.balkanid.app
* Navigate to ‘Configure’ —> ‘Integrations’
* Click on ‘Add Integration’
* Search for ‘Zoho People’ and select the app and Click on ‘Next’
* Enter details such description, choose the owner
* Click on ‘Get Access Token’
* Follow along the steps and fill in the required information
* Click on next to move onto Optional Configuration.\
Fill Optional configuration, if required.
* Once you filled in the information, click Save. Your integration is now configured and you will see the status of the integration displayed alongside other integrations on the Integrations page. When data is available, the integration Status will read Connected and the integration Message will read Data available.
# Generic SFTP
## Overview
SFTP (Secure File Transfer Protocol) is a secure and private service for sending files over the internet. Generic SFTP lets customers whose HRIS is not natively supported by our Merge HRIS Connector, share employee data via scheduled CSV exports or a one-time manual CSV upload. BalkanID Merge Connector resyncs the entire file on each transfer and deletes rows that are not present in the latest export.
## What can I share via Generic SFTP?
* A recurring CSV export from your HRIS, delivered to Merge HRIS connector on a schedule (daily, weekly, etc.).
* A one-time CSV upload through the Merge HRIS Connector Link modal, useful for a single sync or occasional updates.
For the full list of supported fields, file naming requirements, and schema constraints, download the Generic SFTP Report Template below.
{% file src="/files/eCi1oTUm7kKpG4yEDNEM" %}
**Note**: Merge treats each report as the full set of employees. If an employee that previously appeared in the report is missing from the next sync, Merge HRIS Connector will mark that employee as deleted. Merge HRIS Connector does not assume deleted employees are terminated employees — include a worker-status column if you need that distinction.
## How do I build the report in my source system?
1. Log in to your HRIS.
2. Navigate to the reporting or data export module.
3. Create a custom report (or modify an existing one).
4. Add the fields that you want to share as columns in the report.
5. Confirm your HRIS supports the file format and column requirements defined in the SFTP standards and requirements spreadsheet refered in [this](#what-can-i-share-via-generic-sftp) section.
6. Include a column called `employee_id` containing the value that uniquely identifies an employee in your HRIS.
7. If you wish to share Employment, Group, Location, or Time Off data, include the corresponding id columns (e.g., `employment_id`).
8. Name the output file `HRIS.csv`, run the report, and export to CSV.
## How do I send the export to BalkanID Merge HRIS Connector?
### Option A: Manual (one-time) upload
Download the report as a CSV, then upload it inside the Merge Link modal. Use this when you only need a single sync or occasional updates.
### Option B: Recurring / automated transfer via SFTP
1. Configure your system to schedule periodic CSV exports.
2. Provide the SFTP connection details to the receiver: **Username**, **Host**, **Port**, **Path**, and **Public Key** (Merge generates the public key for you to install on your SFTP server).

## How do I go live and validate the connection?
1. Once setup is complete, run a test file transfer.
2. Confirm the CSV is valid — schema, required fields, and no formatting errors.
3. Confirm successful ingestion and sync.
4. Monitor the first few runs to catch issues such as field mismatches or missing rows.
## Troubleshooting
* The file must be `.csv`.
* `employee_id` must be a column in your CSV.
* Remove any extraneous summary or footer rows (e.g., "Totals").
* Verify required identifier columns ar
# Oracle PeopleSoft Integration
### Overview
The BalkanID Oracle PeopleSoft Agent extracts employee data from an on-premise PeopleSoft HCM deployment and uploads it to BalkanID. It is **read-only** and never writes to PeopleSoft.
The agent runs inside your network and makes only **outbound** connections — HTTPS to BalkanID and a database connection to PeopleSoft. **No inbound connectivity** is required.
Each cycle uploads a full snapshot of the workforce, which replaces the previous one.
***
### Architecture
```mermaid
flowchart LR
subgraph CN["Customer network"]
AGENT["Agent host balkanid-psft-agent Windows Server or Linux"]
DB[("PeopleSoft HCM database SQL Server or Oracle")]
end
subgraph BID["BalkanID"]
API["balkanid.app"]
end
AGENT -->|"TCP 1433 / 1521 / 2484 SELECT on 6 tables, read-only"| DB
AGENT -->|"HTTPS 443 outbound only"| API
```
The agent only ever initiates connections. Nothing from BalkanID reaches into your network, no port is opened inbound on the agent host, and the agent does not run on the PeopleSoft server.
#### The extraction cycle
Every `extraction_interval`, and once immediately on start:
```mermaid
sequenceDiagram
autonumber
participant A as Agent host
participant P as PeopleSoft DB
participant B as balkanid.app
Note over A: Validate credentials, fail the cycle if incomplete
A->>P: SELECT current job rows (TCP 1433/1521/2484)
P-->>A: Employees
Note over A: Write employees.csv, refuse if empty
A->>B: Request presigned upload URL (HTTPS 443)
B-->>A: Presigned URL
A->>B: PUT employees bundle (HTTPS 443)
```
Credentials are checked before the database is read, so a misconfigured agent fails in a second rather than after extracting the whole workforce.
#### Where to install the agent
Any host that can reach the PeopleSoft database listener. It does **not** need to run on the PeopleSoft application or database server.
| Host | Notes |
| -------------- | ----------------------------------------------------------------------------------------------------------------------------- |
| Windows Server | **Required for AD authentication** (`auth_mode: windows`). Domain-joined member server; the service runs as a domain account. |
| Linux | Suitable for SQL authentication. AD authentication is not usable on Linux — see below. |
| Sizing | Negligible. One query per cycle; the process is idle between cycles. |
| Placement | A management or jumpbox host is typical. Avoid the database server itself so agent restarts never touch PeopleSoft. |
#### Network requirements
| Source | Destination | Protocol | Port | Direction | Configurable | Purpose |
| ---------- | ---------------------------------------------------------------------------- | ------------------- | ---- | --------- | ----------------------------- | ------------------------------------------------------- |
| Agent host | PeopleSoft database (SQL Server) | TDS | 1433 | Outbound | Yes, via `port` | Read the six `PS_*` tables |
| Agent host | PeopleSoft database (Oracle) | Oracle Net | 1521 | Outbound | Yes, via `port` | Read the six `PS_*` tables |
| Agent host | PeopleSoft database (Oracle TCPS) | Oracle Net over TLS | 2484 | Outbound | Yes, via `port` and `use_tls` | Encrypted alternative to 1521 |
| Agent host | `balkanid.app` | HTTPS | 443 | Outbound | No (fixed BalkanID endpoint) | REST API: request a presigned upload URL |
| Agent host | Presigned upload host (`balkanid.app`, `api-integrators.balkanid.app` or S3) | HTTPS | 443 | Outbound | No | Upload the `employees.csv` bundle |
| Agent host | `cdn.balkanid.app` | HTTPS | 443 | Outbound | No (fixed BalkanID endpoint) | **Installation and upgrade only** — not used at runtime |
{% hint style="info" %}
There is no inbound requirement. The agent has no listening port and cannot be called from outside your network.
{% endhint %}
The upload destination is a presigned URL issued by `balkanid.app`. The agent validates the host before sending and refuses redirects, so egress can be restricted to the destinations above.
An air-gapped host does not need `cdn.balkanid.app` at all — install from a local bundle with `--file`.
### Requirements
* **PeopleSoft HCM 9.2** on Microsoft SQL Server or Oracle. Db2 is not supported.
* Network access as described above.
* A read-only database account (see below).
* The PeopleSoft table owner name — conventionally `SYSADM`.
* The `peoplesoft` integration installed on your BalkanID tenant, and all four credentials from the console: **tenant ID, tenant key, tenant secret and integration ID**.
* A Linux (systemd) or Windows host. PeopleTools, an Oracle client, ODBC and Java are not required.
***
#### Required database privileges
The agent reads six tables. Payroll, benefits, compensation and national IDs are not read.
| Table | Supplies |
| -------------------- | -------------------------------------------------------------------------------- |
| `PS_JOB` | job record, department, job code, status, reporting line, effective date, action |
| `PS_NAMES` | primary and preferred name |
| `PS_EMAIL_ADDRESSES` | work email |
| `PS_EMPLOYMENT` | hire and termination dates |
| `PS_DEPT_TBL` | department description |
| `PS_JOBCODE_TBL` | job title |
**SQL Server**
```sql
CREATE LOGIN [BALKANID_RO] WITH PASSWORD = N'';
CREATE USER [BALKANID_RO] FOR LOGIN [BALKANID_RO];
GRANT SELECT ON [SYSADM].[PS_JOB] TO [BALKANID_RO];
GRANT SELECT ON [SYSADM].[PS_NAMES] TO [BALKANID_RO];
GRANT SELECT ON [SYSADM].[PS_EMAIL_ADDRESSES] TO [BALKANID_RO];
GRANT SELECT ON [SYSADM].[PS_EMPLOYMENT] TO [BALKANID_RO];
GRANT SELECT ON [SYSADM].[PS_DEPT_TBL] TO [BALKANID_RO];
GRANT SELECT ON [SYSADM].[PS_JOBCODE_TBL] TO [BALKANID_RO];
```
For Windows authentication, create the login from the domain account instead and set `auth_mode: windows` in the config:
```sql
CREATE LOGIN [DOMAIN\svc-balkanid] FROM WINDOWS;
CREATE USER [svc-balkanid] FOR LOGIN [DOMAIN\svc-balkanid];
```
**Oracle**
```sql
CREATE USER BALKANID_RO IDENTIFIED BY "";
GRANT CREATE SESSION TO BALKANID_RO;
GRANT SELECT ON SYSADM.PS_JOB TO BALKANID_RO;
GRANT SELECT ON SYSADM.PS_NAMES TO BALKANID_RO;
GRANT SELECT ON SYSADM.PS_EMAIL_ADDRESSES TO BALKANID_RO;
GRANT SELECT ON SYSADM.PS_EMPLOYMENT TO BALKANID_RO;
GRANT SELECT ON SYSADM.PS_DEPT_TBL TO BALKANID_RO;
GRANT SELECT ON SYSADM.PS_JOBCODE_TBL TO BALKANID_RO;
```
If your PeopleSoft tables are owned by a schema other than `SYSADM`, set `schema:` in the config to match.
Verify from the agent host with `balkanid-psft-agent --test-connection`, which probes each of the six tables and reports any the account cannot read.
***
#### Windows authentication
`auth_mode: windows` requires a **Windows** agent host. On Windows the agent authenticates as the process identity, with no credentials in the config. On Linux only the NTLM provider is available, which still requires `DOMAIN\user` and a password in the config — gaining nothing over `auth_mode: sql`.
{% hint style="warning" %}
The Windows service is registered as **LocalSystem**, which authenticates to SQL Server as the machine account. With `auth_mode: windows`, re-point the service at the domain account holding the `SELECT` grants (`services.msc` → BalkanID PeopleSoft Agent → Log On).
{% endhint %}
### Installation
#### Linux (systemd)
```sh
curl -fsSL https://cdn.balkanid.app/files/balkanid/psft-agent/releases/latest/install.sh | sudo sh
sudo editor /etc/balkanid/psft-agent/config.yaml
sudo systemctl restart balkanid-psft-agent
```
The installer creates the `balkanid` service user, verifies the download checksum, installs the binary to `/usr/local/bin`, and registers and starts the systemd unit.
| Path | Location |
| ------ | ------------------------------------------------------------------------------------------------- |
| Binary | `/usr/local/bin/balkanid-psft-agent` |
| Config | `/etc/balkanid/psft-agent/config.yaml` |
| Output | `/var/lib/balkanid/psft-agent/output/` |
| Logs | journald (`journalctl -u balkanid-psft-agent`) + per-day files `/var/log/balkanid/YYYY-MM-DD.log` |
#### Windows (service)
From an **elevated PowerShell**:
```powershell
Invoke-WebRequest -Uri "https://cdn.balkanid.app/files/balkanid/psft-agent/releases/latest/install.ps1" -OutFile "C:\temp\install.ps1"
C:\temp\install.ps1
notepad "$env:ProgramData\BalkanID\psft-agent\config.yaml"
Start-Service BalkanIDPSFTAgent
```
| Path | Location |
| ------- | ---------------------------------------------------------------------- |
| Binary | `C:\Program Files\BalkanID\psft-agent\balkanid-psft-agent.exe` |
| Config | `C:\ProgramData\BalkanID\psft-agent\config.yaml` |
| Logs | per-day files `C:\ProgramData\BalkanID\psft-agent\logs\YYYY-MM-DD.log` |
| Service | `BalkanIDPSFTAgent` (auto-start, LocalSystem) |
For an air-gapped host, download the bundle elsewhere and install from the file:
```sh
sudo ./install.sh --file balkanid-psft-agent_linux_amd64.tar.gz
```
### Configuration
The agent uses `--config ` if given, otherwise Linux `/etc/balkanid/psft-agent/config.yaml` or Windows `C:\ProgramData\BalkanID\psft-agent\config.yaml`. If no file exists, a skeleton is written on first run.
Get the tenant ID, tenant key, tenant secret and integration ID from your BalkanID administrator (Integrations → Add Integration → Oracle PeopleSoft HCM). All four are required.
```yaml
server:
heartbeat_mode: true # run the periodic extract-and-upload loop
extraction_interval: 12h # Go duration; floored at 5m
peoplesoft:
instances:
- name: PSFT-PROD # logical name; becomes the source system on rows
driver: mssql # mssql | oracle
host: psft-db.internal.example.com
port: 1433 # 1433 for SQL Server, 1521 for Oracle
database: HCM92 # SQL Server only: database holding the PeopleSoft tables
auth_mode: sql # sql | windows (windows requires a Windows host)
db_username: BALKANID_RO
db_password: "CHANGE_ME"
encrypt: true # SQL Server TLS
trust_server_certificate: false
# service_name: HCMPROD # Oracle only (or set `sid:` instead)
# use_tls: true # Oracle TCPS, usually port 2484
# wallet_path: /etc/balkanid/psft-agent/wallet # Oracle TLS trust anchors
schema: SYSADM # PeopleSoft table owner
manager_source: auto # supervisor | position | auto
email_type: BUSN # PS_EMAIL_ADDRESSES.E_ADDR_TYPE for the work address
auth: # all four are required
tenant_id: "01xxx"
tenant_key: ""
tenant_secret: ""
integration_id: "" # the installed PeopleSoft integration on your tenant
```
{% hint style="warning" %}
The agent refuses to run a cycle if any of the four credentials is missing, and names every missing key at once. `integration_id` is not resolved at runtime: a tenant can hold more than one PeopleSoft integration, and guessing would upload to the wrong one.
`--test-connection` and `--dry-run` do not need these — neither uploads — so the database side can be verified before the credentials are issued.
{% endhint %}
The config file holds the database password and the tenant secret. It is created owner-only, and the agent logs a warning if the permissions later widen.
**Transport encryption.** SQL Server connections are encrypted unless `encrypt: false` is set. For Oracle, set `use_tls: true` to connect over TCPS and point `wallet_path` at an Oracle wallet directory holding the trust anchors; server-certificate verification stays on. Most on-prem deployments use plain TCP on `1521`, in which case leave both unset.
***
#### Settings that depend on your PeopleSoft configuration
| Setting | Values | How to choose |
| ---------------- | -------------------------------- | -------------------------------------------------------------------------------------------------------------------------------------------------------------------------------------------------------------------------------------------------------------------- |
| `schema` | default `SYSADM` | The owner of the `PS_*` tables. A wrong value fails at the first query with a "table not found" error. |
| `manager_source` | `supervisor`, `position`, `auto` | `supervisor` reads `PS_JOB.SUPERVISOR_ID`; `position` resolves `PS_JOB.REPORTS_TO` through the position's current incumbent; `auto` prefers `SUPERVISOR_ID` and falls back to `REPORTS_TO` per row. Sites running Position Management usually populate `REPORTS_TO`. |
| `email_type` | default `BUSN` | The `PS_EMAIL_ADDRESSES.E_ADDR_TYPE` holding the work address. |
To see which reporting-line column your site populates:
```sql
SELECT
SUM(CASE WHEN J.SUPERVISOR_ID IS NOT NULL AND J.SUPERVISOR_ID <> ' ' THEN 1 ELSE 0 END) AS has_supervisor_id,
SUM(CASE WHEN J.REPORTS_TO IS NOT NULL AND J.REPORTS_TO <> ' ' THEN 1 ELSE 0 END) AS has_reports_to
FROM SYSADM.PS_JOB J
WHERE J.EFFDT = (SELECT MAX(J2.EFFDT) FROM SYSADM.PS_JOB J2
WHERE J2.EMPLID = J.EMPLID AND J2.EMPL_RCD = J.EMPL_RCD
AND J2.EFFDT <= GETDATE());
```
Each cycle logs how many employees resolved a manager, and warns below 50%.
***
#### What is extracted
* **Current state only.** From `PS_JOB`, the row in force per `(EMPLID, EMPL_RCD)` — the latest `EFFDT` not in the future, and the last `EFFSEQ` on that date.
* **All employees, including leavers.** There is no status filter. Leavers carry their `TERMINATION_DT` as the end date and report `suspended`. Everyone else reports `active`, including employees on a leave status (`L`, `P`, `S`, `W`).
* **One row per person.** A person holding concurrent jobs is emitted once, preferring an active record and then the lowest `EMPL_RCD`. Run `--check-concurrent-jobs` to see how many people this affects.
* **Job-change actions.** Each row carries the `PS_JOB.ACTION` and effective date behind its current state — `HIR` hire, `XFR` transfer, `PRO` promotion, `TER` termination.
### Running the agent
| Flag | Mode |
| ------------------------------------------- | ------------------------------------------------------------------------------------ |
| `--test-connection` | Verify the connection and probe all six tables; exits non-zero if any is unreadable. |
| `--check-concurrent-jobs` | Report how many people hold more than one job record. |
| `--dry-run --output ` | Extract to `employees.csv` locally; do **not** upload. |
| `--once` | Run one extract-and-upload cycle, then exit. |
| `--headless` | Run the extraction loop in the foreground (used by the services). |
| `--install-service` / `--uninstall-service` | Register / remove the OS service. |
| `--config ` | Use a specific config file. |
| `--version` | Print version and exit. |
In service mode the agent starts on boot, extracts every `extraction_interval` (default 12 hours), and writes per-day log files. The first cycle runs immediately on start.
Before enabling the service, run `balkanid-psft-agent --dry-run --output ./out` and check `employees.csv`. It uploads nothing, and confirms names, departments, titles, managers and termination dates are correct.
A healthy cycle logs:
```
level=info msg="instance \"PSFT-PROD\": read 3512 employees as of 2026-07-31 (manager source \"auto\")"
level=info msg="instance \"PSFT-PROD\": emitted 3512 employees (3488 with a manager, 3501 with a work email, 214 leavers with a termination date)"
level=info msg="instance \"PSFT-PROD\": job-change actions on current rows — HIR=112 XFR=48 PRO=27 TER=214"
level=info msg="uploaded employees bundle"
```
After the first successful cycle, the employees appear under **Users** in the **Configure** section of BalkanID.
***
### Troubleshooting
| Message | Cause and fix |
| ------------------------------------------------- | ------------------------------------------------------------------------------------------------------------------------------------------------------------ |
| `no PeopleSoft instances configured` | The config is still the generated skeleton. Fill in `peoplesoft.instances[0]`. |
| `auth.integration_id ... is not set` | One or more BalkanID credentials are missing. The message names every missing key; all four are required. |
| `connect to :` | Network, not credentials. Check the firewall rule, the listener, and that SQL Server TCP/IP is enabled. |
| `N of 6 tables are unreadable` | The read-only account is missing grants. The message names each failing table. |
| `Invalid column name` / `Invalid object name` | `schema:` points at the wrong owner, or on SQL Server `database:` is wrong. |
| `Login failed for user` with `auth_mode: windows` | The service is running as LocalSystem, authenticating as the machine account. Re-point it at the domain account. |
| `no work email resolved for any employee` | `email_type` does not match this site. Run `SELECT E_ADDR_TYPE, COUNT(*) FROM SYSADM.PS_EMAIL_ADDRESSES GROUP BY E_ADDR_TYPE` to see which types are in use. |
| `only N of M employees resolved a manager` | `manager_source` does not match how the site records reporting lines. See the query above. |
| `refusing to emit an empty roster` | The query returned no employees. Check `schema:` and the grants. |
| `peoplesoft integration not found for tenant` | `auth.integration_id` is wrong, or the integration is not installed on the tenant. |
| `the tenant API key was rejected` | `auth.tenant_key` / `auth.tenant_secret` are wrong or rotated. |
| Service starts then stops (Linux) | The `balkanid` service user does not exist. Run `useradd --system --no-create-home --shell /usr/sbin/nologin balkanid`. |
| Service runs but nothing uploads | `server.heartbeat_mode` is `false`. Set it to `true` and restart. |
# Add user from BalkanID application
While BalkanID offers robust integrations with your HRIS and Identity Providers for automated user data synchronization, there are scenarios where you might need to add individual users directly through the BalkanID application's user interface. This method is perfect for:
* **Quick Onboarding:** Swiftly add a new user who needs immediate access or review.
* **Testing Purposes:** Create test user accounts for internal validation or campaign testing.
* **Manual Adjustments:** Add users who might not be present in your synced systems, or for temporary access scenarios.
This guide will walk you through the simple process of manually adding a user to your BalkanID tenant.
***
### Step-by-Step Guide to Adding a User
Follow these steps to directly add users within the BalkanID application:
#### 1. Navigate to the Users Page
* From the BalkanID dashboard, locate the **"Configure"** section in the navigation menu.
* Under "Configure," click on **"Users."** This page displays all existing user identities within your BalkanID tenant.
#### 2. "Add User" button
* On the "Users" page, find and click the **"Add User"** button. This button is typically located in the top-right corner of the user table.
#### 3. Enter User Details
* A form will appear, prompting you to enter the new user's information. This page is designed to capture all essential details for the user's profile within BalkanID.
**Required Fields:**
* **Email:** This is a crucial and unique identifier for the user within BalkanID. It's used for notifications, linking to integrated applications, and primary identification.
* **Fullname:** The complete name of the user.
**Recommended (but Optional) Fields:**
While only Email and Fullname are strictly required, it is **highly recommended** to populate other available fields as they significantly enhance BalkanID's capabilities for:
* **Access Reviews:** Information like `Manager Email` allows for accurate assignment of access review campaigns to the correct managers.
* **Risk Analysis & Insights:** Details such as `Department`, `Job Title`, `Employee ID`, and `Location` provide richer context for risk analysis, outlier detection, and reporting.
* **Filtering & Reporting:** Comprehensive user data enables more granular filtering and insightful reporting across the platform.
**Examples of other useful fields you might encounter:**
* `Employment Type`
* `Start Date`
* `End Date`
* `Manager`
* `Job Title`
* `Department`
#### 4. Assign BalkanID Roles
* Once you have finished entering the user's personal data, it's essential to **assign appropriate roles** to this user within BalkanID. User roles determine what permissions the user has *within the BalkanID application itself* (Administrator, Reviewer, Risk Manager).
* By default, a "Reviewer" role is assigned to all users added. One or more roles can be assigned to each user based on the tasks required to be undertaken by them. To learn more about the different user roles and their corresponding permissions, please refer to our [**User role management**](/getting-started/setting-up-your-tenant/user-role-management) documentation.
#### 5. Save the User
* After carefully reviewing all the entered details and assigned roles, click the **"Save"** button at the bottom of the page.
Upon successful saving, the new user will be immediately added to your BalkanID tenant. This user's profile will now be available across the platform for access reviews, assignment to campaigns, and inclusion in reporting. The user will also be able to login to the application and access this tenant with the role assigned.
# Manual user data upload
## Steps to manually upload user data
1. To perform a manual .CSV upload in the application, you will need a CSV file containing user data (including employees, contractors etc). All HR / payroll / employee source of truth tools should allow you do to download this data. Please ensure that your data is formatted as per the format attached at the bottom of this page.
User ID
Full Name
First Name
Last Name
Work Email
Department
Title
Start Date
End Date
Employment Type
Organization
Manager
Manager Work Email
Source User ID
BalkanID Roles
Metadata Version
Metadata
12345
John Q
John
Q
john.q@acme.com
Ops
Engineer
01/01/2002
Full time
Security
Jane Doe
jane.doe@acme.com
111111
reviewer
v1
{"employee":"John Q","role id":"1","location":{"address":"123 Main Street, Office Suite 111, Anytown, USA 12345"}}
67890
Jane Doe
Jane
Doe
jane.doe@acme.com
Ops
Manager
01/01/2002
Full time
Security
222222
reviewer, risk manager, administrator
v1
{"employee":"Jane Doe","role id":"2","location":{"address":"123 Main Street, Office Suite 222, Anytown, USA 12345"}}
\
**Required fields:** Work email, Start date
2. Metadata is a JSON object and has a corresponding Metadata Version. Metadata Versions and their respective allowed fields which are currently supported -
1. "v1"
1. "location" - JSON with the following fields:
1. "address" - String
2. "manager id" - String
3. "manager name" - String
4. "employee" - String
5. "role id" - String
6. "app" - String (Internal use)
7. "correlation id" - String (Internal use)
8. "tenant" - String (Internal use)
9. "timestamp" - String (Internal use)
3. Even though the "Internal use" fields are supported, they are meant for internal use and are only supported for the purpose of being able to download from an Employee integration (like Merge or Google) and then upload after edits to the Employee without losing relevant information about the original extraction from the integration.
4. Once you have processed your data and converted it into the suitable format, proceed to upload the .CSV file in the *Configure* > *Users* page. Click on "*Bulk Upload".*
5. You will be able to see a side screen as shown below. Under the *Employees Upload* section, upload your formatted .CSV file.
6. You will be intimated regarding the status of the upload through the snackbar on the top-right of the screen while the BalkanID environment ingests your data and updates your tenant.
{% hint style="info" %}
If you need help, contact .
{% endhint %}
{% file src="/files/ygCWJdYgmNpLatOx1lbu" %}
# SSO Setup
BalkanID makes it easy to integrate Single Sign-On (SSO) with your existing Identity Provider (IdP), helping you streamline authentication and improve security across your organization. By connecting your Identity Provider, you can centralize authentication, reduce password-related risks, and provide a seamless login experience for your users.
We support a wide range of industry-standard IdPs **out of the box**. Whether you're using a popular cloud IdP like Okta or Azure Entra ID, or a custom in-house solution that supports SAML or OIDC, BalkanID offers flexible support to meet your needs.
### Supported Identity Providers
BalkanID currently supports the following IdPs:
* Auth0
* Azure EntraID
* Classlink
* Cyberark
* Descope
* Duo
* Google Workspace
* Jumpcloud
* Keycloak
* Lastpass
* Microsoft AD FS
* miniOrange
* Okta
* Onelogin
* PingOne
* PingFederate
* Salesforce
Each of these providers can be configured to enable secure, seamless SSO login for your users within BalkanID.
#### Don't See Your IdP?
If your Identity Provider isn't listed above, no problem! BalkanID also supports any **custom SAML 2.0** or **OIDC (OpenID Connect)**-compliant provider. This flexibility ensures you can still set up SSO, regardless of which IdP you use.
### What You'll Need to Get Started
Before setting up your SSO integration, make sure you have the following:
* Admin access to your Identity Provider
* Your SAML metadata or OIDC configuration details
* Admin access to your BalkanID Tenant
{% hint style="info" %}
If required for SSO setup, the redirect URI for our application is:
{% endhint %}
Important Notice for Okta OIDC Configuration
Please be aware of a known issue with the current Okta OIDC setup suite that may cause configuration errors. Our team is working on a fix.
In the meantime, please follow this temporary workaround to ensure your Okta OIDC integration is set up correctly.
When configuring your Okta OIDC application, you **must manually adjust** the following three settings:
1. **Scopes:** Make sure that `openid` is added within the desired scopes option as shown in the below image.
2. **Grant Type**: Set the grant type to **`implicit`**.
3. **Allow ID Token**: Ensure the **`ID Token`** option is checked and allowed.
4. **User Attribute Mapping**: In the user attribute mapping section, change the default value from **`sub`** to `email` for the `Login ID` user attribute.
Following these specific steps will allow for a successful connection. We apologize for any inconvenience and will remove this notice once the issue is resolved in a future update.
### How to Set Up SSO
1. Log in to the BalkanID.
2. Under the configure section click Global Settings > SSO Configuration.
3. Click on the `Generate SSO link` button.
4. After clicking "Generate SSO Link," a pop-up or notification will provide you with a unique URL. You'll also see an option to **email this link to yourself** for convenience.
5. Clicking on the provided URL will open the SSO Suite, a step-by-step guided experience. This suite will walk you through the configuration process tailored to your chosen SSO provider, ensuring a smooth and accurate setup.
{% hint style="info" %}
If you need any help or assistance, don't hesitate to reach out to the **BalkanID team** at ****.
{% endhint %}
# User role management
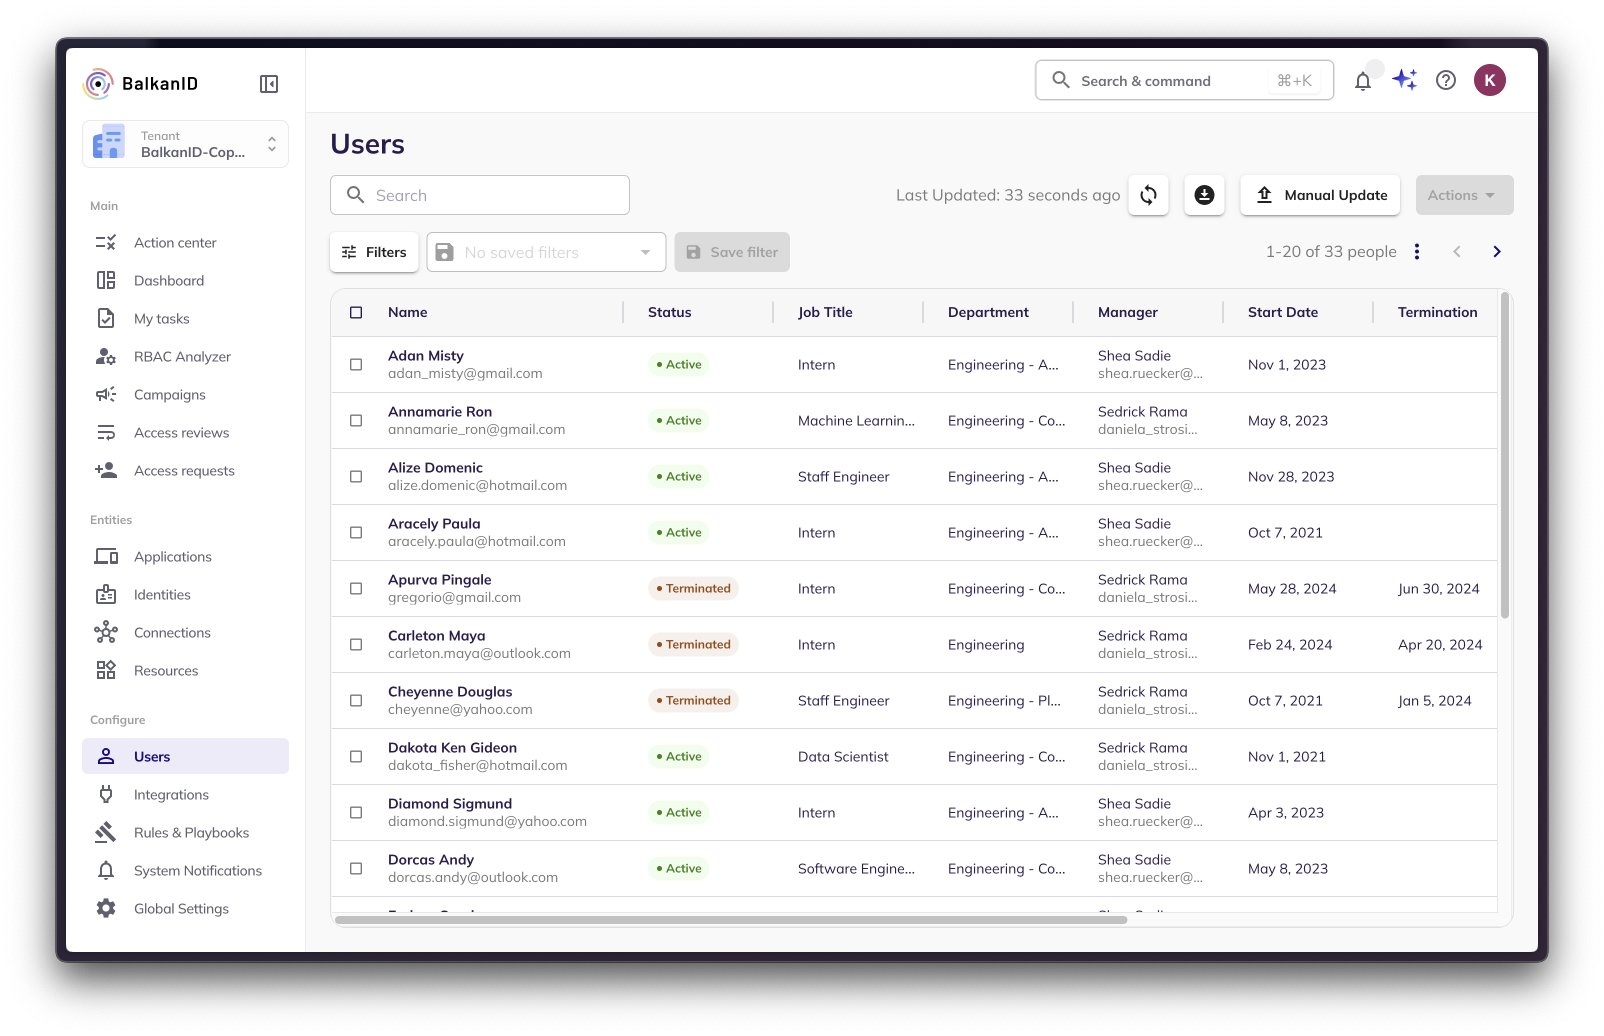
Administrators in BalkanID can manage user accounts on the Users page. To start, log into BalkanID and navigate to the Users page as seen below. This page lists all employees at your company (typically fed via your direct HRIS Integration). To do this, refer to - [Integrating Employee Data](/getting-started/setting-up-your-tenant/integrate-employee-data/integration-with-hris-system).
### User roles in BalkanID
We support three roles with the following capabilities:
* **Reviewers:** Users with this role can view the **My Tasks**, **Access Requests**, **Profile, Preferences**, and **Help** menus. Reviewers are primarily responsible for reviewing access reviews and requests, and performing tasks assigned to them by other roles.
* **Risk Managers:** This role includes all the permissions of a Reviewer, plus access to the **Entities**, **Summary**, **Campaigns**, and **Access Reviews** menus. Risk Managers can discover application, people, connection, and identity entitlements, view various campaigns, and perform comprehensive access reviews.
* **Administrators:** This is the highest level of access, encompassing all the menus and capabilities of a Risk Manager. Additionally, Administrators can access the **Configure** section, allowing them to control system-wide configurations. This includes adding employee data, integrating applications, managing rules and saved filters, and configuring system notifications.
### Steps to edit user roles:
To manage user roles, navigate to the **Users** page under the **Configure** section. There are two methods for editing user roles:
#### Edit a Single User's Role
1. Locate the user you wish to edit in the table.
2. Navigate to the rightmost **Actions** column and click the **Edit** button (represented by a pencil icon).
3. The option to edit the user and their respective role will appear, allowing you to select one or more roles for that specific user, as shown below.
#### Edit Multiple Users' Roles
1. Select the users whose roles you want to edit by checking the box next to their names.
2. Click on the **Actions** dropdown menu and select **"Bulk Edit Roles."**
3. A sidebar will open, providing the option to edit the roles for all the selected users, as shown below.
# Application Integrations
Configure your tenant by integrating applications, SSO and fulfillment options.
This section provides a detailed guide to **Application Integrations** within BalkanID, a critical step in establishing comprehensive identity and access governance for your tenant. Here, you will learn how to connect your various applications to our platform, enabling the extraction of valuable identity and entitlement data.
We will cover:
* [**Supported Integrations**](/getting-started/setting-up-your-tenant/application-integrations/direct-application-integrations)**:** A comprehensive list of the applications BalkanID natively supports for seamless integration and steps to integrate them.
* [**Identity Mapping**](/getting-started/setting-up-your-tenant/application-integrations/mapping-and-unmapping-identities-to-employees)**:** How to effectively map extracted identities from these applications to your employee data, providing a clear understanding of who owns what access.
* [**Configuring Fulfillment Options**](/getting-started/setting-up-your-tenant/application-integrations/fulfillment-options)**:** Defining automated actions and workflows to be triggered based on the approval or denial of access requests and reviews, ensuring efficient and consistent access management.
* [Custom Application Integration Data Upload](/getting-started/setting-up-your-tenant/application-integrations/custom-application-integration-data-upload): How to upload data manually for your custom applications and other data sources.
* [**Media Extraction for Disconnected Apps**](/getting-started/setting-up-your-tenant/application-integrations/media-extraction-for-disconnected-apps)**:** Upload PDFs and images from apps without integrations. Review and approve extracted entitlements before ingestion.
By leveraging these powerful integration capabilities, you can gain a unified view of access across your entire enterprise and automate critical governance processes.
# Direct Application Integration
This section provides a detailed guide to integrating your applications with BalkanID. It's divided into two main parts: first, the general steps for integrating any application once you have its credentials, and second, specific instructions for obtaining credentials for each of the directly supported applications. If a particular integration that you are interested in is not in this list, BalkanID team can build those additional integrations for you. Typically new integrations take a couple of days to a week to be deployed in your environment.
{% hint style="info" %}
Reach out to us at **** for any new integrations that we do not support yet.
{% endhint %}
## Integrating a new Application
1. Obtain the [necessary credentials](#supported-integrations) for your desired application by following the steps mentioned in the list of integrations below. Follow these steps to integrate it with BalkanID.
2. Login to the BalkanID application and switch to the tenant you would like to add your integration to.
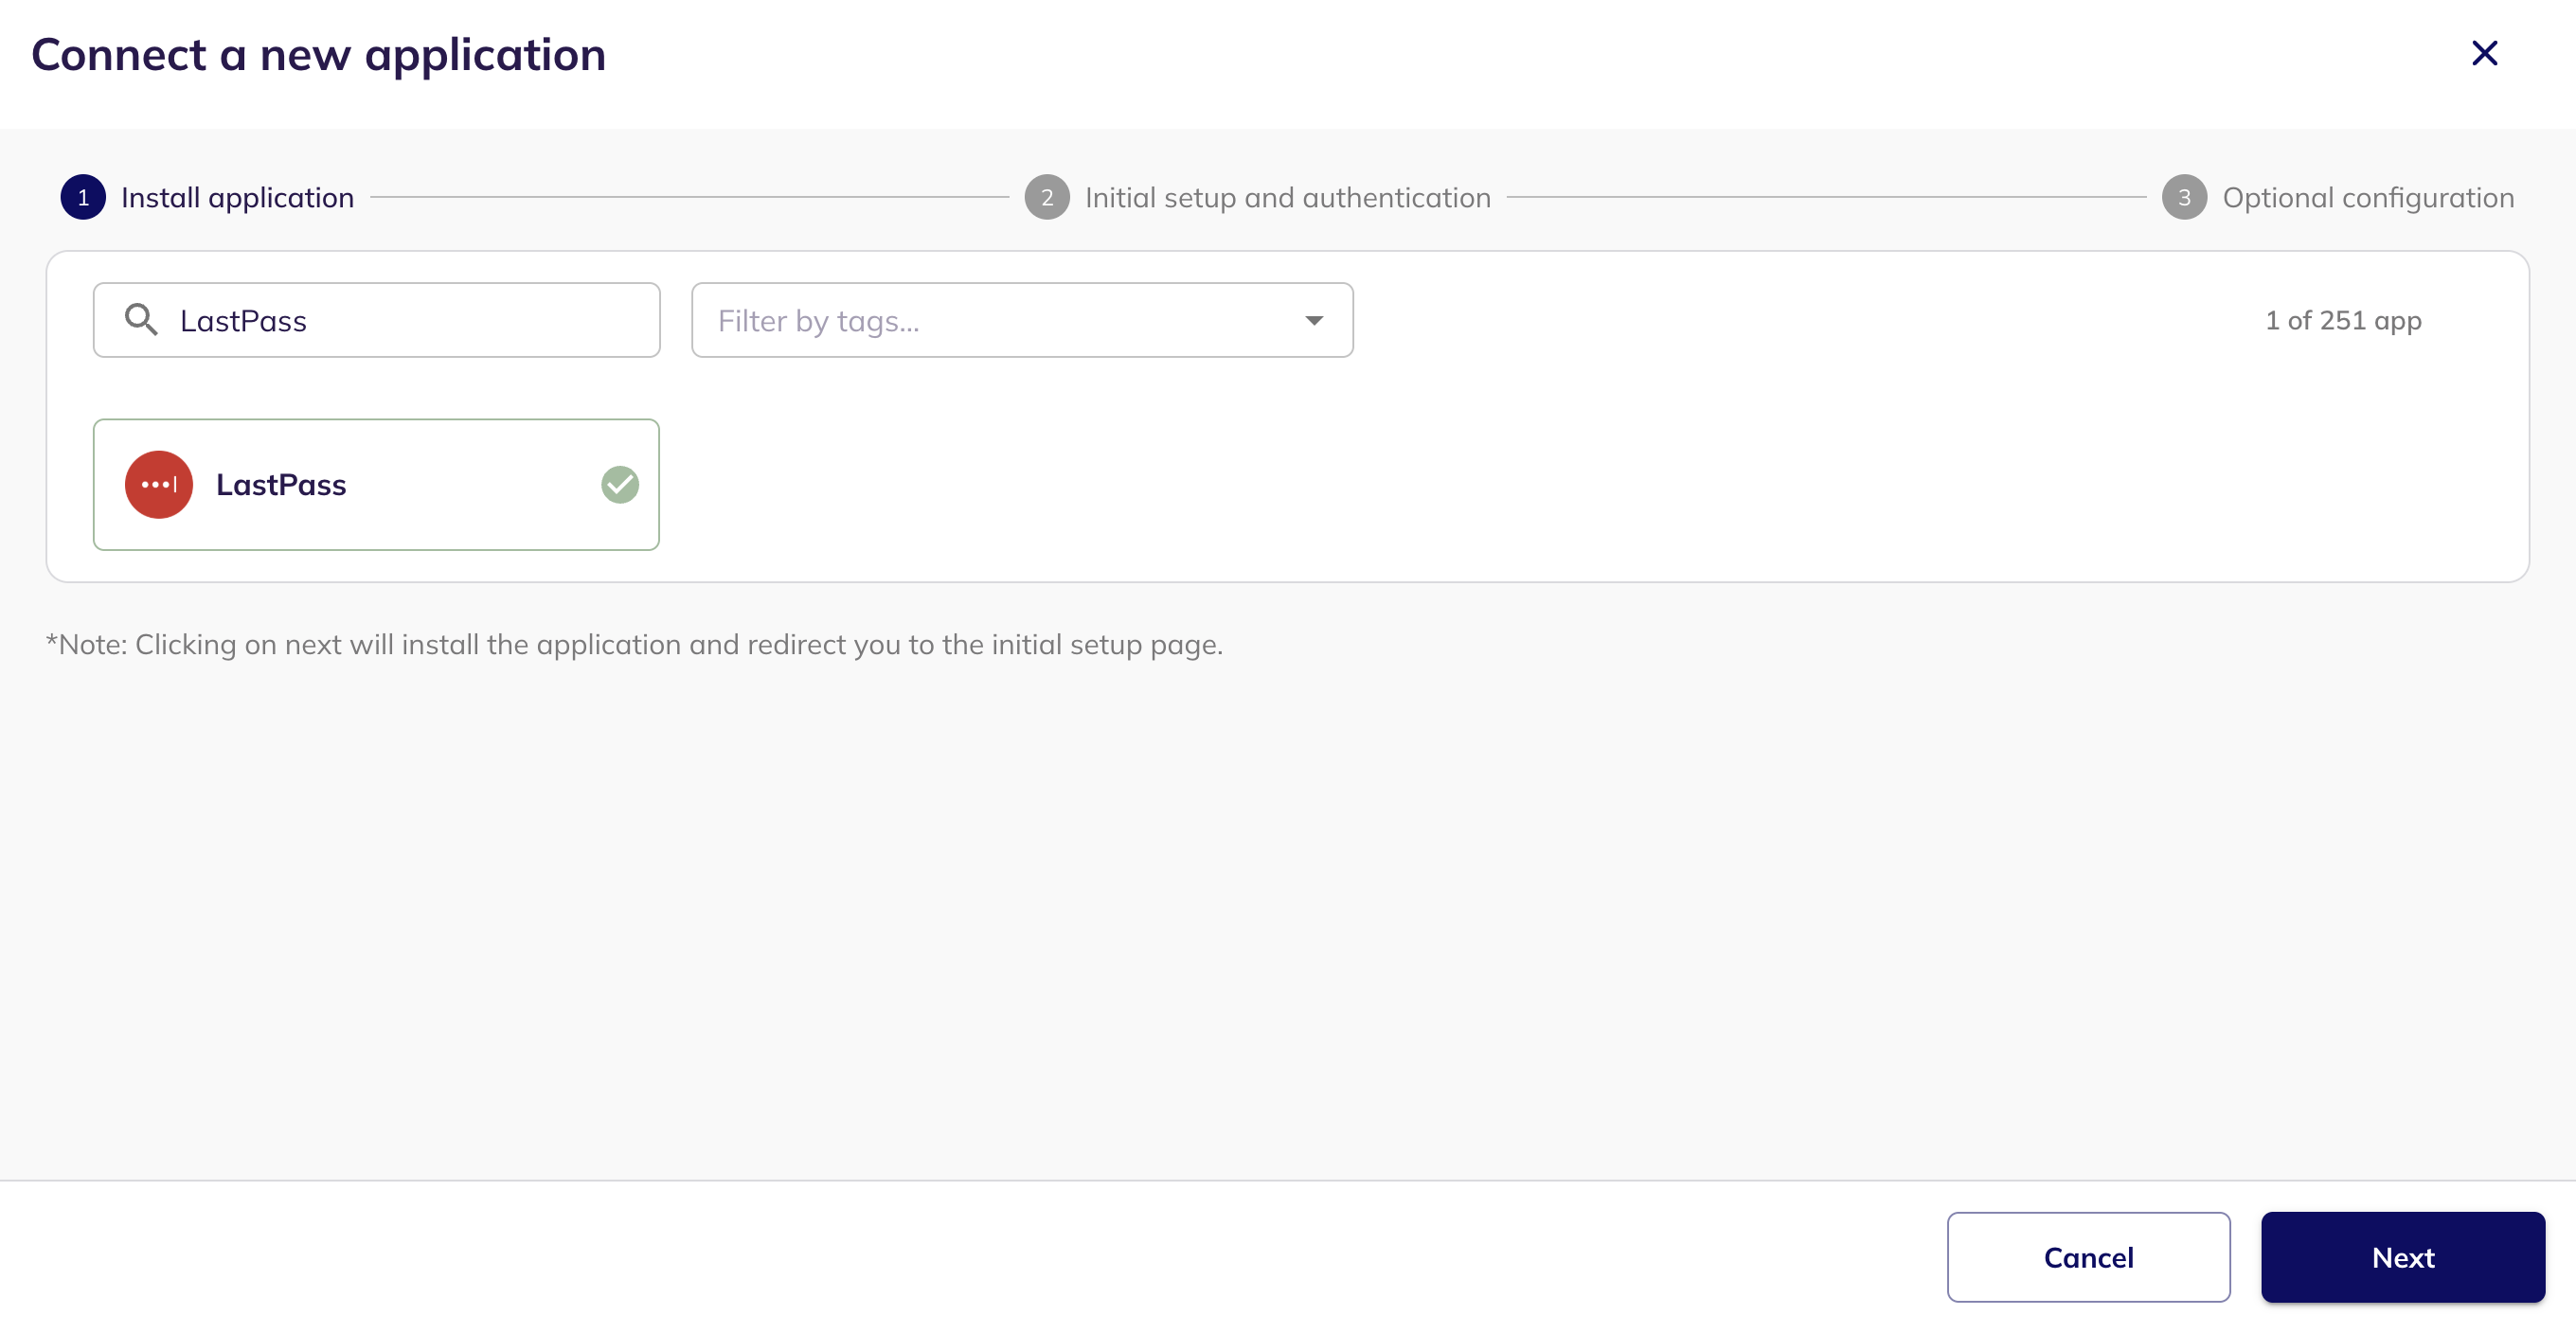
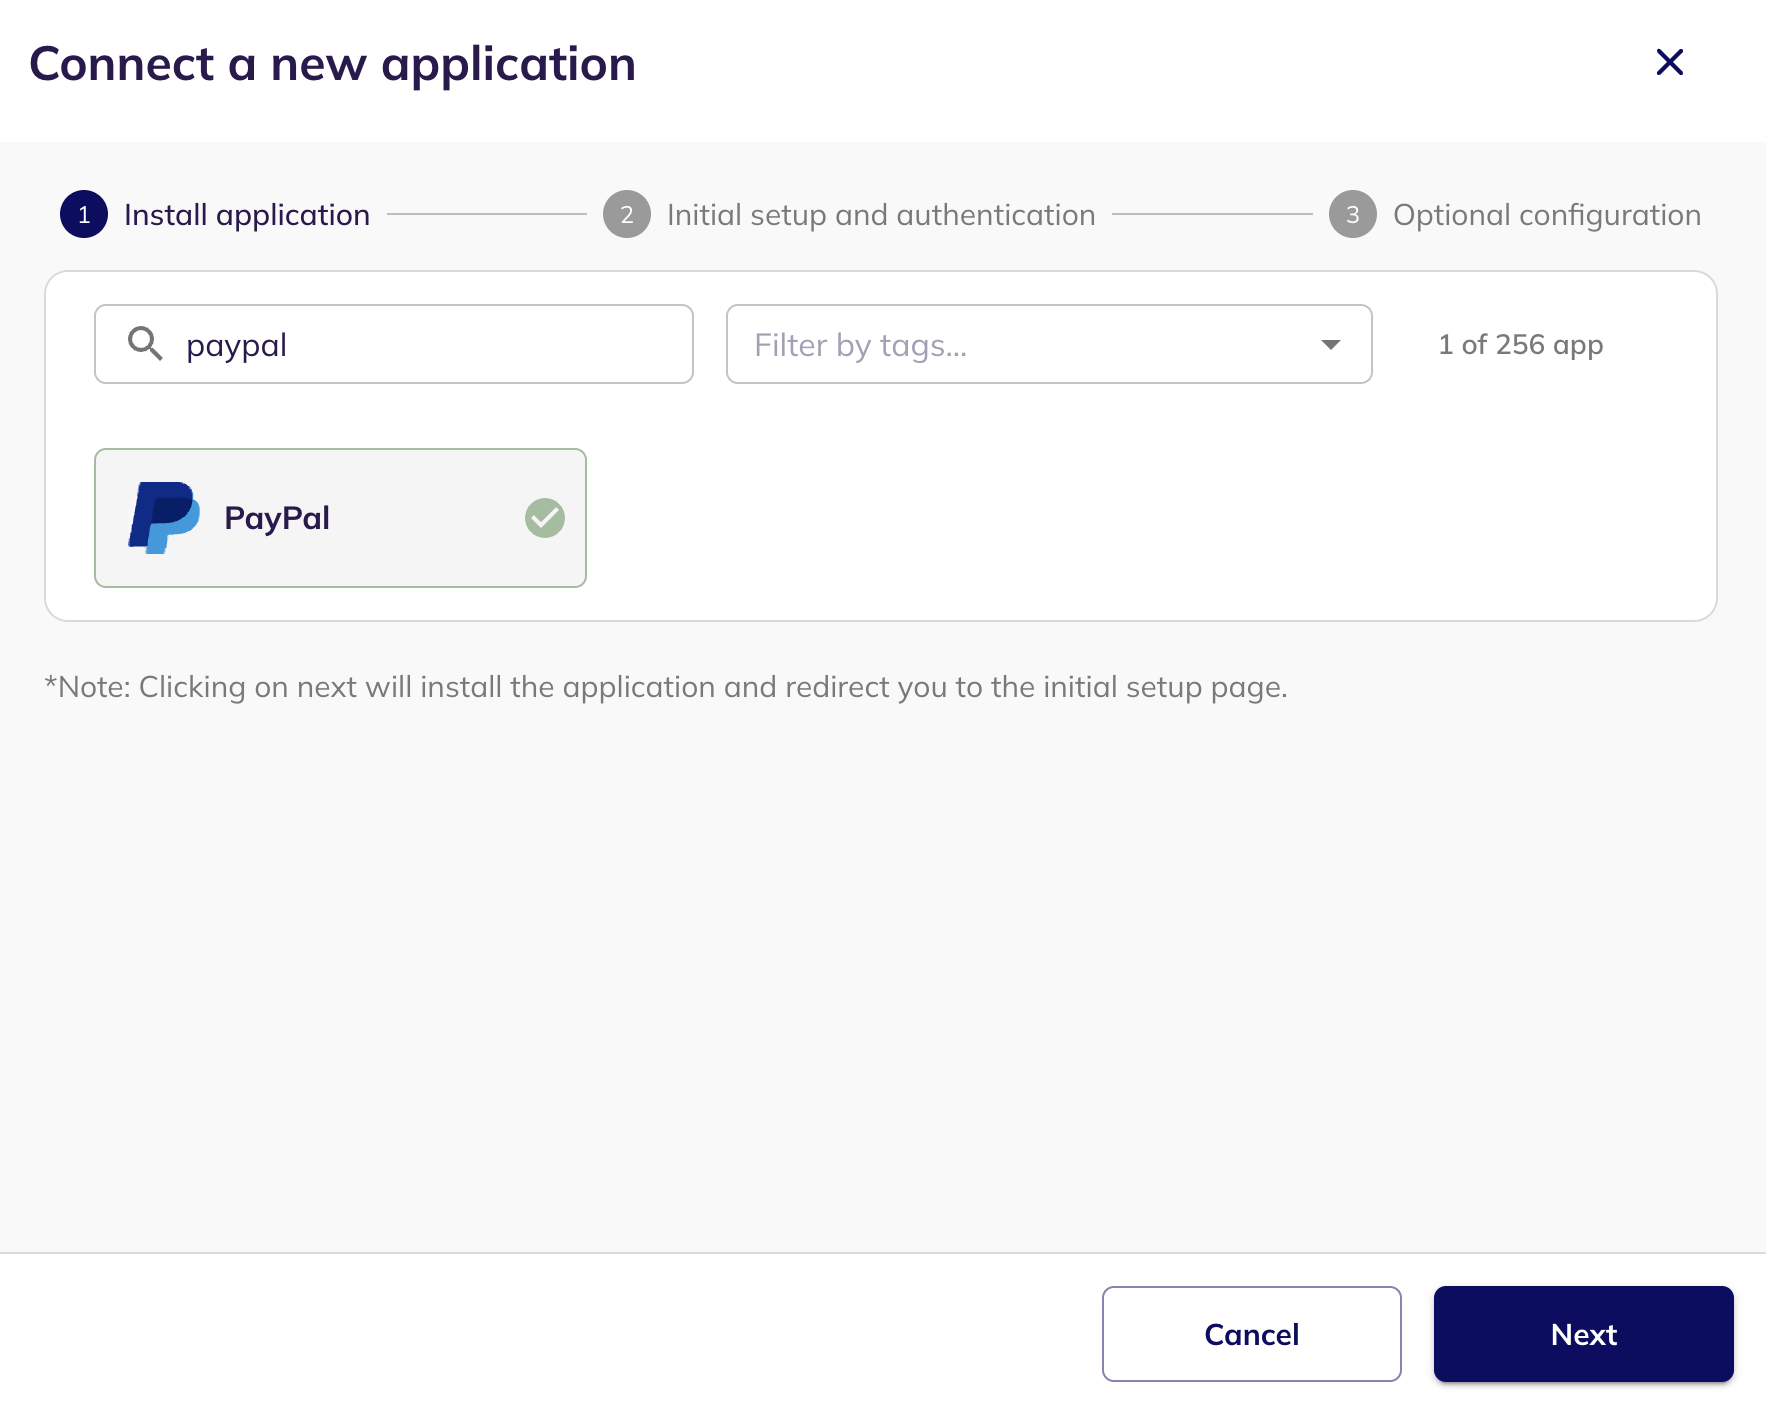
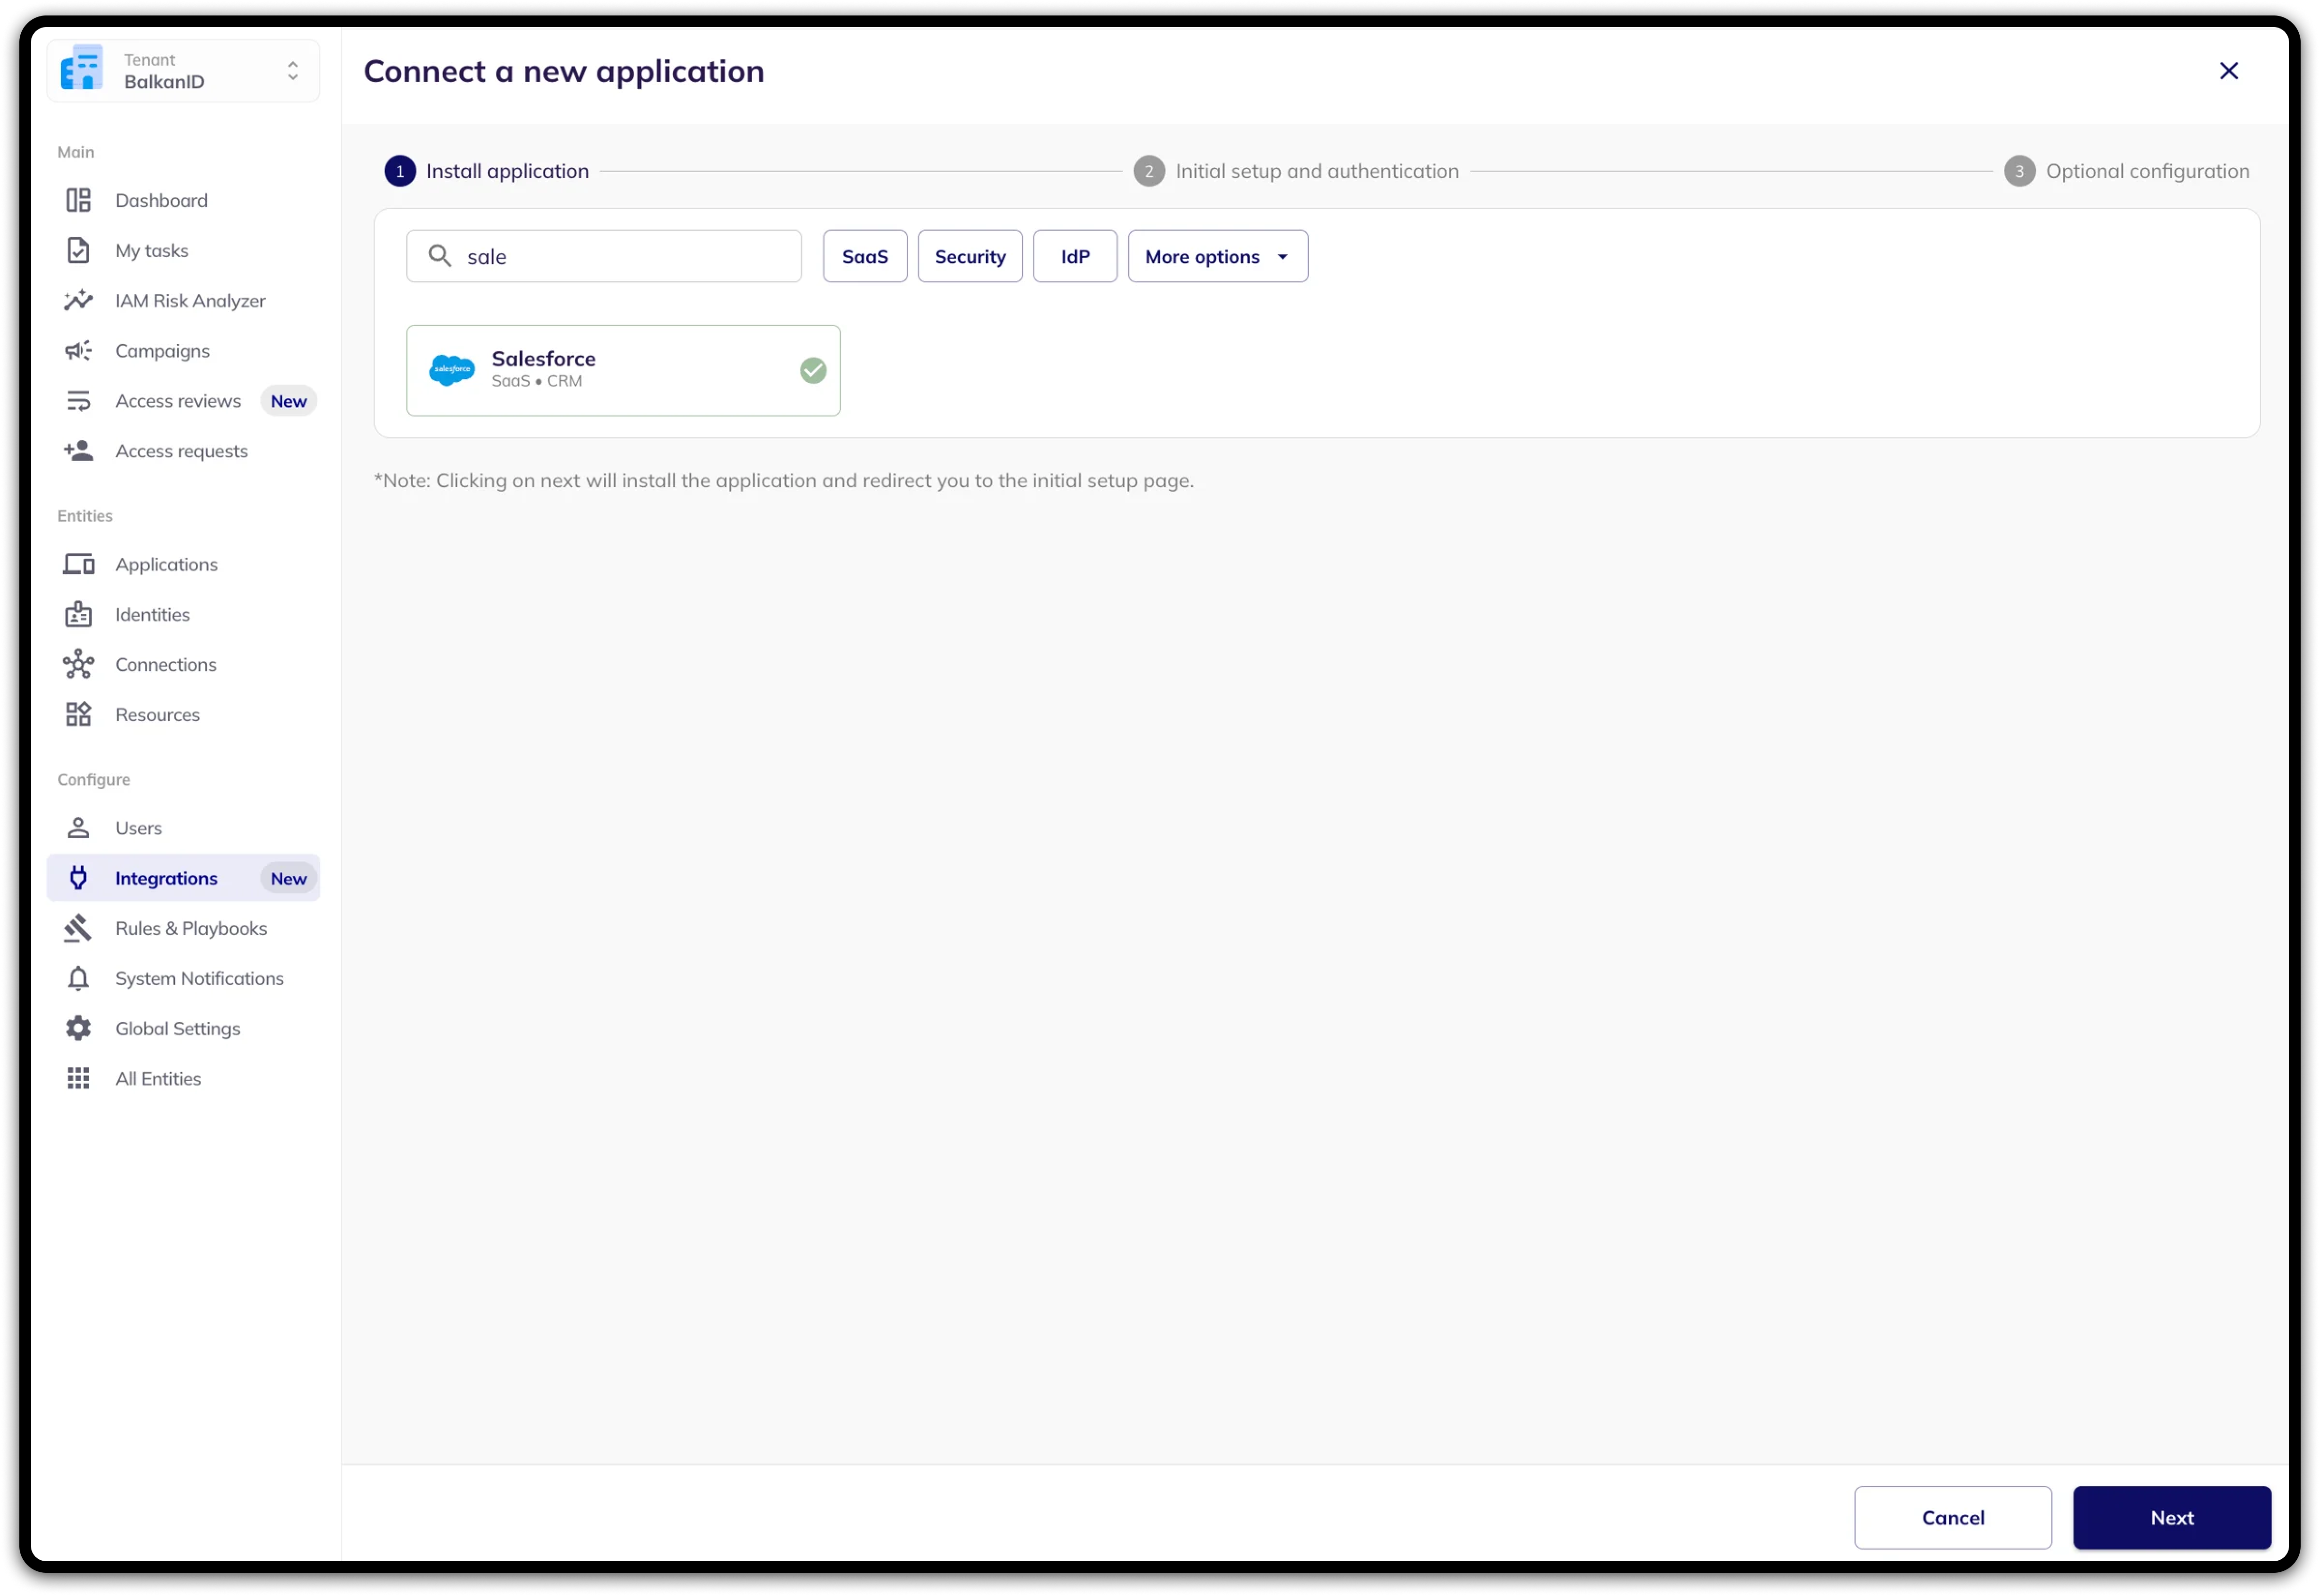
3. Head to *Integrations* > **Add Integration**, select your desired application**.**
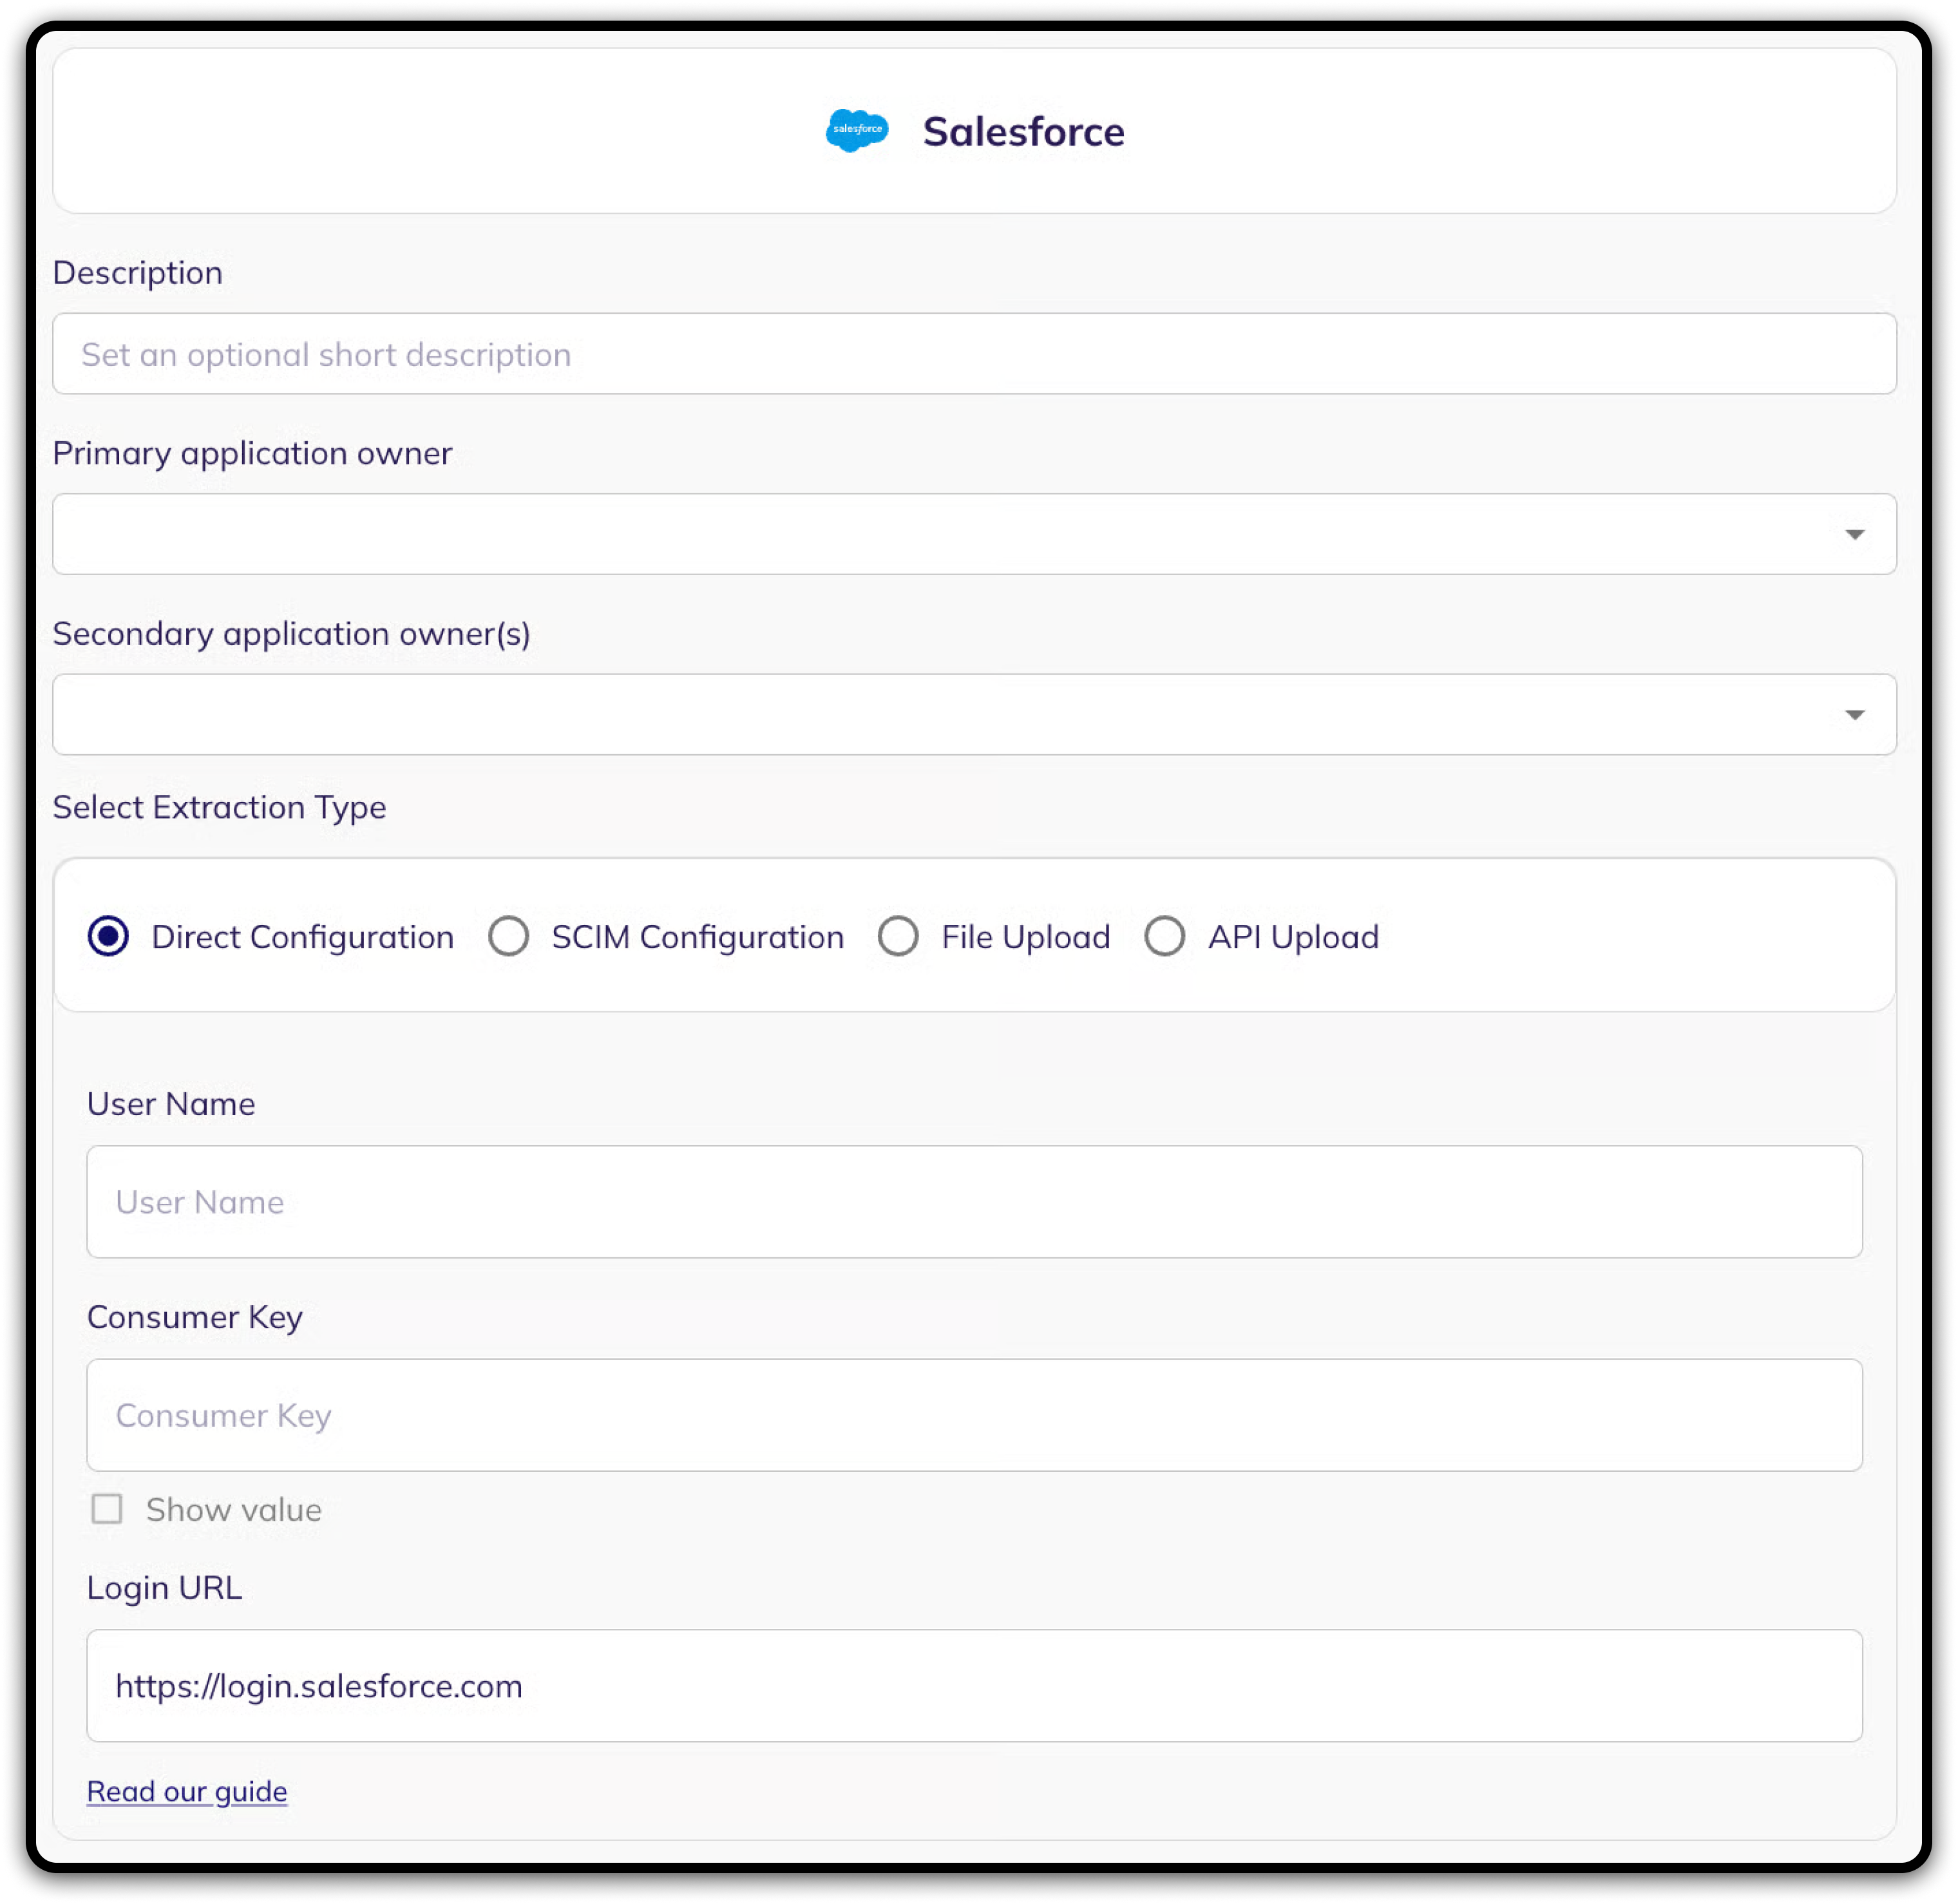
4. Set up the *Primary Application owner (mandatory)* and the *Description*, if any. Set up Secondary Application Owner(s), if any.
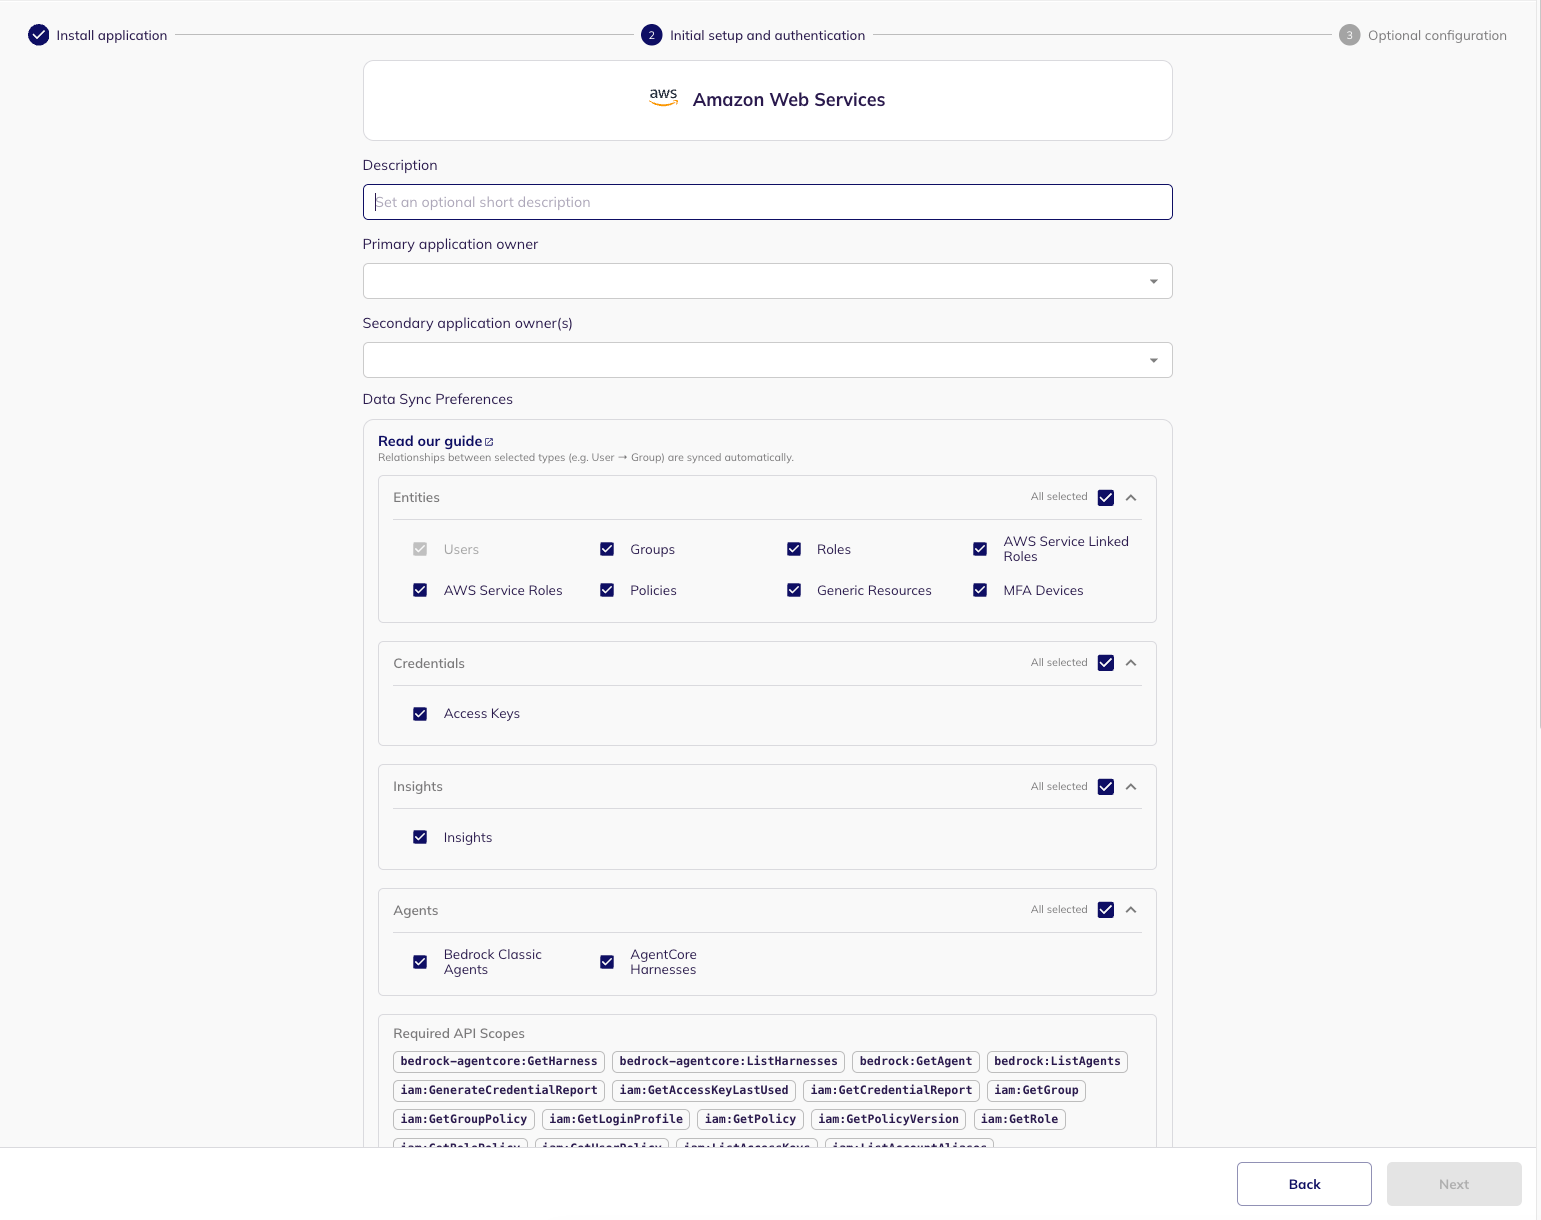
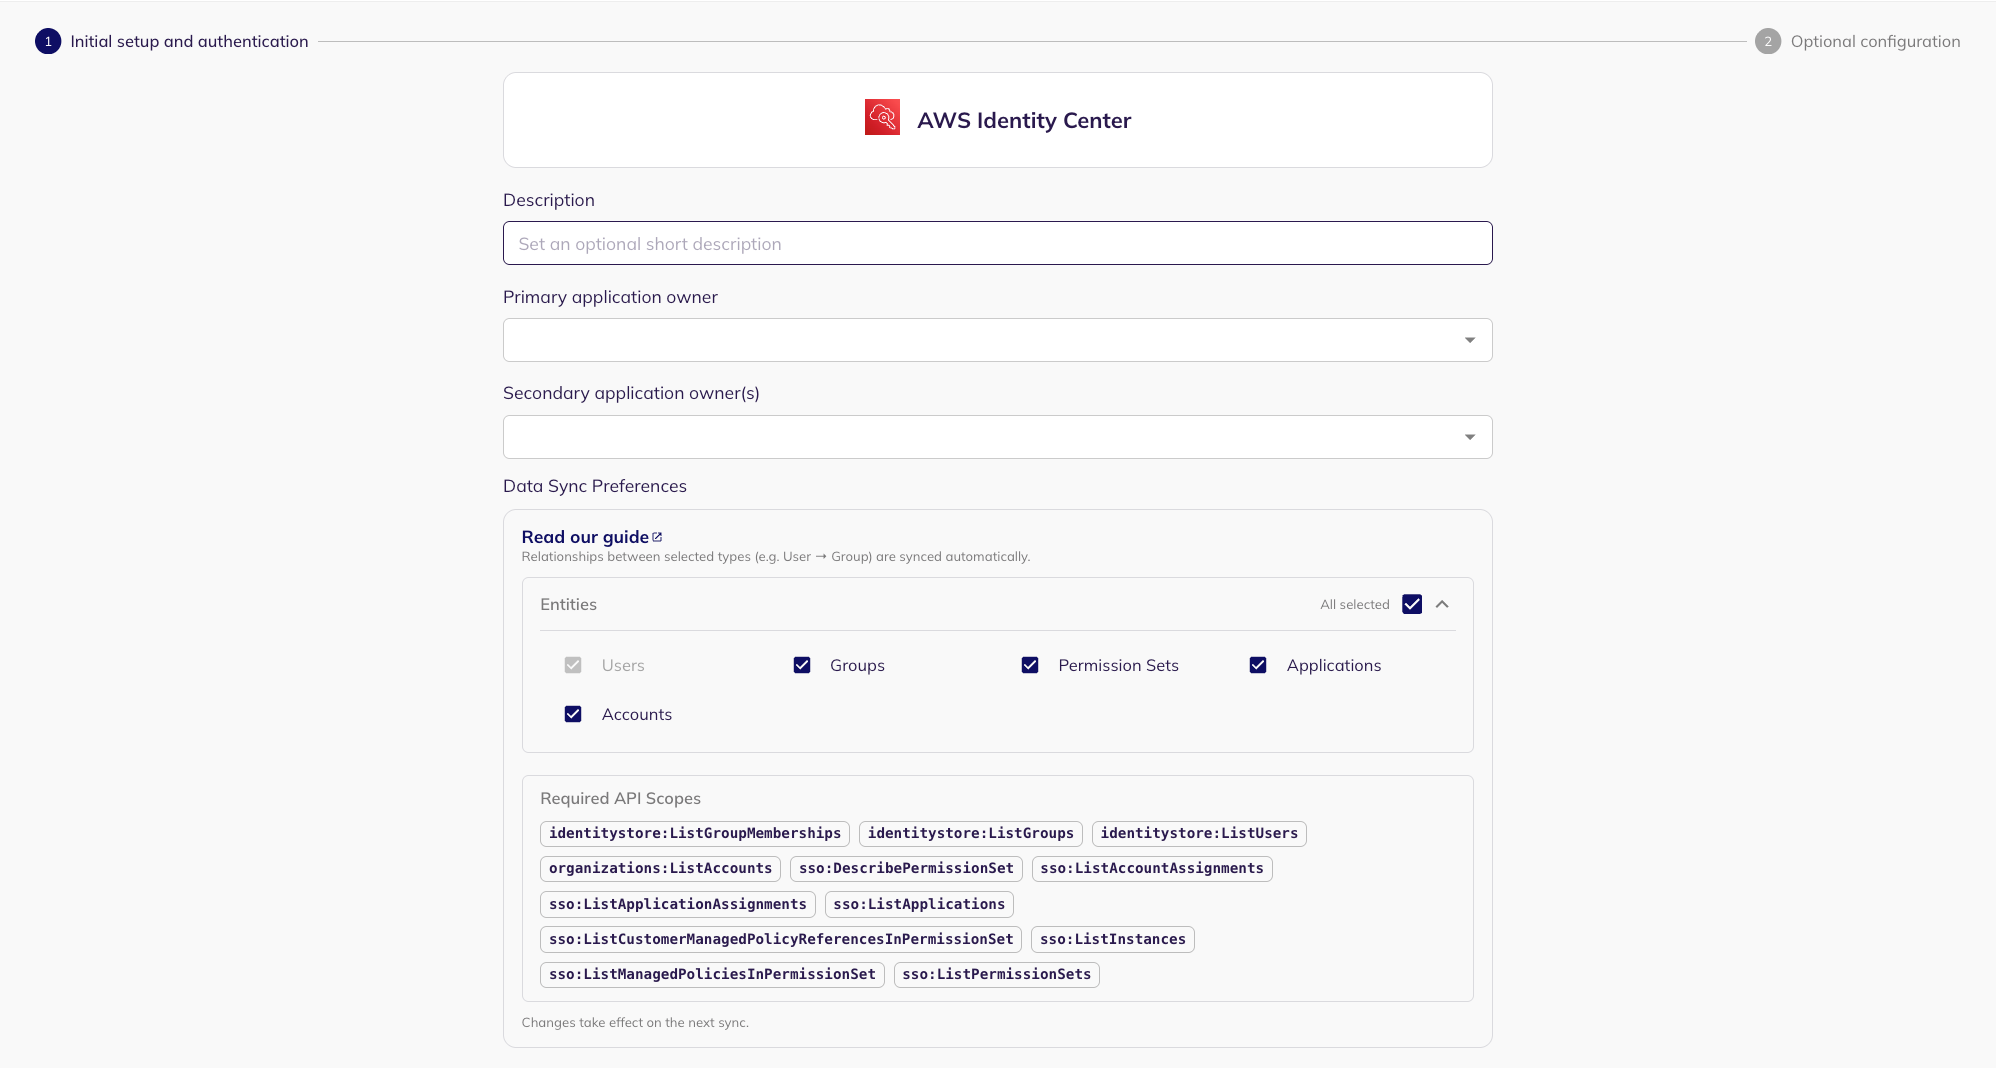
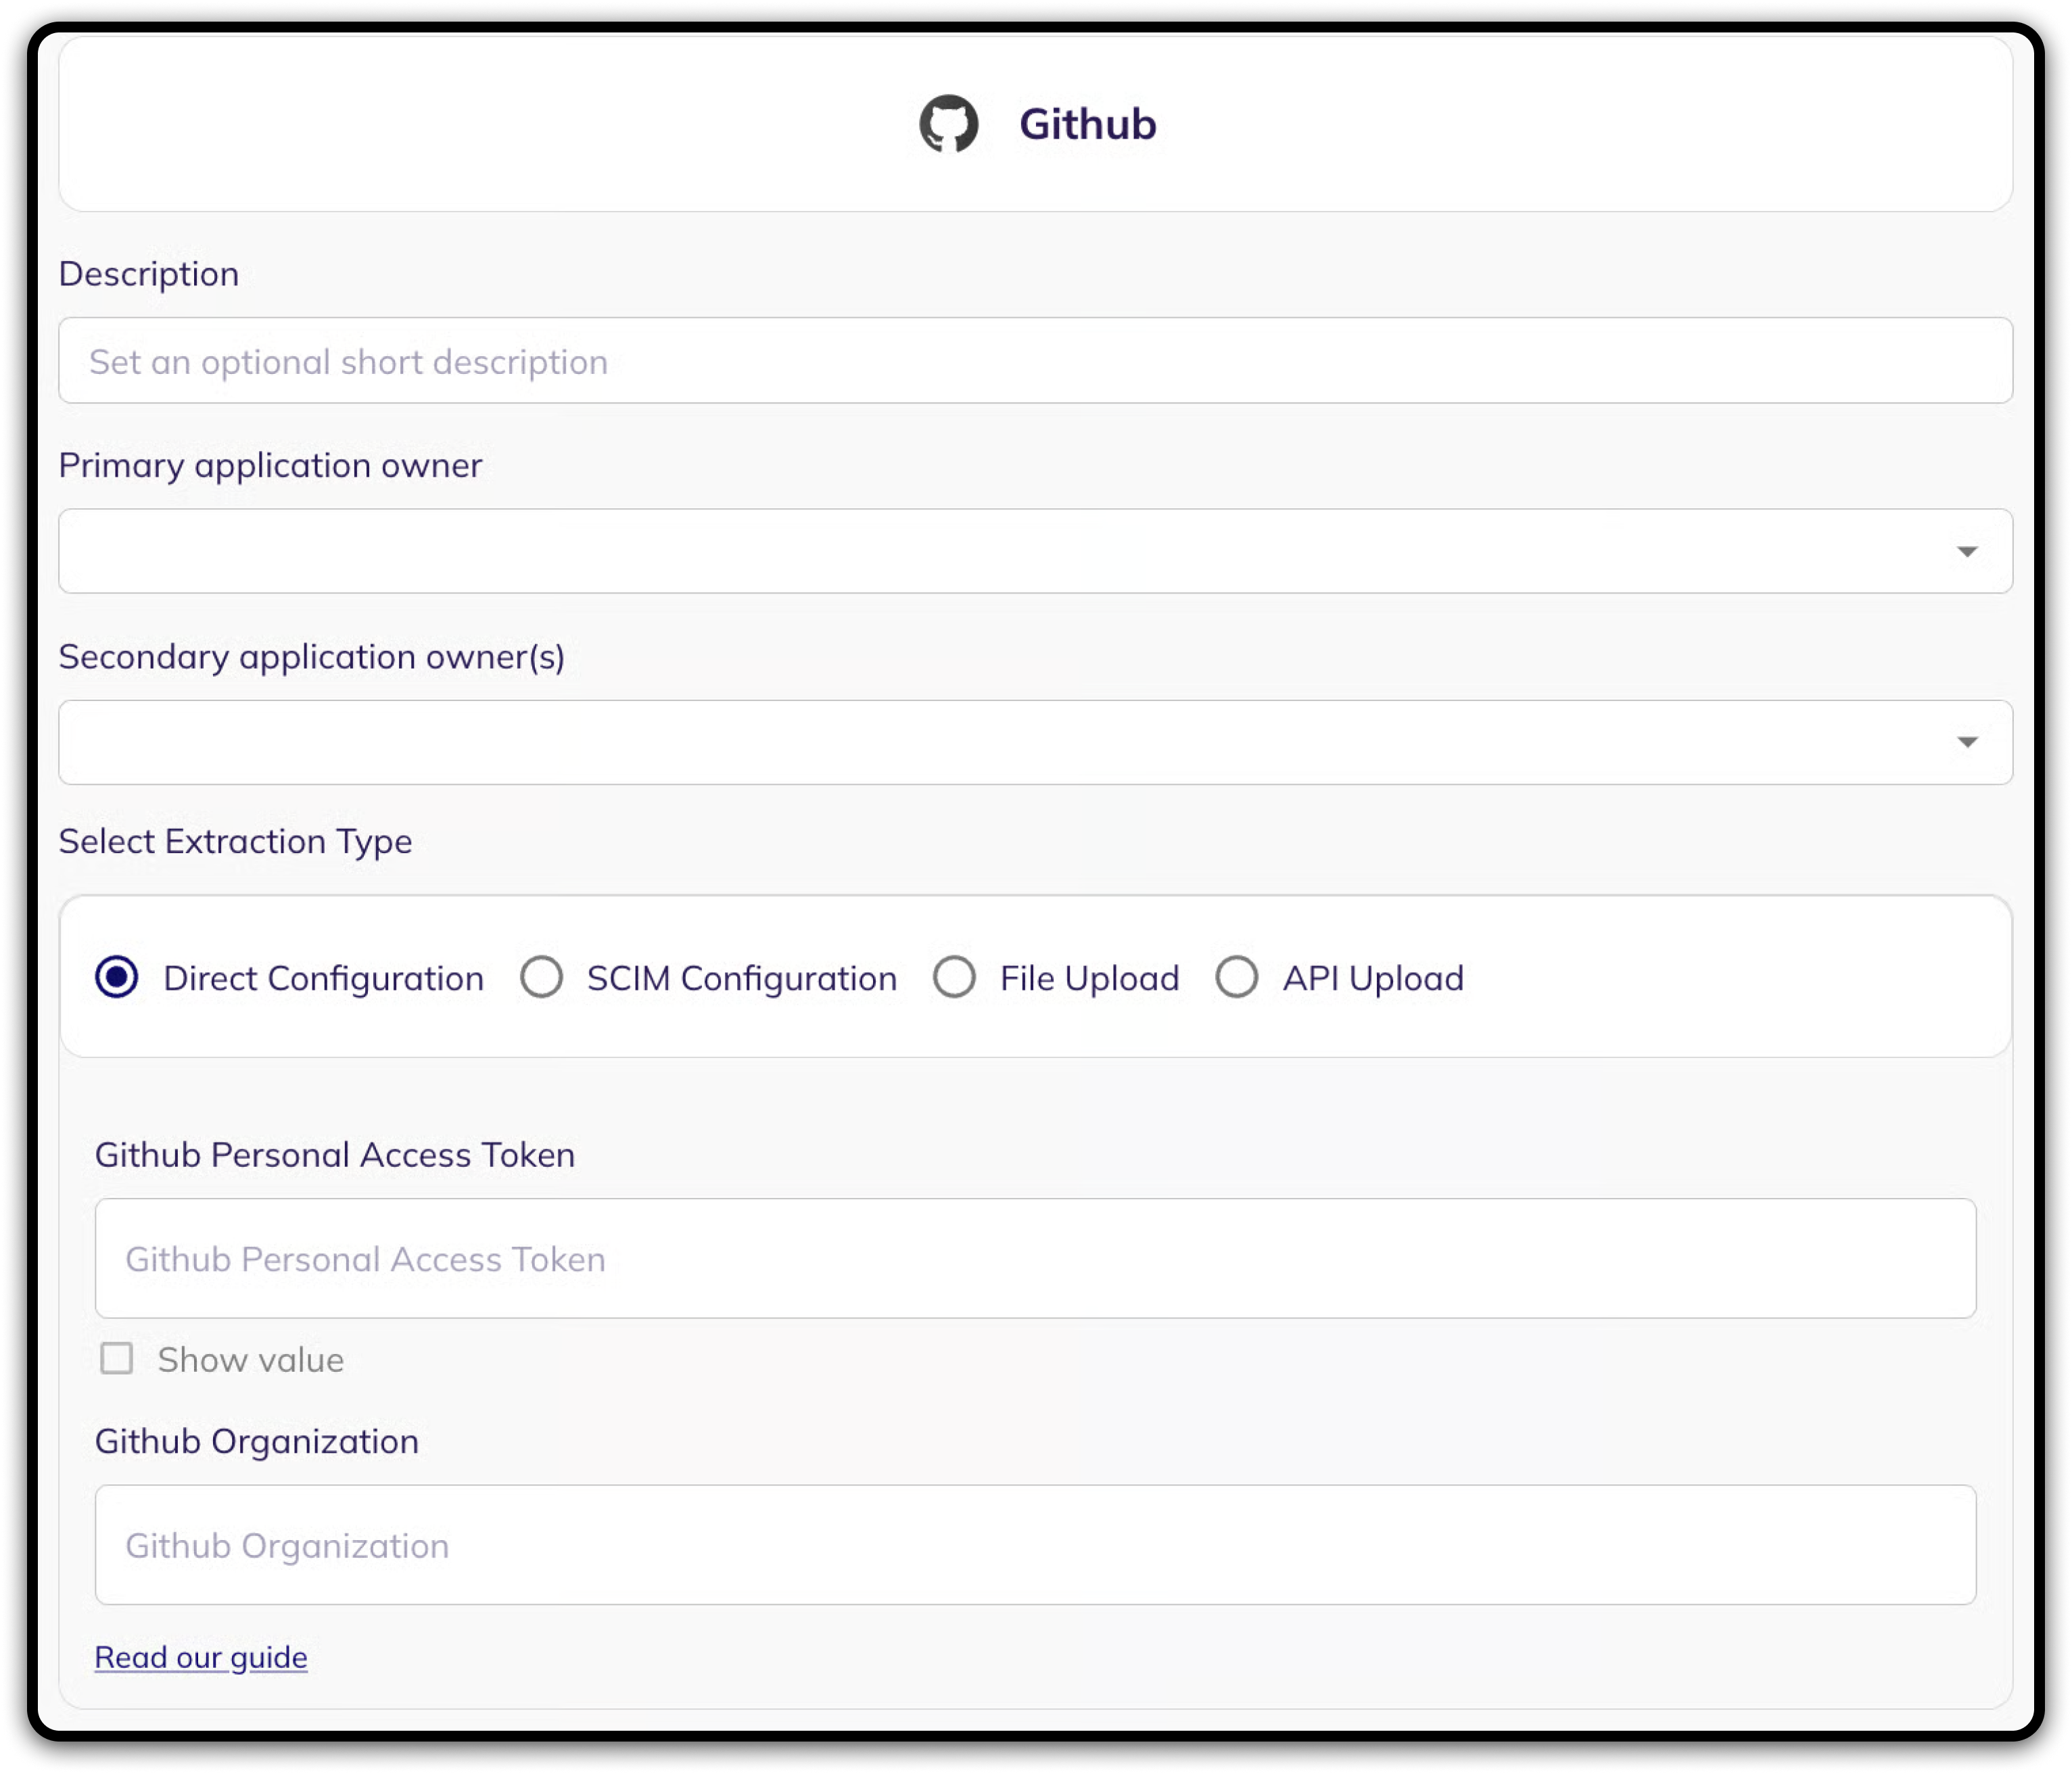
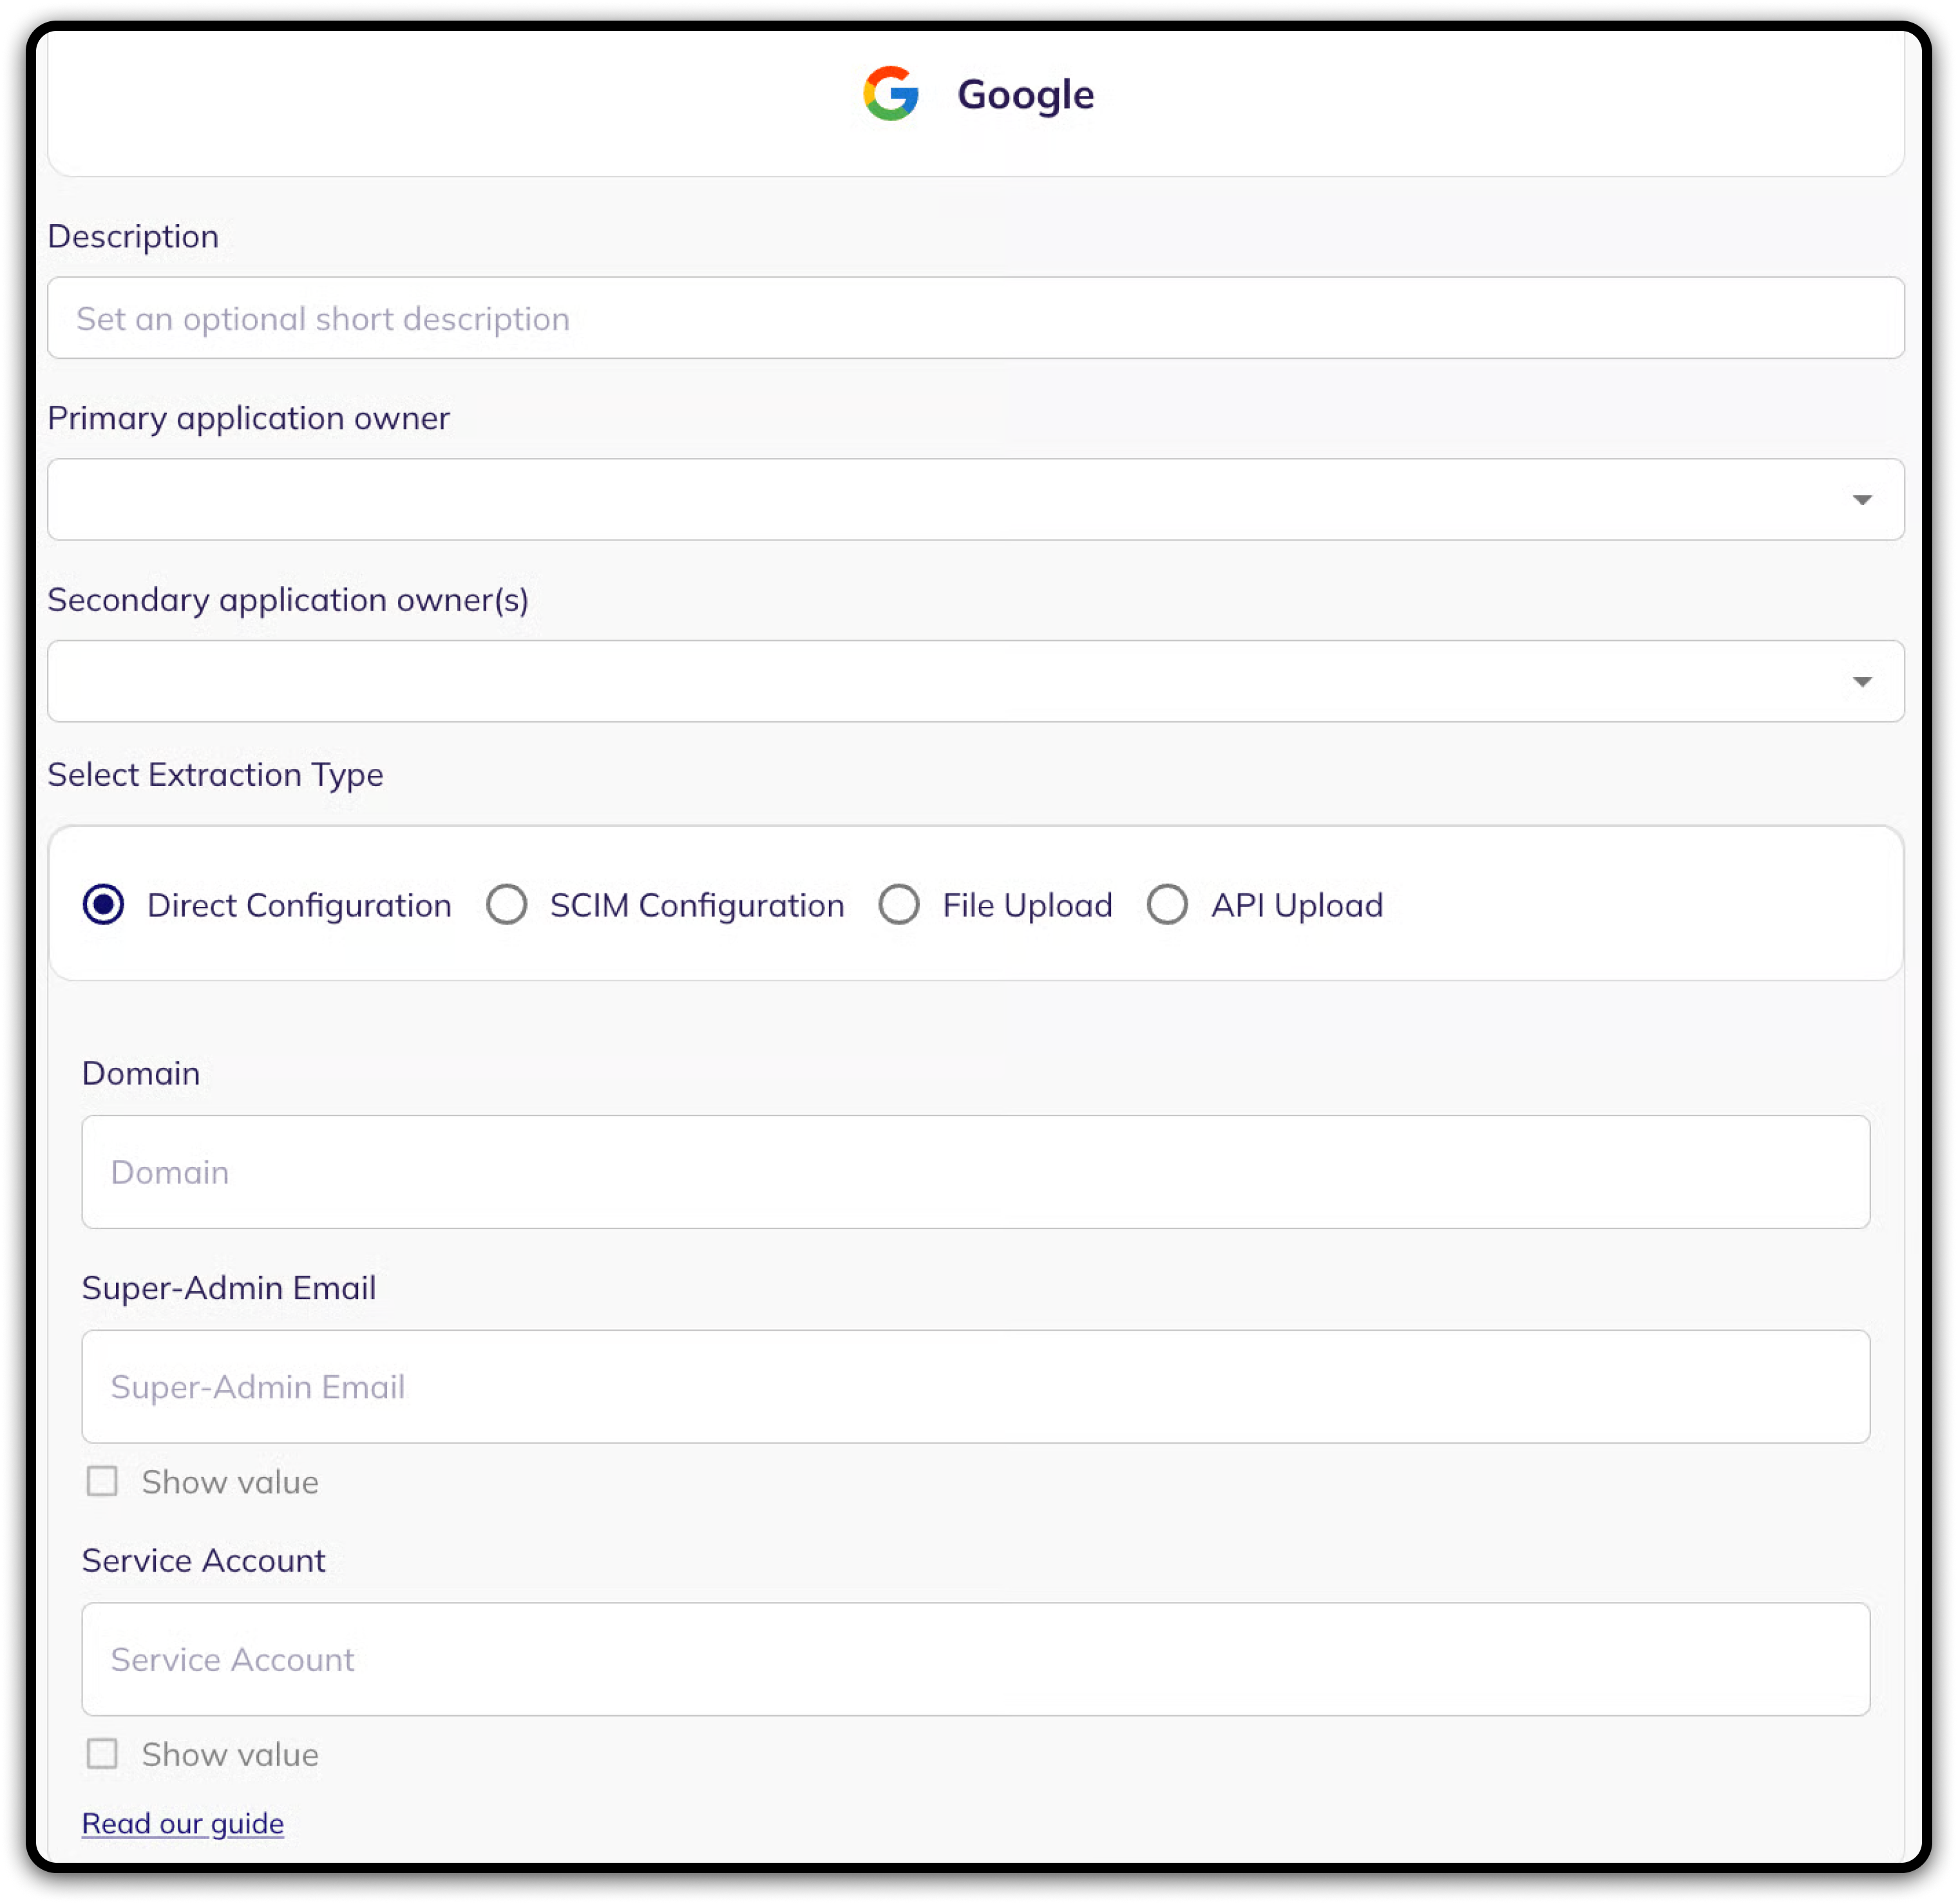
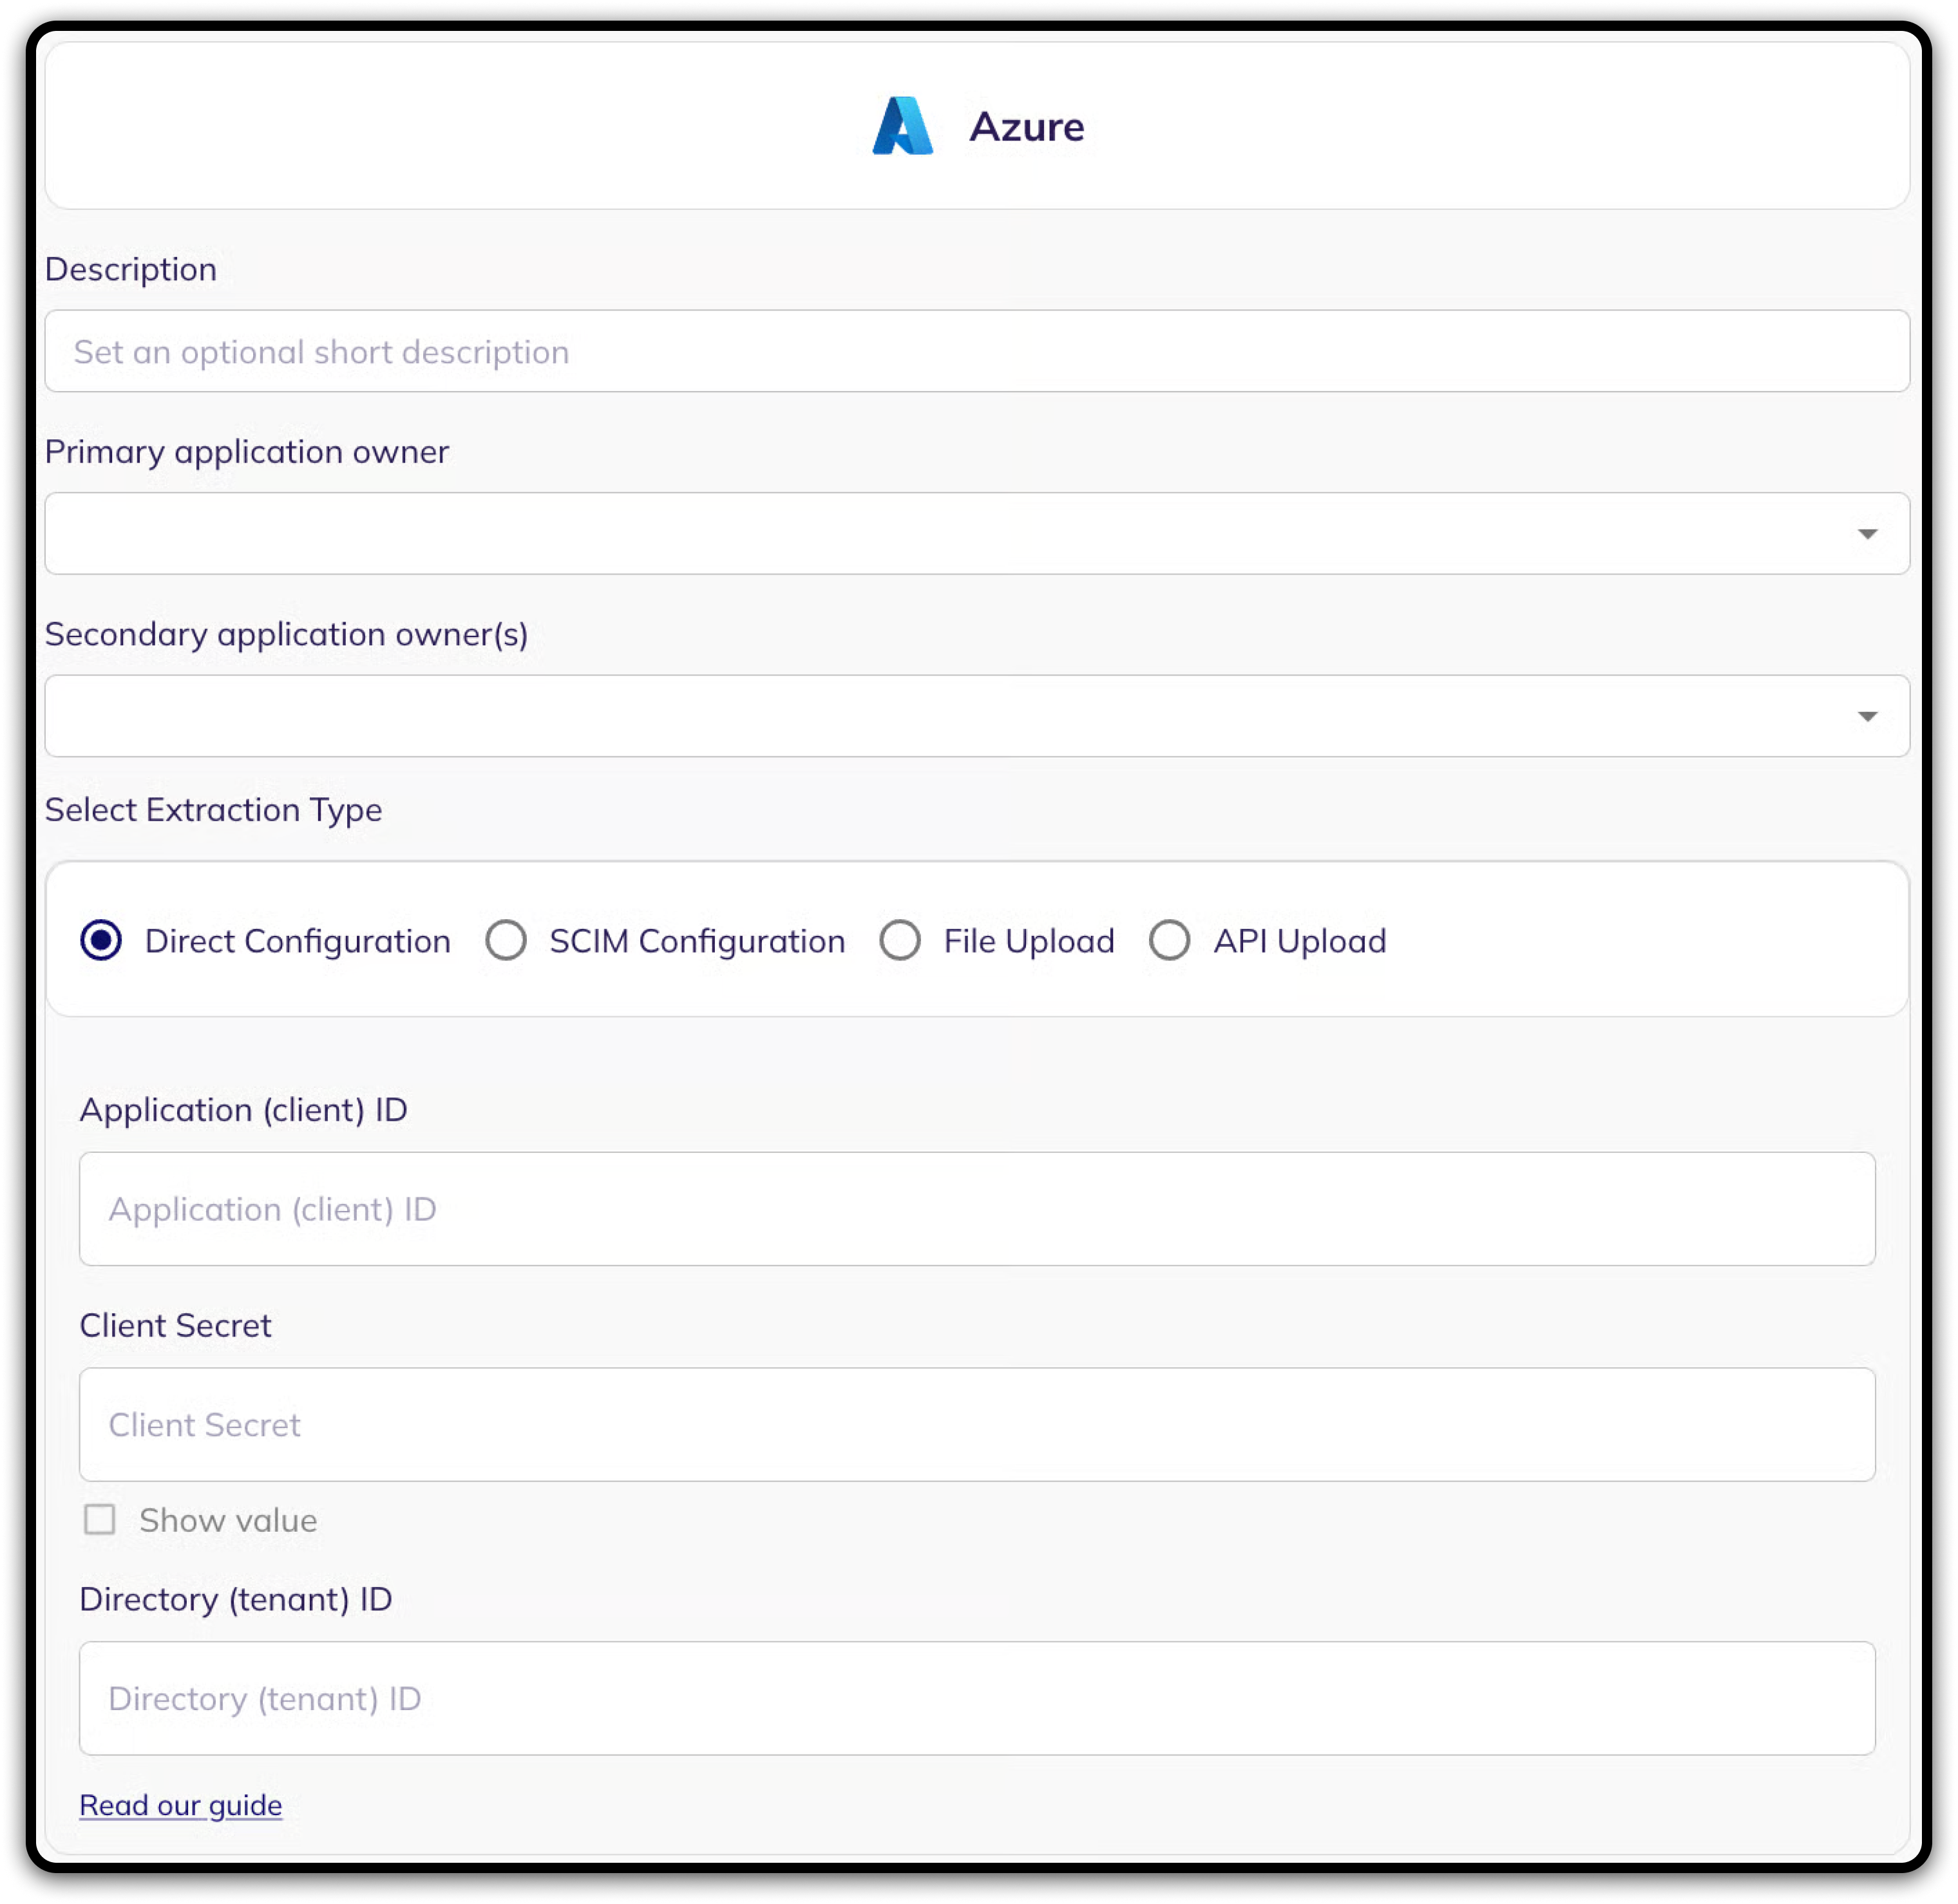
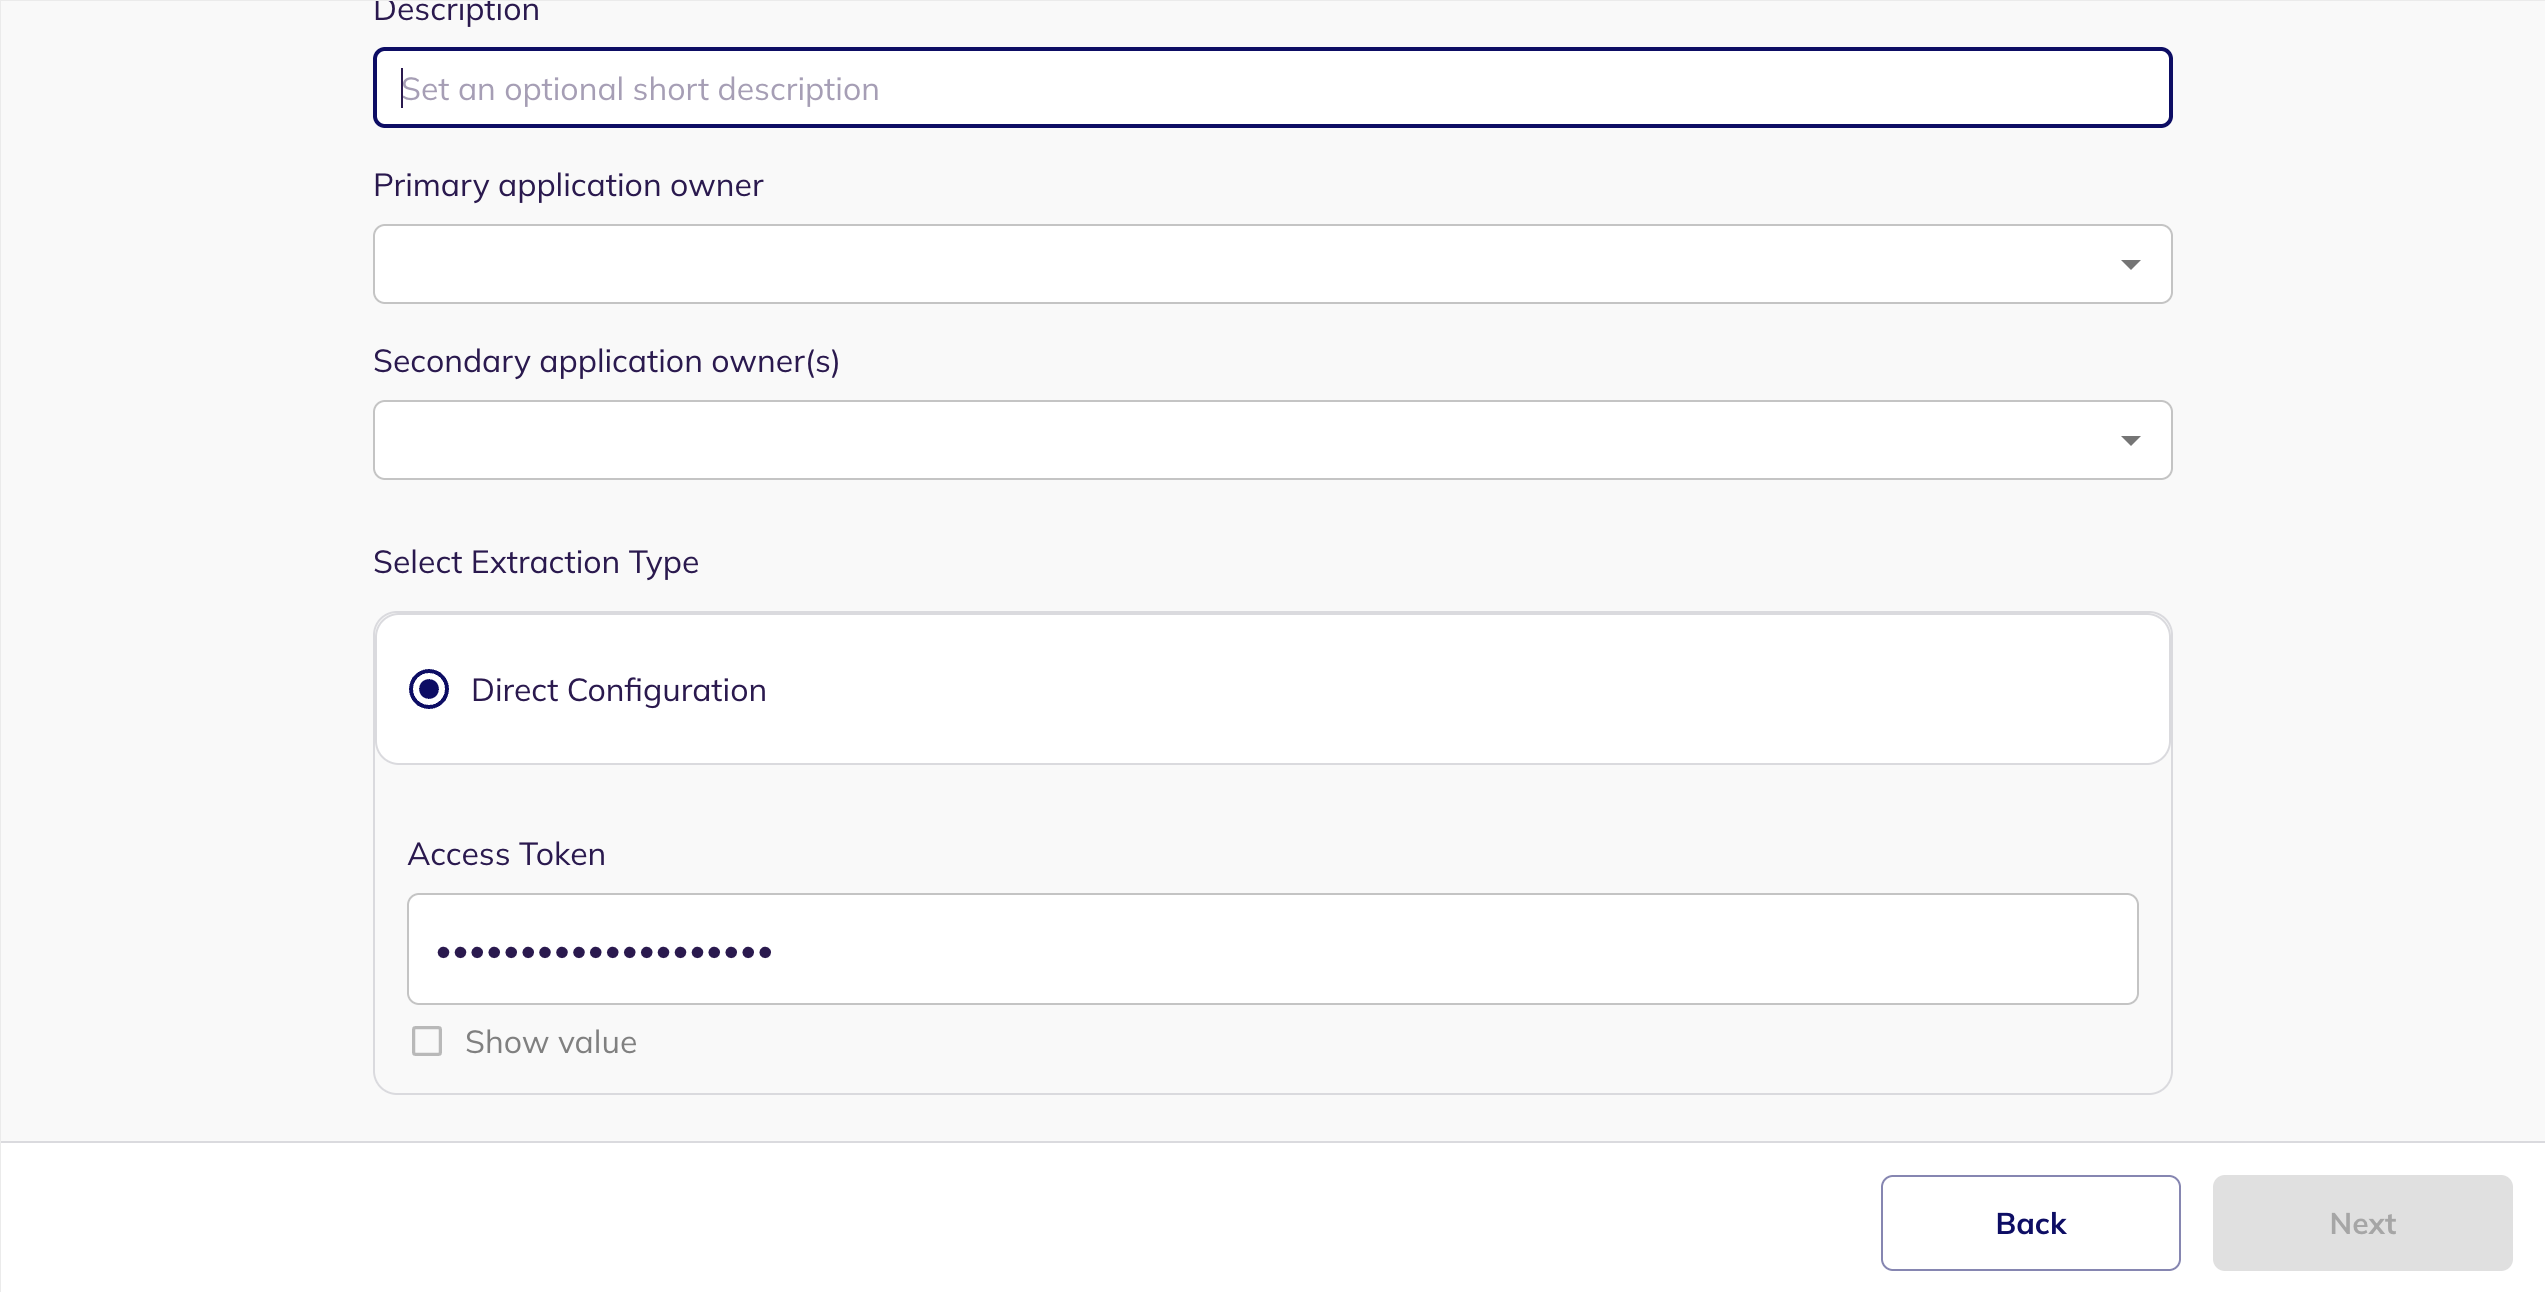
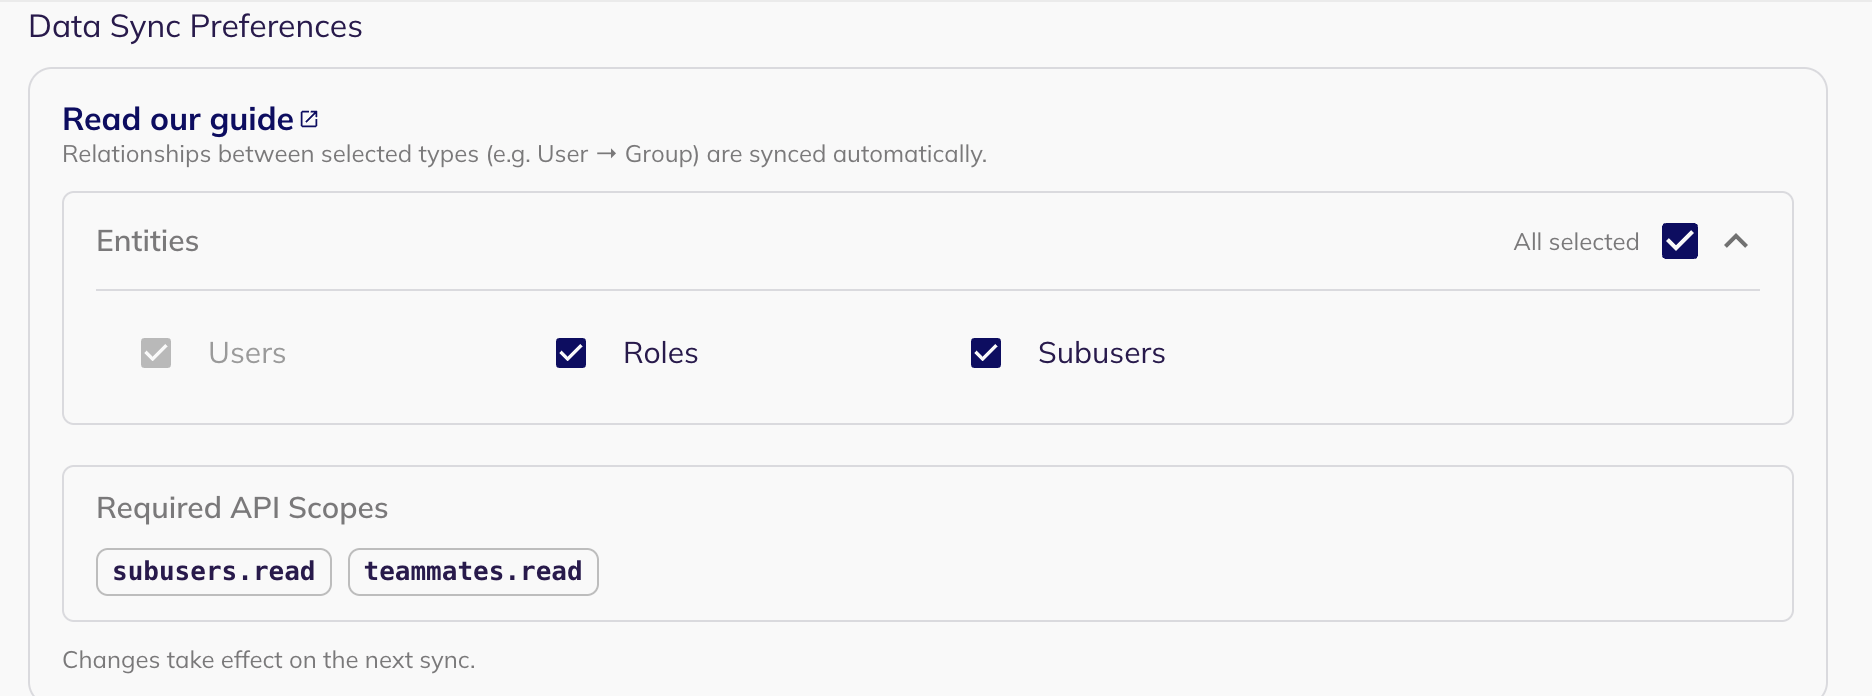
5. Under **Data Sync Preferences**, select the entities you want BalkanID to sync from this application. Everything supported is selected by default; deselect anything you don't need to reduce sync time and API load on the application. Users are always synced and cannot be deselected, and relationships between the entities you select are synced automatically. This section appears only for applications that support configurable data sync. For details on each group and guidance on narrowing scope, see [Data Sync Preferences](/getting-started/setting-up-your-tenant/application-integrations/data-sync-preferences).
6. If the only Extraction Type option you see is Direct Configuration, and you see a button labeled *Get Access Token*, **jump ahead to step 8. Otherwise, continue on to step 7!**
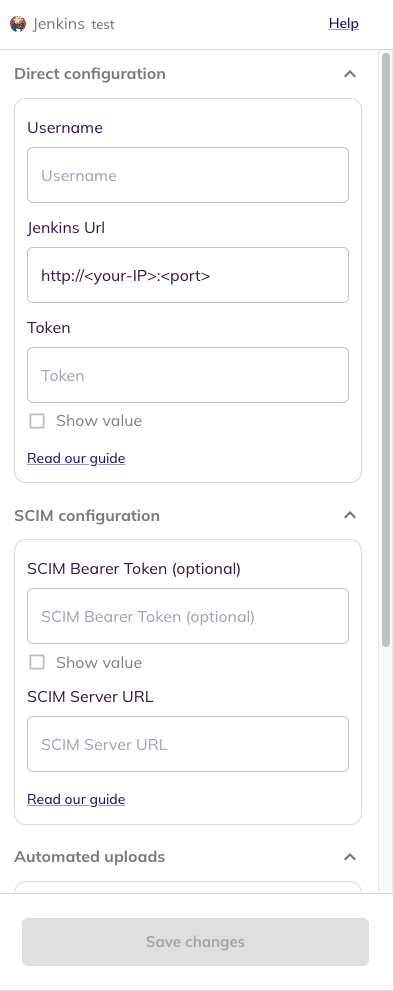
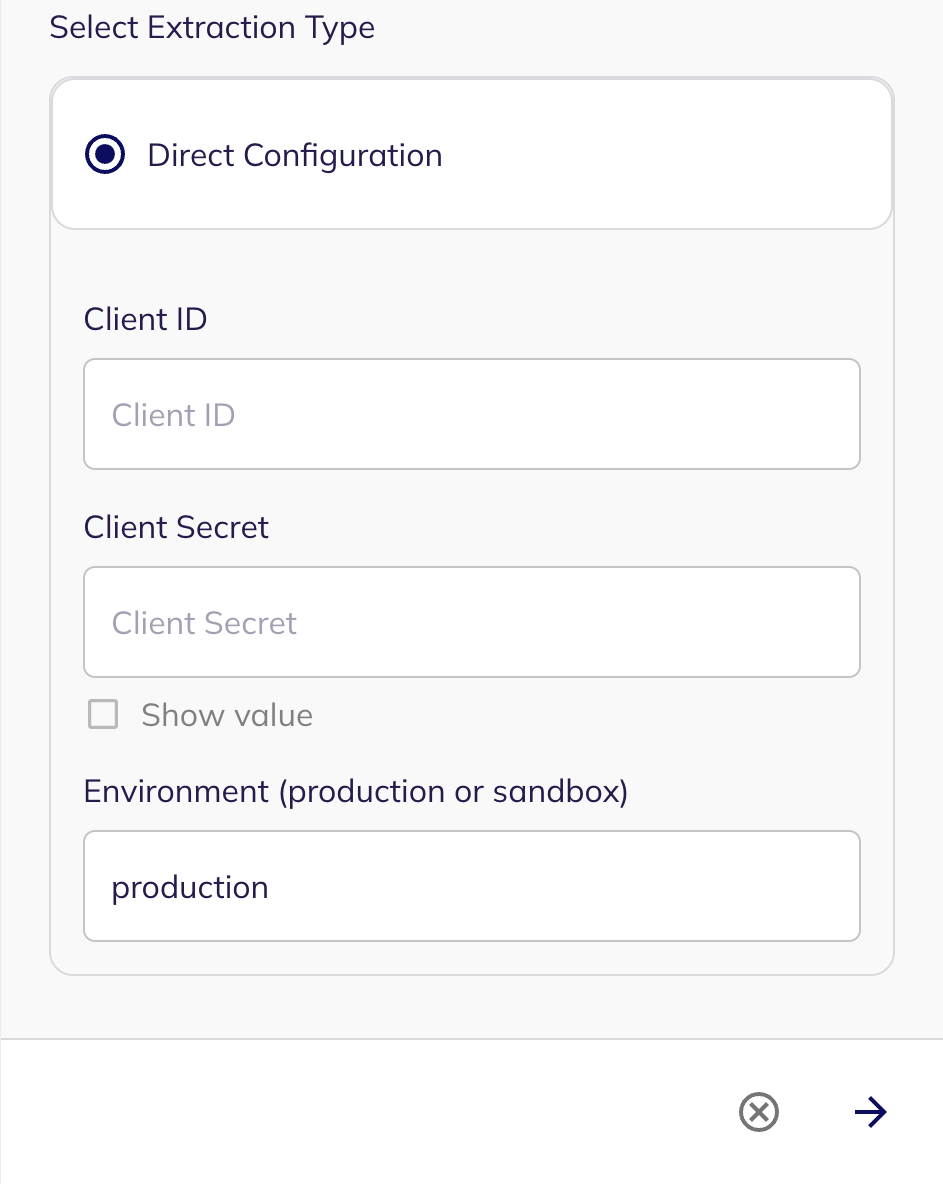
7. Select the Extraction Type and fill in the fields for successful extraction. From here, you can configure your application using one of the following methods:
1. **Direct integration** - Provide your application integration credentials to set up a direct connection between BalkanID and the application in question. You can refer to the application documents to get understand how to procure the tokens.
2. **SCIM integration** - Provide SCIM server credentials to set up a SCIM connection between BalkanID and the application.
3. **Manual file upload** - You may also upload application Entity and Entity Relations through a .CSV file upload. Contact the team for assistance with this.
4. **Automated upload using API -** You can upload data using our [Bulk APIs](https://developer.balkan.id/) with the help of an API key which will be provided to you. Please refer to the application [entity](https://developer.balkan.id/bulk-entities-upload-api-early-access-12828095e0) and [entity relation](https://developer.balkan.id/bulk-entity-relations-upload-api-early-access-12828102e0) upload docs for specific instructions on uploading your application data through the API.
8. **Flow for integrations with the *****Get Access Token***** flow:** Ignore this step if you already entered your app credentials in the previous step! Otherwise: go ahead and click the button labelled *Get Access Token*.
1. You'll find yourself on an informational page titled *Balkan uses Truto to connect your account*. Go ahead and click continue.
2. Follow the instructions on the subsequent screen! Depending on the application, it may ask you for an API Key and related information, or take you through an OAuth2 flow after clicking the *Connect* button.
3. Once connected successfully, you'll be brought back to the BalkanID page you were on previously, and the Access Token field would have been filled.
9. Click on next to move onto *Optional Configuration.*
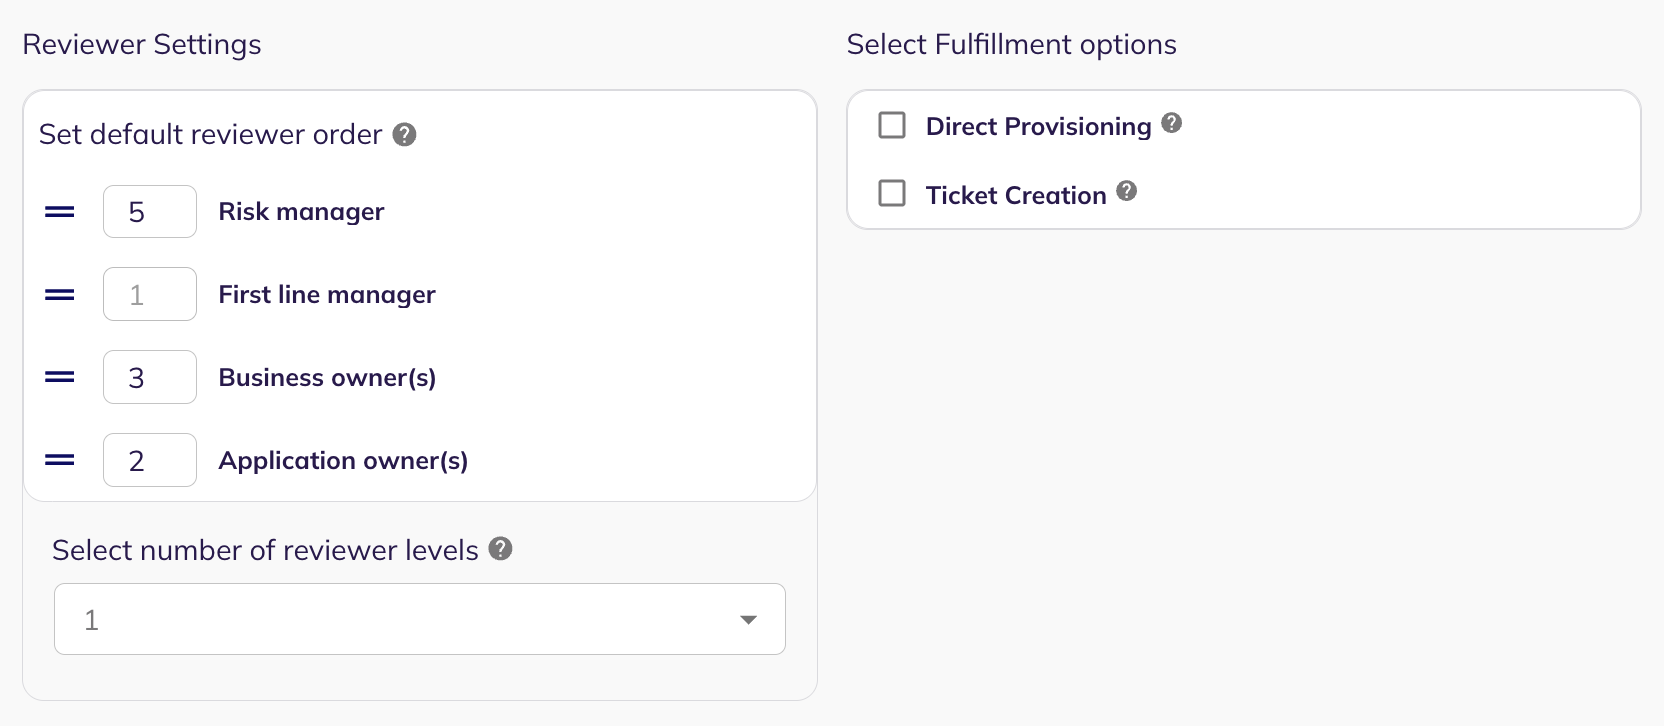
10. Configure your [fulfilment options](/getting-started/setting-up-your-tenant/application-integrations/fulfillment-options) as you see fit in this page. You can configure your [multi-level & multi-approval review settings](/user-access-reviews/access-review-management/configuring-access-reviews-and-campaigns/configuring-integration-specific-multi-level-review-settings) here as well.
{% hint style="info" %}
For **Direct Configuration** integrations, the **Optional Configuration** step also supports **Audit Evidence** in **Early Access**.
You can attach rich text notes and files before saving. BalkanID stores that evidence with the resulting sync. Learn more in [Audit evidence and sync history](/getting-started/setting-up-your-tenant/application-integrations/audit-evidence-and-sync-history).
{% endhint %}
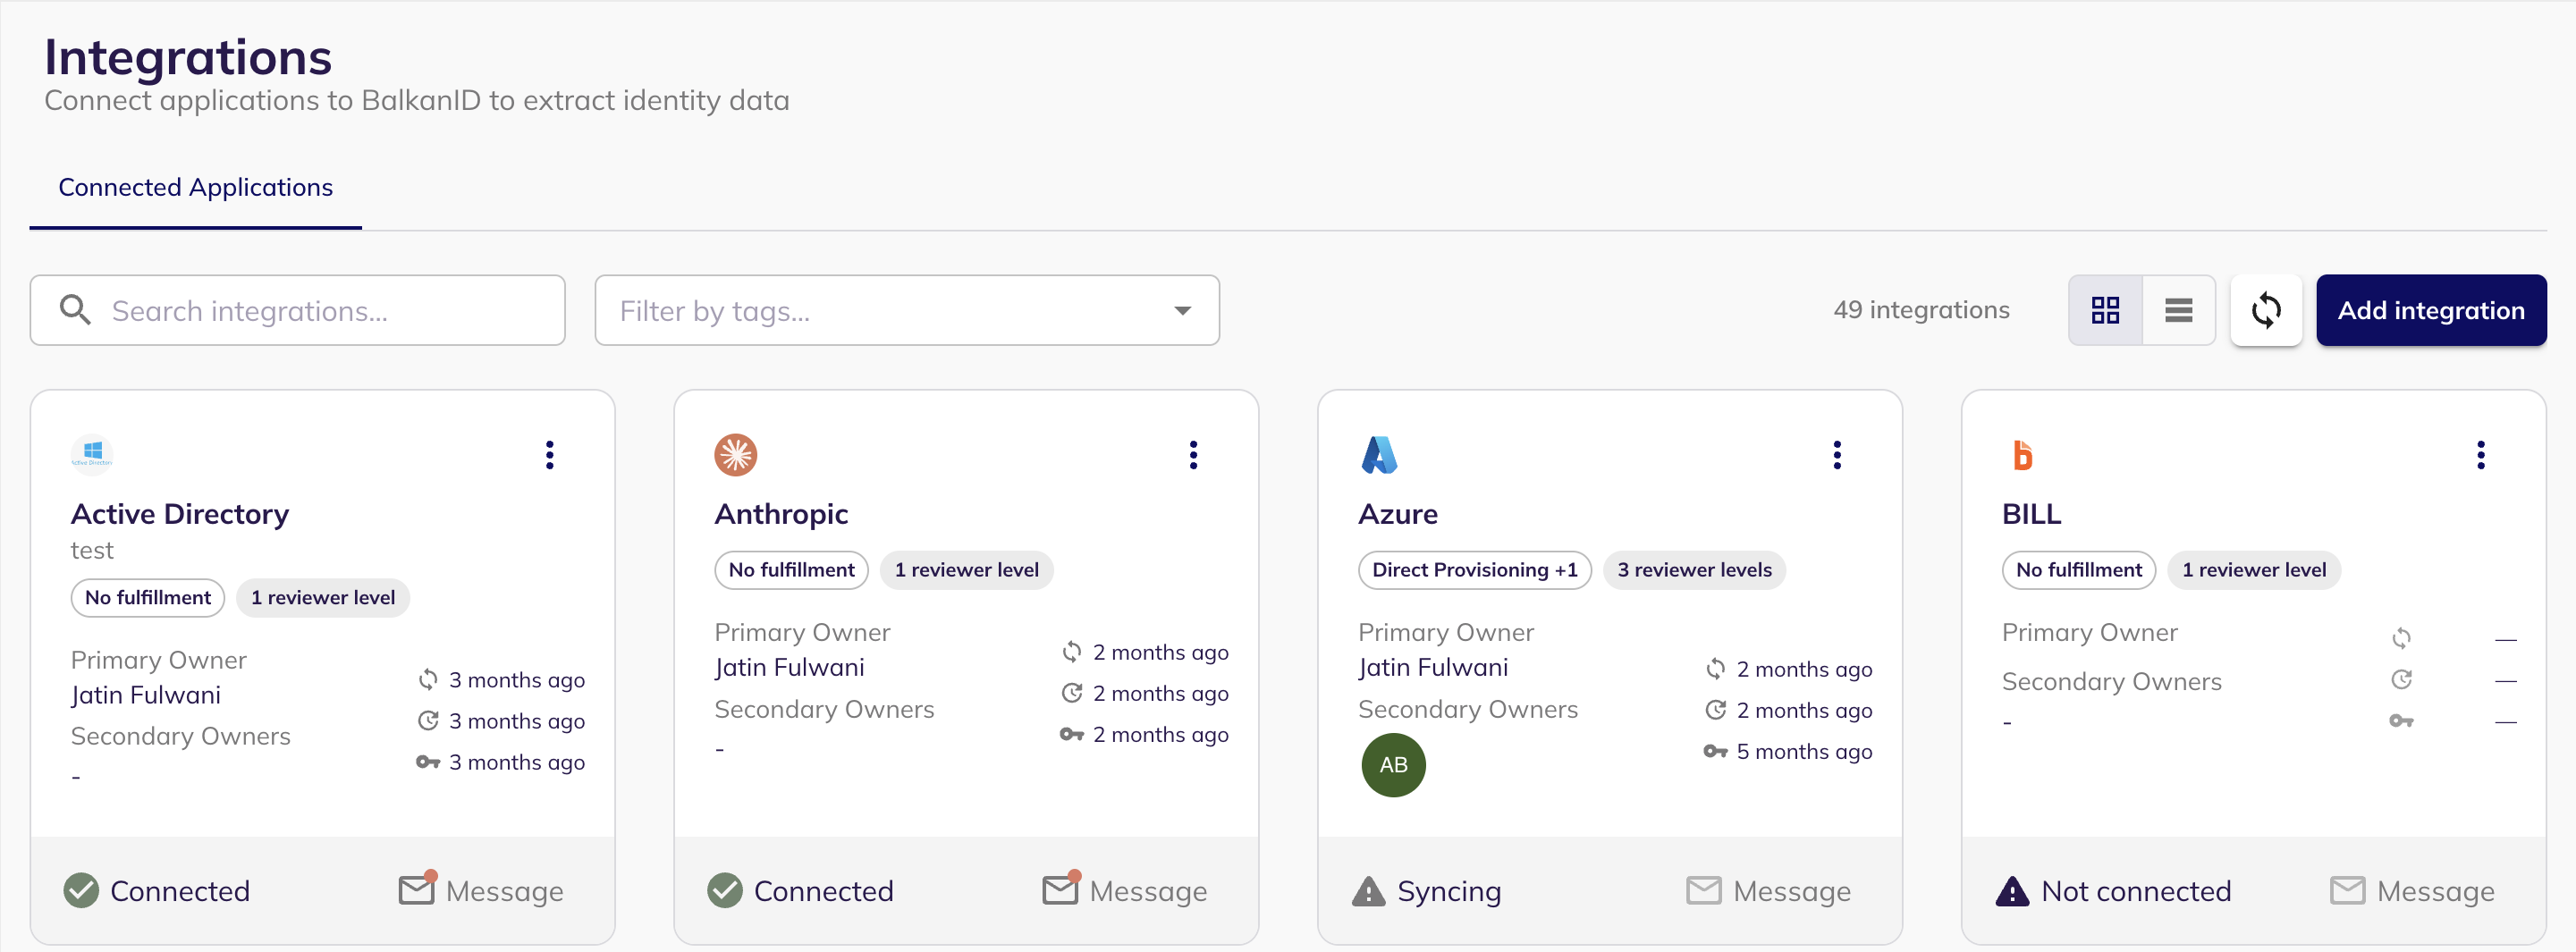
11. Once done, click on the "*Save Changes*" button. Your integration will process and extract your data in a few minutes. You can track the status of your integration from the snackbar we provide as shown in the below images.
12. You can view your application entitlement data once the status of application integration is "*Connected*" and you see the "*Data Available*" message in the table.
**Need Assistance?** Please reach out to if you have any questions or need assistance configuring an integration. We are always available to help!
{% hint style="info" %}
For applications not listed below and without API access to pull entitlements, direct integration may not be feasible. However, if the application is a web-based system, you can use the BalkanID browser extension and BalkanID team can support such integrations for you. The browser extension enables data extraction through web scraping and automatically pushes the information to your BalkanID tenant, ensuring a similar experience that you get with direct integrations and comprehensive coverage even for systems without APIs.
Contact your customer success manager or to get the BalkanID browser extension.
{% endhint %}
## Supported Integrations
Each application listed below includes specific instructions on how to procure the necessary credentials (e.g., API keys, client secrets, access tokens) required to set up the direct connection within BalkanID. Once you have these credentials, follow the general integration steps outlined in the "Integrating a New Application" section above.
This list covers a wide range of categories, including project management & collaboration tools, cloud platforms & infrastructure services, version control & code management systems, CI/CD & DevOps tools, database & storage solutions, customer relationship management (CRM) systems, identity & access management (IAM) solutions, financial & business management tools, security & monitoring systems, and email & communication platforms.
If a particular integration you're interested in isn't on this list, the BalkanID team can build additional integrations for you. Typically, new integrations can be deployed in your environment within a matter of days.
{% hint style="info" %}
Reach out to us at **** for any new integrations that we do not support yet.
{% endhint %}
* [15Five](https://wiki.truto.one/integration-guides/15five/#finding-your-api-key-on-15five)
* Accelo
* [ActiveCampaign](https://wiki.truto.one/integration-guides/activecampaign/#activecampaign)
* Adobe
* Adobe Acrobat Sign
* Adobe Marketo Engage
* [Active Directory (On-Prem)](broken://pages/arVE7ZdQgy7P4u3VlWgG)
* Adyen
* [Aha](https://wiki.truto.one/integration-guides/aha/#finding-your-aha-subdomain)
* [Airtable](https://truto.one/docs/integration-guides/airtable)
* [Amazon Web Services](/getting-started/setting-up-your-tenant/application-integrations/direct-application-integrations/aws-application-integration-setup)
* [Amplitude (SCIM)](/getting-started/setting-up-your-tenant/application-integrations/direct-application-integrations/amplitude-scim-integration-setup)
* [Anthropic](/getting-started/setting-up-your-tenant/application-integrations/direct-application-integrations/anthropic-application-integration-setup)
* Apollo
* [Articulate 360](/getting-started/setting-up-your-tenant/application-integrations/direct-application-integrations/articulate-360-integration-setup)
* [Asana](/getting-started/setting-up-your-tenant/application-integrations/direct-application-integrations/asana-integration-setup)
* Asset Panda
* [Atlassian Confluence](/getting-started/setting-up-your-tenant/application-integrations/direct-application-integrations/atlassian-confluence-integration-setup)
* [Atlassian Jira](/getting-started/setting-up-your-tenant/application-integrations/direct-application-integrations/atlassian-jira-application-integration-setup)
* [Auth0](https://auth0.com/docs/get-started/applications/application-settings)
* Avigilon Alta
* Avoma
* [AWS Identity Center](/getting-started/setting-up-your-tenant/application-integrations/direct-application-integrations/aws-identity-center-integration-setup)
* BambooHR
* Baremetrics
* Basecamp
* BigPanda
* [BILL](/getting-started/setting-up-your-tenant/application-integrations/direct-application-integrations/bill-integration-setup)
* [Bitbucket](/getting-started/setting-up-your-tenant/application-integrations/direct-application-integrations/bitbucket-integration-setup)
* Bitwarden
* Blackline
* Boomi
* Box
* [Brex](/getting-started/setting-up-your-tenant/application-integrations/direct-application-integrations/brex-integration-setup)
* Britive
* [BrowserStack](/getting-started/setting-up-your-tenant/application-integrations/direct-application-integrations/browserstack-integration-setup)
* Buildkite
* [Calendly](/getting-started/setting-up-your-tenant/application-integrations/direct-application-integrations/calendly-integration-setup)
* [Canva](https://www.canva.dev/docs/scim/authentication/#generate-an-access-token)
* Capsule
* [Checkr](https://docs.checkr.com/#section/Introduction/API-keys)
* [Cisco Meraki](https://developer.cisco.com/meraki/api-v1/authorization/#obtaining-your-meraki-api-key)
* ClickUp
* [Close](https://help.close.com/docs/api-keys-oauth#creating-an-api-key)
* Cloudflare
* CockroachDB Cloud
* Coda
* Confluent
* Constant Contact
* Contentful Content Management
* Copper
* [CrowdStrike](/getting-started/setting-up-your-tenant/application-integrations/direct-application-integrations/crowdstrike-integration-setup)
* [CrowdStrike Falcon](/getting-started/setting-up-your-tenant/application-integrations/direct-application-integrations/crowdstrike-falcon-integration-setup)
* CyberArk
* CyberArk Identity Management
* Dashlane
* [Databricks](/getting-started/setting-up-your-tenant/application-integrations/direct-application-integrations/databricks-application-integration-setup)
* [Datadog](https://wiki.truto.one/integration-guides/datadog/#finding-your-datadog-api-key-and-application-key)
* dbt Labs
* DevRev
* Dialpad
* [Dixa](https://docs.dixa.io/docs/tutorial-create-an-api-token/)
* [DockerHub](/getting-started/setting-up-your-tenant/application-integrations/direct-application-integrations/docker-hub-integration-setup)
* [DocuSign](/getting-started/setting-up-your-tenant/application-integrations/direct-application-integrations/docusign-integration-setup)
* Domo
* [Doppler](/getting-started/setting-up-your-tenant/application-integrations/direct-application-integrations/doppler-integration-setup)
* Drata
* Drift
* [Dropbox Sign (HelloSign)](https://wiki.truto.one/integration-guides/hellosign/#finding-your-hellosign-api-key)
* Duo
* [Dynatrace](https://wiki.truto.one/integration-guides/dynatrace/#finding-your-client-id-and-client-secret)
* [Elastic Cloud](https://www.elastic.co/guide/en/cloud/current/ec-api-authentication.html#ec-api-keys)
* Enchant
* Eventbrite
* Figma
* [Figma](/getting-started/setting-up-your-tenant/application-integrations/direct-application-integrations/figma-integration-setup)
* [Files.com](https://wiki.truto.one/integration-guides/filescom/#finding-your-files-com-subdomain-api-key)
* Fireberry
* Fireflies.ai
* [Five9](/getting-started/setting-up-your-tenant/application-integrations/direct-application-integrations/five9-integration-setup)
* [Fivetran](/getting-started/setting-up-your-tenant/application-integrations/direct-application-integrations/fivetran-integration-setup)
* Fountain
* FreeAgent
* Freshcaller
* Freshchat
* [Freshdesk](https://support.freshdesk.com/en/support/solutions/articles/215517-how-to-find-your-api-key)
* [Freshservice](https://wiki.truto.one/integration-guides/freshservice/#finding-your-freshservice-api-key-and-subdomain)
* Front
* FuseDesk
* [GitHub](/getting-started/setting-up-your-tenant/application-integrations/direct-application-integrations/github-application-integration-setup)
* GitLab
* Gladly
* Gong
* Google
* Google Ads
* [Google Analytics](/getting-started/setting-up-your-tenant/application-integrations/direct-application-integrations/google-analytics-integration-setup)
* [Google Cloud Platform](/getting-started/setting-up-your-tenant/application-integrations/direct-application-integrations/google-cloud-platform-integration-setup)
* [Google Workspace](/getting-started/setting-up-your-tenant/application-integrations/direct-application-integrations/google-workspace-integration-setup)
* Gorgias
* Grafana
* [Greenhouse](/getting-started/setting-up-your-tenant/application-integrations/direct-application-integrations/greenhouse-integration-setup)
* HappyFox
* [Harness](https://wiki.truto.one/integration-guides/harness/#finding-your-harness-api-key-base-url)
* Harvest
* Hashicorp Terraform Coud
* Height
* [HelloID](https://docs.helloid.com/en/api/generate-an-api-key.html)
* Help Scout
* Heroku
* [HiBob](https://wiki.truto.one/integration-guides/hibob/#generating-hibob-token-and-id)
* Highlevel
* Hive
* Hootsuite
* [Hubspot](/getting-started/setting-up-your-tenant/application-integrations/direct-application-integrations/hubspot-integration-setup)
* Humaans
* Illow
* [Indeed](/getting-started/setting-up-your-tenant/application-integrations/direct-application-integrations/indeed-integration-setup)
* Insightly
* Intercom
* Ironclad
* [Jamf](https://learn.jamf.com/bundle/jamf-pro-documentation-current/page/API_Roles_and_Clients.html)
* Jenkins
* [Jetbrains](/getting-started/setting-up-your-tenant/application-integrations/direct-application-integrations/jetbrains-integration-setup)
* [JFrog](/getting-started/setting-up-your-tenant/application-integrations/direct-application-integrations/jfrog-integration-setup)
* Jira Service Management
* Jostle
* [JumpCloud](/getting-started/setting-up-your-tenant/application-integrations/direct-application-integrations/jumpcloud-integration-setup)
* JustCall
* Keap
* [KnowBe4](/getting-started/setting-up-your-tenant/application-integrations/direct-application-integrations/knowbe4-integration-setup)
* Kommo
* Kustomer
* [LastPass](/getting-started/setting-up-your-tenant/application-integrations/direct-application-integrations/lastpass-integration-setup)
* [Lattice](/getting-started/setting-up-your-tenant/application-integrations/direct-application-integrations/lattice-integration-setup)
* [LaunchDarkly](https://docs.launchdarkly.com/home/account/api)
* [Leadsquared](https://wiki.truto.one/integration-guides/leadsquared/#finding-your-leadsquared-secret-key-access-key-and-api-host)
* Lemist
* Lever
* Linear
* [LinkedIn](/getting-started/setting-up-your-tenant/application-integrations/direct-application-integrations/linkedin-integration-setup)
* LiveAgent
* [LiveVox](/getting-started/setting-up-your-tenant/application-integrations/direct-application-integrations/livevox-integration-setup)
* [LoanPro](/getting-started/setting-up-your-tenant/application-integrations/direct-application-integrations/loanpro-integration-setup)
* [Looker](https://truto.notion.site/looker)
* Loxo
* [Lucid](/getting-started/setting-up-your-tenant/application-integrations/direct-application-integrations/lucid-integration-setup)
* [Mailchimp](/getting-started/setting-up-your-tenant/application-integrations/direct-application-integrations/mailchimp-integration-setup)
* Mailersend
* [Mailgun](https://help.mailgun.com/hc/en-us/articles/203380100-Where-can-I-find-my-API-keys-and-SMTP-credentials#h_01HVM3GKEPNTB5TR11JGDHY367)
* Make
* ManageEngine ServiceDesk Plus
* Metabase
* Microsoft 365
* Microsoft Dynamics 365 Finance and Operations
* Microsoft Dynamics 365 Sales
* [Microsoft Azure and Entra ID](/getting-started/setting-up-your-tenant/application-integrations/direct-application-integrations/microsoft-azure-and-entra-id-integration-setup)
* Microsoft Teams
* miniOrange
* Miro
* Missive
* Mixpanel
* Mode
* [Monday.com](/getting-started/setting-up-your-tenant/application-integrations/direct-application-integrations/monday-integration-setup)
* Moneybird
* MongoDB Atlas Admin
* Mural
* [MySQL](/getting-started/setting-up-your-tenant/application-integrations/direct-application-integrations/mysql-integration-setup)
* Netlify
* [New Relic](https://wiki.truto.one/integration-guides/newrelic/#finding-your-new-relic-api-key-and-data-center-region)
* Notion
* Nutshell
* [Ocrolus](/getting-started/setting-up-your-tenant/application-integrations/direct-application-integrations/ocrolus-integration-setup)
* [Okta](/getting-started/setting-up-your-tenant/application-integrations/direct-application-integrations/okta-application-integration-setup)
* OneDrive
* [Onelogin](/getting-started/setting-up-your-tenant/application-integrations/direct-application-integrations/onelogin-integration-setup)
* OpenAI
* OpenVPN CloudConnexa
* [Opsgenie](https://wiki.truto.one/integration-guides/opsgenie/#finding-your-opsgenie-api-key)
* [Oracle E-Business Suite (EBS)](/getting-started/setting-up-your-tenant/application-integrations/direct-application-integrations/oracle-e-business-suite-integration-setup)
* Oracle Fusion Cloud
* Oracle Netsuite
* Orca Security
* Outlook Mail
* Outreach
* PagerDuty
* PandaDoc
* Peakon
* [Paylocity](/getting-started/setting-up-your-tenant/application-integrations/direct-application-integrations/paylocity-integration-setup)
* [PayPal](/getting-started/setting-up-your-tenant/application-integrations/direct-application-integrations/paypal-integration-setup)
* [Pendo SCIM](https://support.pendo.io/hc/en-us/articles/4412768395803-Set-up-SCIM-in-Pendo)
* PingOne
* Pinpoint
* [Pipedrive](https://wiki.truto.one/integration-guides/pipedrive/#finding-your-pipedrive-account)
* Pipeliner
* [Pivotal Tracker](https://wiki.truto.one/integration-guides/pivotaltracker/#finding-your-api-key-on-pivotal-tracker)
* Platform.sh
* Podio
* [PostgreSQL](/getting-started/setting-up-your-tenant/application-integrations/direct-application-integrations/postgresql-integration-setup)
* Podium
* PostHog
* Postman
* Power BI
* ProdPad
* Puzzel Case Management
* Pylon
* Qdrant Cloud
* [Qlik Sense](https://qlik.dev/authenticate/api-key/generate-your-first-api-key/)
* Qualtrics CoreXM
* Quickbase for Project Management
* Re:amaze
* Redis
* Render
* Retool
* Richpanel
* Rippling
* Robin
* Rockset
* Rollbar
* Rootly
* Sage Intacct
* SailPoint Identity Security Cloud
* SailPoint IdentityIQ SCIM
* SailPoint NERM
* Salesflare
* [Salesforce](/getting-started/setting-up-your-tenant/application-integrations/direct-application-integrations/salesforce-application-integration-setup)
* [Salesloft](https://wiki.truto.one/integration-guides/salesloft/#finding-your-api-key-on-salesloft)
* SAP Concur
* Scale AI
* [Segment](https://wiki.truto.one/integration-guides/segment/#finding-your-segment-api-key)
* Seismic
* Semgrep
* [SendGrid](/getting-started/setting-up-your-tenant/application-integrations/direct-application-integrations/sendgrid-integration-setup)
* Sentry
* [ServiceNow](/getting-started/setting-up-your-tenant/application-integrations/direct-application-integrations/service-now-integration-setup)
* ServiceNow SCIM
* [ShareFile](/getting-started/setting-up-your-tenant/application-integrations/direct-application-integrations/sharefile-integration-setup)
* SharePoint
* Shopify
* Shortcut
* Showpad
* Sigma Computing
* Sisense
* Slab
* [Slack](/getting-started/setting-up-your-tenant/application-integrations/direct-application-integrations/slack-application-integration-setup)
* Slack Enterprise
* [Slido](/getting-started/setting-up-your-tenant/application-integrations/direct-application-integrations/slido-integration-setup)
* SmartRecruiters
* [Smartsheet](https://smartsheet.redoc.ly/#section/API-Basics/Raw-Token-Requests)
* [Snipe-IT](/getting-started/setting-up-your-tenant/application-integrations/direct-application-integrations/snipe-it-integration-setup)
* [Snowflake](https://www.notion.so/truto/Snowflake-1d9ac512f5a5801da133df17c670287f)
* [Snyk](https://wiki.truto.one/integration-guides/synk/#finding-your-snyk-api-key)
* SolarWinds Service Desk
* [SonarQube Cloud](/getting-started/setting-up-your-tenant/application-integrations/direct-application-integrations/sonarqube-cloud-integration-setup)
* SonarQube Server
* SpotDraft
* [Statsig](https://wiki.truto.one/integration-guides/statsig/#finding-your-api-key-on-statsig)
* Sumo Logic
* Supabase
* Superchat
* Survery Monkey
* SurveySparrow
* [Tableau](https://help.tableau.com/current/pro/desktop/en-us/useracct.htm#create-and-manage-personal-access-tokens)
* Tailscale
* TalentLMS
* TalentLyft
* Talkdesk
* Teamleader
* TeamViewer
* Teamwork CRM
* Teamwork Desk
* Teamwork Project Management
* Teamwork Spaces
* [Tenable](/getting-started/setting-up-your-tenant/application-integrations/direct-application-integrations/tenable-integration-setup)
* ThoughtSpot
* [Trello](https://wiki.truto.one/integration-guides/trello/#finding-your-token-and-api-key)
* Trengo
* Truto
* Turso
* [Twilio](/getting-started/setting-up-your-tenant/application-integrations/direct-application-integrations/twilio-integration-setup)
* [Twingate](/getting-started/setting-up-your-tenant/application-integrations/direct-application-integrations/twingate-integration-setup)
* Typeform
* [Udemy Business](/getting-started/setting-up-your-tenant/application-integrations/direct-application-integrations/udemy-integration-setup)
* [UniFi](/getting-started/setting-up-your-tenant/application-integrations/direct-application-integrations/unifi-integration-setup)
* UserVoice
* Vanta
* Veeva Vault
* [Venminder](/getting-started/setting-up-your-tenant/application-integrations/direct-application-integrations/venminder-integration-setup)
* [Vercel](https://wiki.truto.one/integration-guides/vercel/#finding-your-vercel-api-key)
* [Verkada](/getting-started/setting-up-your-tenant/application-integrations/direct-application-integrations/verkada-integration-setup)
* Vidyard
* Webex
* Webflow
* Wingman
* Wiz
* WordPress
* Wrike
* Xero
* YouTrack
* Youtrack Hub
* [Zapier SCIM](/getting-started/setting-up-your-tenant/application-integrations/direct-application-integrations/zapier-integration-setup)
* [Zendesk](/getting-started/setting-up-your-tenant/application-integrations/direct-application-integrations/zendesk-integration-setup)
* Zendesk Sell
* Zeplin
* Zoho Analytics
* Zoho Bigin
* Zoho Books
* Zoho BugTracker
* Zoho CRM
* Zoho Desk
* Zoho Meeting
* [Zoho People](/getting-started/setting-up-your-tenant/application-integrations/direct-application-integrations/zoho-people-integration-setup)
* Zoho Projects
* Zoho Sprints
* Zoho Vault
* Zoom
* ZoomInfo SCIM
* Zscaler
* Zscaler ZIA
* Zscaler ZPA SCIM
# 1Password Integration Setup
### Getting Started
#### Requirements:
* API Token
#### Step to obtain API Token
{% embed url="" %}
You can follow the steps mentioned in the above documentation to create a service account token for your 1Password instance. This will be your API token to input into the BalkanID environment.
### Configure 1Password within your BalkanID tenant
1. Login to the BalkanID application and switch to the tenant you would like to add your integration to.
2. Head to *Integrations* > **Add Integration**, select **1Password**.
3. Set up the *Primary Application owner (mandatory)* and the *Description*, if any. Set up Secondary Application Owner(s), if any. Select the Extraction Type. From here, you can configure your application using the following method:
1. **Direct integration** - Provide your API Token obtained above to set up a direct connection with BalkanID.
4. Click on next to move onto *Optional Configuration.*
5. Fill **Optional configuration,** if required.
6. Once you filled in the information, click **Save**. Your integration is now configured and you will see the status of the integration displayed alongside other integrations on the *Integrations* page. When data is available, the integration Status column will read **Connected** and the integration Message will read **Data available**.
# Anthropic Application Integration Setup
### Getting started
BalkanID recommends creating a separate service account for the purposes of this integration, instead of using personal or employee named accounts.
#### Requirements:
* ***Admin API Key***
* ***Organization API Key (Managed Agents)***
{% hint style="info" %}
The Anthropic Admin API is unavailable for individual Claude accounts. You must use an Anthropic **organization**. Only organization members with the **admin** role can create Admin API keys.
{% endhint %}
#### Create an Admin API Key
1. Login to the [Claude Console](https://platform.claude.com/) with an organization member who has the **admin** role.
2. Navigate to *Settings* > *Admin keys*.
3. Click the **Create key** button.
4. Provide a name for the key.
5. Copy the *key value* to your clipboard. Store it securely for future purposes. Admin API keys start with `sk-ant-admin`.
In addition to the Admin API Key above, ensure your Anthropic organization can expose API key inventory and usage data so BalkanID can discover [Anthropic Credentials](/getting-started/entitlement-data-discovery/credentials-discovery/anthropic-credentials).
#### Create an Organization API Key (Managed Agents)
The Organization API Key is required to discover managed agents and vault-backed credentials. If you do not need managed agent discovery, you can leave this field empty in BalkanID.
1. In the Claude Console, create an organization API key for your organization.
2. Copy the *key value* to your clipboard. Store it securely for future purposes.
In addition to the Organization API Key above, [Agents](/agents/introduction-to-agents) discovery must be enabled for your tenant (Early Access). For what BalkanID surfaces after sync, see [Anthropic: Agents](/agents/onboarding-agents/discovering-agents-from-integrations/anthropic-agents).
### Configure Anthropic within your BalkanID tenant
1. Login to the BalkanID application and switch to the tenant you would like to add your integration to.
2. Head to *Integrations* > **Add Integration**, select **Anthropic.**
3. Set up the *Primary Application owner (mandatory)* and the *Description*, if any. Set up Secondary Application Owner(s), if any.
Select the Extraction Type. From here, you can configure your application using one of the following methods:
1. **Direct integration** - Provide your Admin API Key and Organization API Key (Managed Agents) obtained above to set up a direct connection with BalkanID.
4. Click on next to move onto *Optional Configuration.*
5. Fill **Optional configuration,** if required.
6. Once you filled in the information, click **Save**. Your integration is now configured and you will see the status of the integration displayed alongside other integrations on the *Integrations* page. When data is available, the integration Status will read **Connected** and the integration Message will read **Data available**.
# Asana Integration Setup
### Getting Started
BalkanID recommends creating a separate service account for the purposes of this integration, instead of using personal or employee named accounts. Make sure that the account has ownership or super admin level permissions.
#### Requirements:
* ***Personal Access Token***
#### Step to obtain Personal Access Token
1. Login to Asana, and Click on your profile photo in the top right corner of the Asana app. Select *My Settings*... > *Apps* > *Manage Developer Apps*.
2. Follow the below steps to get personal access token from Asana:
1. Click on **Create New Token.**
2. Type a Purpose for which you want to create a Token. Click **Create token.**
3. Copy the Token value and store it securely.
### Configure Asana within your BalkanID tenant
1. Login to the BalkanID application and switch to the tenant you would like to add your integration to.
2. Head to *Integrations* > **Add Integration**, select **Asana**.
3. Set up the *Primary Application owner (mandatory)* and the *Description*, if any. Set up Secondary Application Owner(s), if any.
Select the Extraction Type. From here, you can configure your application using one of the following methods:
1. **Direct integration** - Provide your Personal Access Token obtained above to set up a direct connection with BalkanID.
2. **SCIM integration** - Provide SCIM server credentials to set up a SCIM connection with BalkanID.
3. **Manual file upload** - Upload Entity and Entity Relations through a .CSV file upload. Contact the team for assistance with this.
4. **Automated upload using API -** You can upload data using our [Bulk APIs](https://developer.balkan.id/) with the help of an API key which will be provided to you. Please refer to the [entity](https://developer.balkan.id/bulk-entities-upload-api-early-access-12828095e0) and [entity relation](https://developer.balkan.id/bulk-entity-relations-upload-api-early-access-12828102e0) upload docs for specific instructions on uploading your data through the API.
4. Click on next to move onto *Optional Configuration.*
5. Fill **Optional configuration,** if required.
6. Once you filled in the information, click **Save**. Your integration is now configured and you will see the status of the integration displayed alongside other integrations on the *Integrations* page. When data is available, the integration Status column will read **Connected** and the integration Message will read **Data available**.
# Atlassian Confluence Integration Setup
### Getting Started
BalkanID recommends creating a separate service account for the purposes of this integration, instead of using personal or employee named accounts.
#### Requirements:
* ***API Key***
* ***Domain Name***- organization’s domain name(for example: [https://organization.atlassian.net](https://organization.atlassian.net/))
* ***Email*** - Email ID of admin who has access to all organizational resources.
#### To obtain API-Key:
1. Login into the admin account for Confluence. Click your profile image and select **Profile** from the menu.
2. Navigate to **Security** and click on **Create and Manage API** token.
3. Click on **Create API token.** Provide a label for the token (like “*balkan setup*” or something similar) and create token.
4. Save the token in a secure location.
### Configuring Atlassian Confluence in your BalkanID tenant
1. Login to the BalkanID application and switch to the tenant you would like to add your integration to.
2. Head to *Integrations* > **Add Integration**, select **Confluence.**
3. Set up the *Primary Application owner (mandatory)* and the *Description*, if any. Set up Secondary Application Owner(s), if any.
Select the Extraction Type and fill in the fields for successful extraction.
From here, you can configure your application using one of the following methods:
1. **Direct integration** - Provide your API key, Domain Name and Email obtained above to set up a direct connection with BalkanID.
2. **SCIM integration** - Provide SCIM server credentials to set up a SCIM connection with BalkanID.
3. **Manual file upload** - Upload Entity and Entity Relations through a .CSV file upload. Contact the team for assistance with this.
4. **Automated upload using API -** You can upload data using our [Bulk APIs](https://developer.balkan.id/) with the help of an API key which will be provided to you. Please refer to the [entity](https://developer.balkan.id/bulk-entities-upload-api-early-access-12828095e0) and [entity relation](https://developer.balkan.id/bulk-entity-relations-upload-api-early-access-12828102e0) upload docs for specific instructions on uploading your data through the API.
4. Click on next to move onto *Optional Configuration.*
5. Fill **Optional configuration,** if required.
6. Once you filled in the information, click **Save**. Your integration is now configured and you will see the status of the integration displayed alongside other integrations on the *Integrations* page. When data is available, the integration Status will read **Connected** and the integration Message will read **Data available**.
# Atlassian Jira Application Integration Setup
### Getting started
BalkanID recommends creating a separate service account for the purposes of this integration, instead of using personal or employee named accounts.
#### Requirements:
* ***Jira Personal Access Token (or) Service Account API Token***
* ***Jira Site name***
### Connecting via Personal Access Token (Legacy Method)
#### Steps to obtain credentials
1. Ensure the Service account/user you are creating an API token with has the "Site administrator" role.
2. Go to [Atlassian API tokens](https://id.atlassian.com/manage-profile/security/api-tokens).
3. Choose **Create API token** (unscoped). You can give it a name and an expiry date.
{% hint style="info" %}
**Note:** When entering Jira Personal Access Token in BalkanID, it should be formatted as `me@example.com:my-api-token`, using the email associated with the token.
{% endhint %}
4. Once created, copy the token and store it securely.
5. Get your site name from jira (for example, if your jira URL is `https://YOUR-SITE.atlassian.net`, the site name is `YOUR-SITE` (e.g. `acme` for `https://acme.atlassian.net`).
### Connecting via Service Account Access Token
### Getting credentials from Jira Cloud
The extractor supports both **unscoped** and **scoped** API tokens. You only need **siteName** (or **orgName**) and **token** - the extractor auto-detects which API to use.
#### Create API token
1. Go to [Atlassian API tokens](https://id.atlassian.com/manage-profile/security/api-tokens)
2. Choose **Create API token** (unscoped) or **Create API token with scopes** (for least-privilege; see [checklist](https://github.com/balkanid/extractor-jira/blob/release-1/docs/JIRA_API_CREDENTIALS_CHECKLIST.md) for required scopes)
3. Copy the token and store it securely
#### Get your site name
From your Jira URL `https://YOUR-SITE.atlassian.net`, the site name is `YOUR-SITE` (e.g. `acme` for `https://acme.atlassian.net`).
#### Config format
```
{
"appConfig": {
"token": "your-email@company.com:your_api_token",
"siteName": "your-site"
}
}
```
* **token**: `EMAIL:API_TOKEN` (email of the Jira user + colon + API token)
* **siteName** or **orgName**: Site subdomain from your Jira URL (they are aliases)
#### Required Jira permissions
The Jira user must have **Browse users and groups**, **Administer Jira**, and **Browse projects**.
#### Scopes for scoped API tokens (Read Only)
If you use **Create API token with scopes**, select **Jira** and add:
**Granular scopes (recommended):**
```
read:permission:jira
read:project:jira
read:project.property:jira
read:issue-type:jira
read:user:jira
read:application-role:jira
read:group:jira
read:avatar:jira
```
**Classic scopes (alternative):**
```
read:jira-work
read:jira-user
manage:jira-configuration
```
#### Scopes for scoped API tokens (Lifecycle)
```
read:user:jira
read:group:jira
read:avatar:jira
read:project:jira
read:project.property:jira
read:issue-type:jira
write:permission:jira
write:user.property:jira
write:group:jira
delete:group:jira
read:role:jira
delete:user.property:jira
```
### Configuring Atlassian Jira in your BalkanID tenant
1. Login to the BalkanID application and switch to the tenant you would like to add your integration to.
2. Head to *Integrations* > **Add Integration**, select **Atlassian Jira.**
3. Set up the *Primary Application owner (mandatory)* and the *Description*, if any. Set up Secondary Application Owner(s), if any.
Select the Extraction Type. From here, you can configure your application using one of the following methods:
1. **Direct integration** - Provide your Jira Personal Access Token and Jira Organization Site Name obtained above to set up a direct connection with BalkanID.
2. **SCIM integration** - Provide SCIM server credentials to set up a SCIM connection with BalkanID.
3. **Manual file upload** - Upload Entity and Entity Relations through a .CSV file upload. Contact the team for assistance with this.
4. **Automated upload using API -** You can upload data using our [Bulk APIs](https://developer.balkan.id/) with the help of an API key which will be provided to you. Please refer to the [entity](https://developer.balkan.id/bulk-entities-upload-api-early-access-12828095e0) and [entity relation](https://developer.balkan.id/bulk-entity-relations-upload-api-early-access-12828102e0) upload docs for specific instructions on uploading your data through the API.
**Note:** When setting up Jira Personal Access Token, format it as `me@example.com:my-api-token`, using the email associated with the token. In the **JIRA Site Name** field, enter the site name from Jira Admin Settings under Products.
4. Click on next to move onto *Optional Configuration.*
5. Fill **Optional configuration,** if required.
6. Once you filled in the information, click **Save**. Your integration is now configured and you will see the status of the integration displayed alongside other integrations on the *Integrations* page. When data is available, the integration Status will read **Connected** and the integration Message will read **Data available**.
# Atlassian Application Integration Setup
### Getting started
BalkanID recommends creating a separate service account for the purposes of this integration, instead of using personal or employee named accounts.
#### Requirements:
* ***Atlassian Service Account API Token***
* ***Atlassian Organization ID***
* ***Atlassian Organization API Key***
### Connecting via Service Account Access Token
### Getting credentials from Jira Cloud
The extractor supports both **scoped** and **unscoped** API tokens.
#### Create API token
1. Go to [Atlassian Administration.](https://admin.atlassian.com/)
1. If you are part of multiple organizations, select the desired organizations
2. In the sidebar, expand **Directories** and select Service Accounts\

3. Select the Service Account you want to use.
2. Choose **Create Credentials** > **API token**
3. Give the API token a name. Then, select the following scopes:
```
read:jira-work
read:jira-user
read:permission:jira
manage:jira-configuration
read:confluence-user
read:confluence-groups
read:confluence-space.summary
read:space:confluence
```
4. Copy the token and store it securely.
#### Required App (Jira/Confluence) permissions for Service Account
In order to use the above scopes, the service account must have **Jira Administrator** (site-level) and **Confluence Administrator** (site-level) on all the Jira and Confluence apps required to be discovered.
This means it must be part of those apps with **App Admin** / **User Access Admin** permissions.
#### Get your Organization Admin Token
1. Navigate to Atlassian Administration.
2. Expand Organization Settings in the sidebar, and click on API keys:\
\

3. Click on **Create API key.**
4. Atlassian provides two types of API keys:
* **Scoped API keys** – Grant access only to the organization APIs and permissions explicitly selected.
* **Unscoped API keys** – Grant access to all organization APIs available to the organization administrator who created the key.
Choose the API key type based on the functionality you want to enable.
* #### Option 1: Read-Only Scopes:
If you only need to discover and import data from Atlassian (users, groups, workspaces, credentials, etc.), create a **Scoped API key** and select the following **Fine-Grained scopes**:
```
read:orgs:admin
read:directories:admin
read:groups:admin
read:accounts:admin
read:workspaces:admin
```
\
In addition to the scopes listed above, the below **Fine-Grained** scopes must be enabled to ensure discovery of Atlassian [Credentials](/getting-started/entitlement-data-discovery/credentials-discovery/atlassian-credentials).
```
read:tokens:admin
read:keys:admin
read:service-accounts-tokens:admin
```
* #### Option 2: Lifecycle Management (Provisioning)
If you plan to use provisioning or other lifecycle management features, create an **Unscoped API key**.\
An unscoped API key has the required `manage:org` permission, which is necessary for lifecycle operations such as provisioning.
5. Copy and save the key to a secure location. Your organization ID is also available here.
#### Get your Organization ID
Your Organization ID should have been displayed in the previous step while creating the Organization API key. If you did not note it down, you can retrieve it like so:
1. Navigate to [Atlassian Administration](https://admin.atlassian.com/).
2. If you belong to multiple organizations, select the desired organization.
3. Once the organization dashboard loads, check the browser address bar for the URL.
4. The Organization ID is the value that appears after `/o/` in the URL.
For Example,\
If your URL is `https://admin.atlassian.com/o/ORGANIZTION-ID/overview` the site name is `ORGANIZATION-ID` .
#### Config format
```
{
"appConfig": {
"token": "your-email@company.com:your_api_token",
"orgId": "your-organization-id",
"orgAdminToken": "your-Org-Admin-token"
}
}
```
* **token**: `EMAIL:API_TOKEN` (email of the Jira user + colon + API token)
* **orgId**: Organization ID from your Atlassian Administration URL.
* **orgAdminToken:** Organization Admin token.
### Configuring Atlassian in your BalkanID tenant
1. Login to the BalkanID application and switch to the tenant you would like to add your integration to.
2. Head to *Integrations* > **Add Integration**, select **Atlassian.**
1. Set up the *Primary Application owner (mandatory)* and the *Description*, if any. Set up Secondary Application Owner(s), if any.
Select the Extraction Type. From here, you can configure your application using one of the following methods:
1. **Direct integration** - Provide your Atlassian API Token, Organization ID and Organization API Token obtained above to set up a direct connection with BalkanID.
**Note:** When setting up Atlassian API Token, format it as `serviceaccountid@example.com:my-api-token`, using the service account email associated with the token.
2. Click on next to move onto *Optional Configuration.*
3. Fill **Optional configuration,** if required.
4. Once you filled in the information, click **Save**. Your integration is now configured and you will see the status of the integration displayed alongside other integrations on the *Integrations* page. When data is available, the integration Status will read **Connected** and the integration Message will read **Data available**.
# AWS Application Integration Setup
### Getting Started
There are two supported ways to grant BalkanID access to your account. Pick whichever fits your environment.
#### Requirements
**Option 1: Using an IAM Role**
* IAM Role ARN
* AWS Region
* External ID *(optional, but highly recommended; BalkanID generates this value, see below)*
**Option 2: Using an IAM User**
* Access Key ID
* Secret Access Key
* AWS Region
* A dedicated service account, rather than a personal or employee-named account, for creating this access key *(strongly recommended, see below)*
### Getting the Configuration
#### Option 1: Using an IAM Role
We use an IAM User called `balkan-service-user`, which assumes the IAM Role you provide, to connect to your AWS account.
1. Navigate to the AWS Web Console, Roles section.
2. Click **Create role**.
3. Set **Trusted entity type** to **Custom trust policy** and paste the policy below. Leave the
External ID condition off for now. You will add it after BalkanID generates a value. See [#protecting-your-role-with-an-external-id](#protecting-your-role-with-an-external-id "mention").
```json
{
"Version": "2012-10-17",
"Statement": [
{
"Sid": "AllowBalkanIDServiceUserAssumeRole",
"Effect": "Allow",
"Principal": {
"AWS": "arn:aws:iam::015482169847:user/balkan-service-user"
},
"Action": "sts:AssumeRole",
"Condition": {
"StringEquals": {
"sts:ExternalId": ""
}
}
}
]
}
```
Note: the Account ID above (015482169847) is our shared BalkanID service-user account, used for every customer on this trust policy. After you generate an External ID in BalkanID, add an sts:ExternalId condition so your role stays isolated from other tenants that share the same BalkanID principal.
4. In the **Permissions policies** section, create a customer-managed policy using the JSON in
[#least-privilege-permissions-policy](#least-privilege-permissions-policy "mention") below, and attach it to this role.
5. In the next section, set the IAM Role Name and Description, then click **Create role**.
6. Once created, set **Maximum session duration** to **12 hours**.
7. Copy the ARN from the role's **ARN** field (just above Maximum session duration).
8. Continue to [#h\_01hph1r4emybbss8cnq95442gv](#h_01hph1r4emybbss8cnq95442gv "mention") below.
#### **Protecting your role with an External ID**
An External ID is optional, but highly recommended. On our standard, shared environment, every customer's trust policy names the same `balkan-service-user` principal, so without an External ID the only thing distinguishing your role from any other customer's is the secrecy of your Role ARN. BalkanID mints a tenant-specific value and sends it on `sts:AssumeRole`. You cannot type or paste your own External ID.
1. Finish creating the role and save the integration in BalkanID with the Role ARN and Region
(see [#h\_01hph1r4emybbss8cnq95442gv](#h_01hph1r4emybbss8cnq95442gv "mention")).
2. On the integration form, next to **External ID**, click **Generate**. BalkanID stores a value
of the form `balkanid-`.
3. Click the copy control on the field.
4. In AWS, edit the role's **Trust relationships** policy and add the condition below, using the
copied value. Then save the policy.
5. Sync the integration. If the trust-policy value does not match exactly, `sts:AssumeRole`
fails with `AccessDenied`.
To replace an existing External ID, click **Rotate** in BalkanID, copy the new value, and update `sts:ExternalId` in the trust policy **before** the next sync. Rotating invalidates the previous value. Leaving External ID empty means BalkanID will not send one (Role ARN only).
If your organization requires isolation stronger than Role ARN + External ID, contact to discuss your options.
#### Option 2: Getting the Access Key and Secret Access Key
1. Create a dedicated IAM user for this integration first (AWS Console, Users, Create user, e.g. `balkanid-identitycenter-integration`). Do not generate this access key under your own (or any other individual's) AWS Console user. A key tied to a named human user inherits that person's account lifecycle: if they leave, rotate their password, or lose console access, the integration can break unexpectedly or, worse, keep running on a credential nobody is actively tracking as a live secret. A dedicated service IAM user has a lifecycle you control independently of any individual's employment status.
2. In the **Permissions** step, choose **Attach policies directly**, then **Create policy** to
open the policy editor in a new tab. Paste the JSON from [#least-privilege-permissions-policy](#least-privilege-permissions-policy "mention") below, name it (for example `BalkanIDLeastPrivilegePolicy`), and save it. Back in the user wizard, refresh the policy list and select it.
3. On this user, go to **Security credentials**, scroll to **Access Keys**.
4. Click **Create Access Key**, select **Third-party service** when prompted for a use case, and click **Next**.
5. Provide a description and click **Create Access Key**. You'll be shown your credentials.
6. Make a note of the **Access Key** and **Secret Access Key**. Your **Region** is the AWS Region your AWS Identity Center is configured in. Check the region selector next to your account name in the top-right of the console.
Do not generate an External ID on this path. External ID is an `sts:AssumeRole` trust-policy condition. Static access keys never call `AssumeRole`, and BalkanID rejects External ID together with access keys. If your organization can create cross-account IAM roles, prefer Option 1.
### Least-privilege permissions policy
This is the exact list of AWS API calls this extractor makes. Attach it as a customer-managed policy to the role or user you created above. Replace `` with your account ID.
The policy is split into a **Core** statement (always required) and one statement per **Selective Extraction** entity, so you can remove the statements for entities you don't plan to enable. See [#selective-extraction-permissions](#selective-extraction-permissions "mention") for the full mapping, or check this integration's **Data Sync Preferences** screen in your BalkanID tenant: the **Required API Scopes** panel there lists the exact IAM actions needed for whatever entities you've selected, and updates live as you check or uncheck them.
```json
{
"Version": "2012-10-17",
"Statement": [
{
"Sid": "BalkanIDCoreReadOnly",
"Effect": "Allow",
"Action": [
"iam:ListAccountAliases",
"iam:ListUsers",
"iam:GetLoginProfile",
"iam:GenerateCredentialReport",
"iam:GetCredentialReport"
],
"Resource": "*"
},
{
"Sid": "BalkanIDGroups",
"Effect": "Allow",
"Action": [
"iam:ListGroups",
"iam:ListGroupsForUser"
],
"Resource": "*"
},
{
"Sid": "BalkanIDGroupsScoped",
"Effect": "Allow",
"Action": [
"iam:GetGroup",
"iam:ListGroupPolicies",
"iam:GetGroupPolicy",
"iam:ListAttachedGroupPolicies"
],
"Resource": "arn:aws:iam:::group/*"
},
{
"Sid": "BalkanIDRoles",
"Effect": "Allow",
"Action": "iam:ListRoles",
"Resource": "*"
},
{
"Sid": "BalkanIDRolesScoped",
"Effect": "Allow",
"Action": [
"iam:GetRole",
"iam:ListRolePolicies",
"iam:GetRolePolicy",
"iam:ListAttachedRolePolicies"
],
"Resource": "arn:aws:iam:::role/*"
},
{
"Sid": "BalkanIDPolicies",
"Effect": "Allow",
"Action": [
"iam:ListPolicies",
"iam:ListUserPolicies",
"iam:ListAttachedUserPolicies"
],
"Resource": "*"
},
{
"Sid": "BalkanIDPoliciesScoped",
"Effect": "Allow",
"Action": [
"iam:GetPolicy",
"iam:GetPolicyVersion",
"iam:GetUserPolicy"
],
"Resource": [
"arn:aws:iam:::policy/*",
"arn:aws:iam:::user/*"
]
},
{
"Sid": "BalkanIDAWSManagedPolicies",
"Effect": "Allow",
"Action": [
"iam:GetPolicy",
"iam:GetPolicyVersion"
],
"Resource": "arn:aws:iam::aws:policy/*"
},
{
"Sid": "BalkanIDMFA",
"Effect": "Allow",
"Action": "iam:ListMFADevices",
"Resource": "arn:aws:iam:::user/*"
},
{
"Sid": "BalkanIDAccessKeys",
"Effect": "Allow",
"Action": [
"iam:ListAccessKeys",
"iam:GetAccessKeyLastUsed"
],
"Resource": "arn:aws:iam:::user/*"
},
{
"Sid": "BalkanIDInsights",
"Effect": "Allow",
"Action": "iam:SimulateCustomPolicy",
"Resource": "*"
}
]
}
```
> **Why some statements are** `Resource: "*"`**.** Account-wide or list-only actions (like `iam:ListUsers` and `iam:SimulateCustomPolicy`) don't support resource-level scoping. Everything else is scoped to `user/*`, `role/*`, `group/*`, or `policy/*` in your account, except `BalkanIDAWSManagedPolicies`, which scopes to `arn:aws:iam::aws:policy/*` since AWS-managed policies (e.g. `AmazonS3ReadOnlyAccess`) live under AWS's own account, not yours.
You can validate this policy against your account without attaching it to anything, using the IAM policy simulator:
```bash
aws iam simulate-custom-policy \
--policy-input-list file://balkanid-extractor-policy.json \
--action-names iam:ListUsers iam:GetLoginProfile iam:ListRoles iam:GetRole \
--region us-east-1
```
### Lifecycle Management (provisioning) permissions
BalkanID's **Lifecycle Management** feature creates, deletes, and modifies AWS IAM users, groups, roles, and policies directly from BalkanID, for example offboarding a user by deleting their IAM user. It requires the **Direct Provisioning** fulfillment option enabled under Optional Configuration (see [#h\_01hph1r4emybbss8cnq95442gv](#h_01hph1r4emybbss8cnq95442gv "mention")), and the policy below attached in addition to the read-only Access Review policy above. Skip this section if you only use this integration for Access Review.
Attach a customer-managed policy with the exact write actions below, split into one statement per resource type so you can omit statements for actions you don't want to allow.
```json
{
"Version": "2012-10-17",
"Statement": [
{
"Sid": "BalkanIDProvisioningUsers",
"Effect": "Allow",
"Action": [
"iam:CreateUser",
"iam:GetUser",
"iam:DeleteUser",
"iam:CreateLoginProfile",
"iam:UpdateLoginProfile",
"iam:DeleteLoginProfile",
"iam:ListUserPolicies",
"iam:DeleteUserPolicy",
"iam:ListAttachedUserPolicies",
"iam:AttachUserPolicy",
"iam:DetachUserPolicy",
"iam:ListGroupsForUser",
"iam:AddUserToGroup",
"iam:RemoveUserFromGroup",
"iam:ListAccessKeys",
"iam:DeleteAccessKey",
"iam:ListMFADevices",
"iam:DeactivateMFADevice",
"iam:DeleteVirtualMFADevice",
"iam:ListSigningCertificates",
"iam:DeleteSigningCertificate",
"iam:ListSSHPublicKeys",
"iam:DeleteSSHPublicKey",
"iam:ListServiceSpecificCredentials",
"iam:DeleteServiceSpecificCredential"
],
"Resource": "arn:aws:iam:::user/*"
},
{
"Sid": "BalkanIDProvisioningGroups",
"Effect": "Allow",
"Action": [
"iam:CreateGroup",
"iam:DeleteGroup",
"iam:GetGroup",
"iam:ListGroupPolicies",
"iam:DeleteGroupPolicy",
"iam:ListAttachedGroupPolicies",
"iam:AttachGroupPolicy",
"iam:DetachGroupPolicy"
],
"Resource": "arn:aws:iam:::group/*"
},
{
"Sid": "BalkanIDProvisioningRoles",
"Effect": "Allow",
"Action": [
"iam:CreateRole",
"iam:DeleteRole",
"iam:ListRolePolicies",
"iam:DeleteRolePolicy",
"iam:ListAttachedRolePolicies",
"iam:AttachRolePolicy",
"iam:DetachRolePolicy"
],
"Resource": "arn:aws:iam:::role/*"
},
{
"Sid": "BalkanIDProvisioningServiceLinkedRoles",
"Effect": "Allow",
"Action": [
"iam:CreateServiceLinkedRole",
"iam:DeleteServiceLinkedRole"
],
"Resource": "arn:aws:iam:::role/aws-service-role/*"
},
{
"Sid": "BalkanIDProvisioningServiceLinkedRoleDeletionStatus",
"Effect": "Allow",
"Action": "iam:GetServiceLinkedRoleDeletionStatus",
"Resource": "*"
},
{
"Sid": "BalkanIDProvisioningPolicies",
"Effect": "Allow",
"Action": [
"iam:CreatePolicy",
"iam:DeletePolicy"
],
"Resource": "arn:aws:iam:::policy/*"
}
]
}
```
> **Why** `iam:GetServiceLinkedRoleDeletionStatus` **needs** `Resource: "*"`**.** Deleting a service-linked role is asynchronous: AWS returns a deletion task ID, and this action polls that task by ID, not by role ARN. AWS does not support resource-level permissions for it.
>
> **Service-linked roles live under a fixed path.** AWS always creates them at `role/aws-service-role//`, which is why their Create/Delete statement is scoped to that path instead of `role/*`.
#### Lifecycle Management action to IAM action mapping
| Lifecycle Management action | IAM actions called |
| -------------------------------------------------- | ------------------------------------------------------------------------------------------------------------------------------------------------------------------------------------------------------------------------------------------------------------------------------------------------------------------------------------------------------------------------------------------------------------------------------------------------------------------------------------------------------------------------------------------------ |
| Create user (+ initial console password) | `iam:CreateUser`, `iam:CreateLoginProfile` |
| Reset user password | `iam:UpdateLoginProfile` |
| Delete user | `iam:GetUser`, `iam:ListAttachedUserPolicies`, `iam:DetachUserPolicy`, `iam:ListUserPolicies`, `iam:DeleteUserPolicy`, `iam:ListGroupsForUser`, `iam:RemoveUserFromGroup`, `iam:DeleteLoginProfile`, `iam:ListAccessKeys`, `iam:DeleteAccessKey`, `iam:ListMFADevices`, `iam:DeactivateMFADevice`, `iam:DeleteVirtualMFADevice`, `iam:ListSigningCertificates`, `iam:DeleteSigningCertificate`, `iam:ListSSHPublicKeys`, `iam:DeleteSSHPublicKey`, `iam:ListServiceSpecificCredentials`, `iam:DeleteServiceSpecificCredential`, `iam:DeleteUser` |
| Create group | `iam:CreateGroup` |
| Delete group | `iam:ListAttachedGroupPolicies`, `iam:DetachGroupPolicy`, `iam:ListGroupPolicies`, `iam:DeleteGroupPolicy`, `iam:GetGroup`, `iam:RemoveUserFromGroup`, `iam:DeleteGroup` |
| Add / remove user to or from a group | `iam:AddUserToGroup` / `iam:RemoveUserFromGroup` |
| Create role or AWS Service Role | `iam:CreateRole`, `iam:ListAttachedRolePolicies` (Service Role only, to record initial attachments) |
| Create AWS Service-Linked Role | `iam:CreateServiceLinkedRole` |
| Delete role or AWS Service Role | `iam:ListAttachedRolePolicies`, `iam:DetachRolePolicy`, `iam:ListRolePolicies`, `iam:DeleteRolePolicy`, `iam:DeleteRole` |
| Delete AWS Service-Linked Role | `iam:DeleteServiceLinkedRole`, `iam:GetServiceLinkedRoleDeletionStatus` |
| Create policy | `iam:CreatePolicy` |
| Delete policy | `iam:DeletePolicy` |
| Attach / detach a policy to a user, group, or role | `iam:AttachUserPolicy` / `iam:DetachUserPolicy`, `iam:AttachGroupPolicy` / `iam:DetachGroupPolicy`, `iam:AttachRolePolicy` / `iam:DetachRolePolicy` |
**Not supported by this integration:** suspending or reactivating a user (AWS IAM has no concept of a suspended user; BalkanID falls back to deleting the user if you enable that option), updating an existing identity's attributes, and creating or deleting non-IAM resources.
### Optional, early-access permissions
The features below are **not enabled by default** and are rolled out to tenants on request. If you want one of these, contact your BalkanID account team and they'll turn it on for your tenant. Attaching the IAM permissions ahead of time doesn't activate the feature by itself, but is required once it's enabled so extraction doesn't fail with `AccessDenied`.
#### Bedrock Classic agents and AgentCore harnesses
{% hint style="info" %}
**Early Access:** [Agents](/agents/introduction-to-agents) discovery must be enabled for your tenant. For what BalkanID surfaces after sync, see [AWS: Agents](/agents/onboarding-agents/discovering-agents-from-integrations/aws-agents).
{% endhint %}
To discover Bedrock Classic agents and AgentCore harnesses (Non-Human Identity / Agents inventory), add:
```json
{
"Sid": "BalkanIDBedrockAgents",
"Effect": "Allow",
"Action": [
"bedrock:ListAgents",
"bedrock:GetAgent",
"bedrock-agentcore:ListHarnesses",
"bedrock-agentcore:GetHarness"
],
"Resource": "*"
}
```
If this isn't enabled for your tenant or you don't attach these permissions, extraction still succeeds. Agent discovery simply skips (logged, not fatal) and every other entity type continues to sync normally.
#### Access keys as first-class credential entities
Part of BalkanID's Non-Human Identity (NHI) capability. In addition to the **Access Keys** statement already in the core policy above, this requires the NHI feature to be enabled for your tenant by your BalkanID account team. Ask them if you want access keys modeled and risk-scored as standalone credential entities rather than just a user attribute.
#### IAM last-accessed data (Access Advisor)
To let BalkanID show when a user, role, group, or policy last accessed an AWS service, add:
```json
{
"Sid": "BalkanIDLastAccessedScoped",
"Effect": "Allow",
"Action": [
"iam:GenerateServiceLastAccessedDetails",
"iam:ListPoliciesGrantingServiceAccess"
],
"Resource": [
"arn:aws:iam:::user/*",
"arn:aws:iam:::role/*",
"arn:aws:iam:::group/*",
"arn:aws:iam:::policy/*"
]
},
{
"Sid": "BalkanIDLastAccessedJob",
"Effect": "Allow",
"Action": [
"iam:GetServiceLastAccessedDetails",
"iam:GetServiceLastAccessedDetailsWithEntities"
],
"Resource": "*"
}
```
This is the **AWS Access Advisor** API family, the same feature that powers the "Last accessed" tab in the IAM console, and **not CloudTrail**. `GetServiceLastAccessedDetails*` reads back a previously submitted job by ID rather than by resource, which is why AWS requires `Resource: "*"` for those two actions specifically; `GenerateServiceLastAccessedDetails` and `ListPoliciesGrantingServiceAccess` support the scoped ARNs above. Ask your BalkanID account team to enable "last access time" for your tenant if you want this populated.
#### Deeper cross-account role-chain resolution
```json
{
"Sid": "BalkanIDRoleChainSimulation",
"Effect": "Allow",
"Action": "iam:SimulatePrincipalPolicy",
"Resource": "arn:aws:iam:::role/*"
}
```
Used to compute the graph of roles that can be assumed from other roles in your account, so BalkanID can show effective, transitive access. It **only simulates** whether an `sts:AssumeRole` call would be allowed. It never actually calls `AssumeRole`, and no trust-policy changes are needed on the target roles. This ships enabled by default with unlimited chain depth; contact your BalkanID account team if you'd like the depth limited or this turned off entirely for your tenant.
If you don't attach this permission, extraction still succeeds; every user, group, and role logs an `AccessDenied` warning for this specific check (not fatal), and role-chain data simply stays empty. Every other entity type continues to sync normally.
### Selective Extraction permissions
BalkanID's **Selective Extraction** toggles (in the tenant integration form) control which entity types are synced, and each toggle maps directly to a subset of the core policy above. Disable a toggle and the corresponding actions are simply never called, so it's safe to remove the matching policy statement.
| Selective Extraction toggle | IAM actions required | Always on? |
| ---------------------------------------------------- | ---------------------------------------------------------------------------------------------------------------------------------------------------------------------------------- | --------------------------------------------------------- |
| Users | `iam:ListUsers`, `iam:GetLoginProfile`, `iam:GenerateCredentialReport`, `iam:GetCredentialReport`, `iam:ListAccountAliases` | Yes, cannot be disabled |
| Groups | `iam:ListGroups`, `iam:ListGroupsForUser`, `iam:GetGroup`, `iam:ListGroupPolicies`, `iam:GetGroupPolicy`, `iam:ListAttachedGroupPolicies`, `iam:GetPolicy`, `iam:GetPolicyVersion` | No |
| Roles / AWS Service Linked Roles / AWS Service Roles | `iam:ListRoles`, `iam:GetRole`, `iam:ListRolePolicies`, `iam:GetRolePolicy`, `iam:ListAttachedRolePolicies`, `iam:GetPolicy`, `iam:GetPolicyVersion` | No |
| Policies | `iam:ListPolicies`, `iam:GetPolicy`, `iam:GetPolicyVersion`, `iam:ListUserPolicies`, `iam:GetUserPolicy`, `iam:ListAttachedUserPolicies` | No |
| Generic Resources | *(none, derived from already-synced data, no additional API calls)* | No |
| Insights | `iam:SimulateCustomPolicy` | No |
| MFA Devices | `iam:ListMFADevices` | No |
| Access Keys | `iam:ListAccessKeys`, `iam:GetAccessKeyLastUsed` | No, also requires the early-access NHI feature, see above |
Some actions appear under more than one toggle (e.g. `iam:GetPolicy` under both Groups and Roles) because BalkanID resolves attached-policy details as part of both entity types.
**Not required, despite being included in** `IAMReadOnlyAccess`**:** `iam:SimulatePrincipalPolicy` (only used, scoped, for the optional role-chain feature above, not for Insights), and any credential-report-adjacent SSH-key/signing-certificate actions or IAM account-summary/password-policy reads that aren't in the tables above. None of these are called by this extractor.
### Configure AWS in your BalkanID tenant
1. Login to the BalkanID application and switch to the tenant you would like to add your integration to.
2. Head to *Integrations* > **Add Integration**, select **Amazon Web Services.**
3. Set up the *Primary Application owner (mandatory)* and the *Description*, if any. Set up Secondary Application Owner(s), if any.
4. Configure Selective Extraction toggles (see the table above).
5. In the Direct Integration section provide your Role ARN **or** Access Key + Secret Access Key, and Region obtained above. After you save a Role ARN integration, click **Generate** on **External ID** (highly recommended), copy the value, and add it to the role's trust policy as described in [#protecting-your-role-with-an-external-id](#protecting-your-role-with-an-external-id "mention")
6. Click on next to move onto *Optional Configuration.*
7. Fill **Optional configuration,** if required. (Turn on direct provisioning if you plan to use the lifecycle managment features).
8. Once you filled in the information, click **Save**. Your integration is now configured and you will see the status of the integration displayed alongside other integrations on the *Integrations* page. When data is available, the integration Status will read **Connected** and the integration Message will read **Data available**.
# AWS Identity Center Integration Setup
### Getting Started
Your AWS account must have **AWS Organizations** and **AWS IAM Identity Center** actually enabled before starting. This is an account/organization-level feature toggle, separate from any IAM permission. If Identity Center isn't enabled, extraction fails with "No instances found" regardless of the IAM policy attached.
There are two supported ways to grant BalkanID access to your account. Pick whichever fits your environment, both are fully supported.
#### Requirements
**Option 1: Using an IAM Role**
* IAM Role ARN
* AWS Region
* External ID *(optional, but highly recommended; BalkanID generates this value, see below)*
**Option 2: Using an IAM User**
* Access Key ID
* Secret Access Key
* AWS Region
* A dedicated service account, rather than a personal or employee-named account, for creating this access key *(strongly recommended, see below)*
### Getting the Configuration
#### Option 1: Using an IAM Role
We use an IAM User called `balkan-service-user`, which assumes the IAM Role you provide, to connect to your AWS account.
1. Navigate to the AWS Web Console, Roles section.
2. Click **Create role**.
3. Set **Trusted entity type** to **Custom trust policy** and paste the policy below. Leave the
External ID condition off for now. You will add it after BalkanID generates a value. See [#protecting-your-role-with-an-external-id](#protecting-your-role-with-an-external-id "mention").
```json
{
"Version": "2012-10-17",
"Statement": [
{
"Sid": "AllowBalkanIDServiceUserAssumeRole",
"Effect": "Allow",
"Principal": {
"AWS": "arn:aws:iam::015482169847:user/balkan-service-user"
},
"Action": "sts:AssumeRole",
"Condition": {
"StringEquals": {
"sts:ExternalId": ""
}
}
}
]
}
```
Note: the Account ID above (015482169847) is our shared BalkanID service-user account, used for every customer on this trust policy. After you generate an External ID in BalkanID, add an sts:ExternalId condition so your role stays isolated from other tenants that share the same BalkanID principal.
4. In the **Permissions policies** section, create a customer-managed policy using the JSON in
[#least-privilege-permissions-policy](#least-privilege-permissions-policy "mention") below, and attach it to this role.
5. In the next section, set the IAM Role Name and Description, then click **Create role**.
6. Once created, set **Maximum session duration** to **12 hours**.
7. Copy the ARN from the role's **ARN** field (just above Maximum session duration).
8. Continue to [#h\_01hkr26j1kk0nypd601qv5t424](#h_01hkr26j1kk0nypd601qv5t424 "mention") below.
#### **Protecting your role with an External ID**
An External ID is optional, but highly recommended. On our standard, shared environment, every customer's trust policy names the same `balkan-service-user` principal, so without an External ID the only thing distinguishing your role from any other customer's is the secrecy of your Role ARN. BalkanID mints a tenant-specific value and sends it on `sts:AssumeRole`. You cannot type or paste your own External ID.
1. Finish creating the role and save the integration in BalkanID with the Role ARN and Region
(see [#h\_01hkr26j1kk0nypd601qv5t424](#h_01hkr26j1kk0nypd601qv5t424 "mention")).
2. On the integration form, next to **External ID**, click **Generate**. BalkanID stores a value
of the form `balkanid-`.
3. Click the copy control on the field.
4. In AWS, edit the role's **Trust relationships** policy and add the condition below, using the
copied value. Then save the policy.
5. Sync the integration. If the trust-policy value does not match exactly, `sts:AssumeRole`
fails with `AccessDenied`.
To replace an existing External ID, click **Rotate** in BalkanID, copy the new value, and update `sts:ExternalId` in the trust policy **before** the next sync. Rotating invalidates the previous value. Leaving External ID empty means BalkanID will not send one (Role ARN only).
If your organization requires isolation stronger than Role ARN + External ID, contact to discuss your options.
#### Option 2: Getting the Access Key and Secret Access Key
1. Create a dedicated IAM user for this integration first (AWS Console, Users, Create user, e.g. `balkanid-identitycenter-integration`). Do not generate this access key under your own (or any other individual's) AWS Console user. A key tied to a named human user inherits that person's account lifecycle: if they leave, rotate their password, or lose console access, the integration can break unexpectedly or, worse, keep running on a credential nobody is actively tracking as a live secret. A dedicated service IAM user has a lifecycle you control independently of any individual's employment status.
2. In the **Permissions** step, choose **Attach policies directly**, then **Create policy** to
open the policy editor in a new tab. Paste the JSON from [#least-privilege-permissions-policy](#least-privilege-permissions-policy "mention") below, name it (for example `BalkanIDLeastPrivilegePolicy`), and save it. Back in the user wizard, refresh the policy list and select it.
3. On this user, go to **Security credentials**, scroll to **Access Keys**.
4. Click **Create Access Key**, select **Third-party service** when prompted for a use case, and click **Next**.
5. Provide a description and click **Create Access Key**. You'll be shown your credentials.
6. Make a note of the **Access Key** and **Secret Access Key**. Your **Region** is the AWS Region your AWS Identity Center is configured in. Check the region selector next to your account name in the top-right of the console.
Do not generate an External ID on this path. External ID is an `sts:AssumeRole` trust-policy condition. Static access keys never call `AssumeRole`, and BalkanID rejects External ID together with access keys. If your organization can create cross-account IAM roles, prefer Option 1.
#### Least-privilege permissions policy
This is the exact list of AWS API calls this integration makes. Attach it as a customer-managed policy to the role or user you created above.
The exact permissions you need depend on which entity types you turn on under Selective Extraction. In your BalkanID tenant, on this integration's **Data Sync Preferences** screen, the **Required API Scopes** panel lists the exact IAM actions needed for whatever you've selected there, and updates live as you check or uncheck entities. Use it to confirm which statements below you actually need.
```json
{
"Version": "2012-10-17",
"Statement": [
{
"Sid": "BalkanIDCoreReadOnly",
"Effect": "Allow",
"Action": "sso:ListInstances",
"Resource": "*"
},
{
"Sid": "BalkanIDUsers",
"Effect": "Allow",
"Action": "identitystore:ListUsers",
"Resource": "*"
},
{
"Sid": "BalkanIDGroups",
"Effect": "Allow",
"Action": [
"identitystore:ListGroups",
"identitystore:ListGroupMemberships"
],
"Resource": "*"
},
{
"Sid": "BalkanIDPermissionSets",
"Effect": "Allow",
"Action": [
"sso:ListPermissionSets",
"sso:DescribePermissionSet",
"sso:ListManagedPoliciesInPermissionSet",
"sso:ListCustomerManagedPolicyReferencesInPermissionSet",
"sso:ListAccountAssignments",
"organizations:ListAccounts"
],
"Resource": "*"
},
{
"Sid": "BalkanIDApplications",
"Effect": "Allow",
"Action": [
"sso:ListApplications",
"sso:ListApplicationAssignments"
],
"Resource": "*"
},
{
"Sid": "BalkanIDAccounts",
"Effect": "Allow",
"Action": "organizations:ListAccounts",
"Resource": "*"
}
]
}
```
`organizations:ListAccounts` appears in both `BalkanIDPermissionSets` and `BalkanIDAccounts` on purpose, since each toggle needs it independently. Remove only the statement for a toggle you've disabled.
> **Why every statement is** `Resource: "*"`**.** The AWS SSO Admin and Identity Store APIs don't support resource-level scoping for these actions. Attach this policy to a role dedicated to this integration, rather than trying to restrict `Resource` further.
You can validate this policy against your account without attaching it to anything:
```bash
aws iam simulate-custom-policy \
--policy-input-list file://balkanid-identitycenter-policy.json \
--action-names sso:ListInstances identitystore:ListUsers sso:ListPermissionSets \
--region us-east-1
```
`simulate-custom-policy` validates the policy document itself, not whether Identity Center is enabled in your account. See the note under Getting Started.
### Optional, early-access permissions
#### Last access time for applications and last login time for users
Not enabled by default. Rolled out to tenants on request. Contact your BalkanID account team if you want this; attaching the permission ahead of time doesn't activate the feature by itself, but is required once it's enabled so extraction doesn't fail with `AccessDenied`.
```json
{
"Sid": "BalkanIDLastAccessCloudTrail",
"Effect": "Allow",
"Action": "cloudtrail:LookupEvents",
"Resource": "*"
}
```
This is used for exactly two lookups, both filtered by CloudTrail's own `EventName` attribute:
* `Federate` events (`EventSource: sso.amazonaws.com`) → per-user, per-application **last access time** (also requires the Applications Selective Extraction toggle enabled).
* `UserAuthentication` events (`EventSource: signin.amazonaws.com`) → per-user **last login time** (also requires the Users Selective Extraction toggle enabled).
**This is the one place in this integration that can't be scoped further.** `cloudtrail:LookupEvents` has no resource-level permissions or conditions, so granting it gives read access to your account's full CloudTrail management-event history (which control-plane APIs were called and by whom, not log contents or resource data). Skip this permission if that's not acceptable; every other entity type still syncs normally.
### Selective Extraction permissions
| Selective Extraction toggle | IAM/API actions required | Notes |
| --------------------------- | --------------------------------------------------------------------------------------------------------------------------------------------------------------------------------------------------------------------- | ------------------------------------------------------------------------------------------------------------------------------------------- |
| *(always)* | `sso:ListInstances` | Required to locate your Identity Center instance before any entity sync; not tied to a toggle |
| Users | `identitystore:ListUsers` | |
| Groups | `identitystore:ListGroups`, `identitystore:ListGroupMemberships` | |
| Permission Sets | `sso:ListPermissionSets`, `sso:DescribePermissionSet`, `sso:ListManagedPoliciesInPermissionSet`, `sso:ListCustomerManagedPolicyReferencesInPermissionSet`, `sso:ListAccountAssignments`, `organizations:ListAccounts` | `organizations:ListAccounts` is required here too (account assignments are resolved per account), even if the Accounts toggle itself is off |
| Applications | `sso:ListApplications`, `sso:ListApplicationAssignments` | |
| Accounts | `organizations:ListAccounts` | |
Disable a toggle and the corresponding actions are simply never called, so it's safe to remove the matching policy statement.
### Configuring AWS Identity Center on BalkanID Tenant
1. Login to the BalkanID application and switch to the tenant you would like to add your integration to.
2. Head to *Integrations* > **Add Integration**, select **AWS Identity Center.**
3. Set up the *Primary Application owner (mandatory)* and the *Description*, if any. Set up Secondary Application Owner(s), if any.
4. Configure Selective Extraction toggles (see the table above).
5. In the Direct Integration section provide your Role ARN **or** Access Key + Secret Access Key, and Region obtained above. After you save a Role ARN integration, click **Generate** on **External ID** (highly recommended), copy the value, and add it to the role's trust policy as described in [#protecting-your-role-with-an-external-id](#protecting-your-role-with-an-external-id "mention")
6. Click on next to move onto *Optional Configuration.*
7. Fill **Optional configuration,** if required.
8. Once you filled in the information, click **Save**. Your integration is now configured and you will see the status of the integration displayed alongside other integrations on the *Integrations* page. When data is available, the integration Status will read **Connected** and the integration Message will read **Data available**.
# BILL Integration Setup
### Getting Started
Use this guide to connect BILL to your BalkanID tenant. You will need credentials from your BILL account and access to the Integrations section in BalkanID.
#### Requirements:
Before you begin, collect the following values from BILL:
* **Developer Key**
* **Username**
* **Password**
* **Organization ID**
{% hint style="info" %}
Generate the developer key from a BILL user that holds the **Administrator** role. BILL returns only the records the signed-in user is permitted to see, so a more limited role produces a sync that completes successfully while omitting users and funding accounts.
{% endhint %}
### Configure BILL within your BalkanID tenant
1. To find your **Developer Key** and **Organization ID**, sign in to your BILL account.
2. Navigate to **Settings** > **Sync & Integrations** > **Manage Developer Keys**.
3. Click **Generate developer key**, then review and accept the developer terms of service. BILL takes up to a minute to generate the key, so click **Reload page** to display it. You can hold up to four developer keys at a time.
4. Copy the generated developer key. Your **Organization ID** is displayed at the bottom of the same page and begins with `008`.
5. Your **Username** and **Password** are the email address and password used to sign in to this BILL account.
6. In BalkanID, go to **Integrations** and click **Add integration**.
Add integration
7. Search for **BILL**, select it, and click **Next**.
Connect a new application
8. Set the **Primary application owner** and, optionally, a **Description** and **Secondary application owner(s)**.
9. Under **Data Sync Preferences**, select the data you want BalkanID to sync from BILL. Users are always synced. Roles, bank accounts and card accounts can each be deselected if you do not need them.
10. Under **Select Extraction Type**, choose **Direct Configuration** and enter your **Developer Key**, **Username**, **Password** and **Organization ID**, then click **Next**.
Direct Configuration
11. Fill **Optional Configuration**, if required.
Optional Configuration
12. Once you have filled in the information, click **Save**. Your integration is now configured and you will see the status of the integration displayed alongside other integrations on the Integrations page. When data is available, the integration Status column will read **Connected** and the integration Message will read **Data available**.
### What BalkanID syncs from BILL
| Data | Description |
| ----------------- | ------------------------------------------------------------------------------------------------------------------------------------------------------------------- |
| **Users** | Every user in the BILL organization, with their name, email address and account status. |
| **Roles** | The organization's user roles, including any custom roles, and the role each user is assigned. |
| **Bank accounts** | The organization's bank accounts and the users who can use them. Users are also included where an account grants access to everyone holding the Administrator role. |
| **Card accounts** | The organization's card accounts and the users who can use them. |
BalkanID never reads or stores bank account numbers or routing numbers.
# Bitbucket Integration Setup
### Getting Started
BalkanID recommends creating a separate service account for the purposes of this integration, instead of using personal or employee named accounts.
{% hint style="warning" %}
Two extra configuration fields were introduced recently namely,`Bitbucket App Password` and `Bitbucket Account Username` , which utilizes v1 APIs and requires different credentials, steps have been mentioned below.
Workspace access token needs new additional scopes namely, `Projects > Admin, and Repositories > Admin.`
Since these are breaking changes to the integration, if you already have an existing Bitbucket integration, you would need to delete the current Bitbucket integration and add a new app Integration for Bitbucket.\
\
.png)
{% endhint %}
#### Requirements:
* ***Bitbucket Access token of Workspace (Organization)***
* ***Bitbucket API Url (example: “***[***https://api.bucket.org***](https://api.bucket.org/)***”)***
* ***Username of Workspace ID (example: “myworkspace”)***
* ***Bitbucket Account Username (example: "janesmith")***
* ***BitBucket App Password***
#### Get Access Token of Workspace
1. On the Bitbucket Workspace Page, navigate to *Settings*.
2. Go To *Access Tokens*.
3. Click on **Create Workspace Access Token.**
4. Give the following Perms `Accounts > Read`,`Repositories > Read` and `Projects > Read`.
5. Copy the *Workspace Access Token*.
6. Store the generated Access Token securely.
#### Get Workspace ID
1. Go to the *Workspace settings*.
2. Copy the *Workspace ID.*
3. Store the Workspace ID in a secure location.
#### Get Bitbucket Account Username
1. This is your account username, You can go to and copy your username under Bitbucket Profile Settings
#### Get Bitbucket Account App Password
1. Go to or Settings > Bitbucket Personal Settings > Access Management > App Password
2. Click on Create App Password and give the respective permissions.
3. Copy the App Password somewhere securely
#### Get Bitbucket URL
To configure your integration, paste the URL in the following format: `https://api.your_bitbucket_domain.org`.
Simply replace `your_bitbucket_domain.org` with the actual domain URL of your Bitbucket instance as shown in the image.
### Configure Bitbucket within your BalkanID tenant
1. Login to the BalkanID application and switch to the tenant you would like to add your integration to.
2. Head to *Integrations* > **Add Integration**, select **Bitbucket**.
3. Set up the *Primary Application owner (mandatory)* and the *Description*, if any. Set up Secondary Application Owner(s), if any.
Select the Extraction Type. From here, you can configure your application using one of the following methods:
1. **Direct integration** - Provide your Bitbucket Access Token, URL, Workspace, Account Username and Account App Password obtained above to set up a direct connection with BalkanID.
2. **SCIM integration** - Provide SCIM server credentials to set up a SCIM connection with BalkanID.
3. **Manual file upload** - Upload Entity and Entity Relations through a .CSV file upload. Contact the team for assistance with this.
4. **Automated upload using API -** You can upload data using our [Bulk APIs](https://developer.balkan.id/) with the help of an API key which will be provided to you. Please refer to the [entity](https://developer.balkan.id/bulk-entities-upload-api-early-access-12828095e0) and [entity relation](https://developer.balkan.id/bulk-entity-relations-upload-api-early-access-12828102e0) upload docs for specific instructions on uploading your data through the API.
4. Click on next to move onto *Optional Configuration.*
5. Fill **Optional configuration,** if required.
6. Once you filled in the information, click **Save**. Your integration is now configured and you will see the status of the integration displayed alongside other integrations on the *Integrations* page. When data is available, the integration Status column will read **Connected** and the integration Message will read **Data available**.
# Confluent Integration Setup
#### Getting started
BalkanID connects to Confluent Cloud using a **Cloud API key** owned by a dedicated **service account**. We recommend a service account rather than a key owned by a person: a service account has no console login and no password, and its key keeps working when someone leaves the organization.
Before you begin, you must be an **OrganizationAdmin** in the Confluent Cloud organization you want to connect.
{% hint style="warning" %}
The key must be a **Cloud API key** (also shown as "Cloud resource management"), **not** a Kafka cluster API key. A cluster key only reaches a single cluster's data plane and cannot read users, service accounts, or role bindings at all — the integration will fail to authenticate.
{% endhint %}
#### Choose the role for the service account
The API key inherits the permissions of the service account that owns it, so that account's role determines what BalkanID can see.
| Capability | AccountAdmin | OrganizationAdmin |
| --------------------------------------- | ------------ | ----------------- |
| Users and organization | Yes | Yes |
| Service accounts | Yes | Yes |
| Environments and clusters | Yes | Yes |
| Role bindings (entitlements and access) | Own only | Yes |
| API key inventory | No | Yes |
| SSO group mappings | No | Yes |
| Security insights | Partial | Yes |
**OrganizationAdmin is required for a complete access graph.** Confluent Cloud does not offer a read-only IAM role, so there is no lower-privilege option that can still read role bindings across the organization.
{% hint style="danger" %}
An under-privileged key does not produce an error — it produces an incomplete picture. Confluent returns an empty result rather than a permission failure, so an integration configured with an AccountAdmin key will report a successful sync while missing most entitlements and all credentials. If your first sync shows users but few or no entitlements, the key almost certainly lacks OrganizationAdmin.
{% endhint %}
{% hint style="info" %}
BalkanID only ever reads from Confluent Cloud. Every call the integration makes is an HTTP `GET`, and all activity by the service account appears in your Confluent Cloud audit log if you want to verify this independently.
{% endhint %}
#### Create a service account in Confluent Cloud
1. Sign in to [Confluent Cloud](https://confluent.cloud) as a user with the **OrganizationAdmin** role.
2. Open **Accounts & access** from the top-right menu, then select the **Service accounts** tab.
3. Click **Add service account**. Give it a name such as `balkanid-integration` and a description such as `BalkanID access extraction`, then click **Next**.
4. On the role assignment step, choose the **Organization** scope and grant the **OrganizationAdmin** role. Click **Next**, review, and click **Create**.
#### Create the Cloud API key
1. Open **API keys** from the menu panel on the right-hand side of the Confluent Cloud Console, then click **Add API key**.
2. For the account type, select **Service account** and choose the service account you created above.
3. For the resource scope, select **Cloud resource management**. Do not select a Kafka cluster.
4. Add a name such as `BalkanID` and click **Create API key**.
5. Copy both the **Key** and the **Secret**, or click **Download API key**.
{% hint style="warning" %}
The secret is displayed **only once**, at creation. If you lose it, you cannot retrieve it — you will need to delete the key and create a new one.
{% endhint %}
#### Configure Confluent with your BalkanID tenant
1. Log in to your BalkanID application.
2. Navigate to **Integrations** and click **Add Integration**.
3. Select **Confluent** from the list of applications.
4. Assign a **primary owner** and, optionally, a **secondary owner** for the integration.
5. Under **Direct Configuration**, fill in:
| Field | Value |
| ------------- | ---------------------------------------------------------------------------------- |
| API Key | The Cloud API key ID you copied above |
| API Secret | The secret shown at creation |
| Confluent URL | Leave blank unless instructed otherwise. Defaults to `https://api.confluent.cloud` |
6. Expand **Optional Configuration** if required, then save.
The integration is configured correctly when its status shows **Connected** and you see a **Data available** message after the first successful sync.
#### Integration Scopes
| **Read Only (Access Review) Scopes** | **Lifecycle Management Scopes** |
| ------------------------------------ | ------------------------------- |
| OrganizationAdmin (role) | Not supported |
# CrowdStrike Falcon Integration Setup
### Getting Started
Use this guide to connect CrowdStrike Falcon to your BalkanID tenant. You will need credentials from CrowdStrike and access to the Integrations section in BalkanID.
#### Requirements:
Before you begin, collect the following values from CrowdStrike Falcon:
* Client ID
* Client Secret
* Region
### Configure Crowdstrike Falcon within your BalkanID tenant
1. To find the `Client ID` and `Client Secret`, `Region`. Sign in to your CrowdStrike account.
2. Navigate to `Support & Resources` > `API Clients and Keys`.\
3. Locate your CrowdStrike region from the **Base URL** shown in the console:
4. Click `Create API client` then enter a descriptive name and assign the required API scopes.
5. After completing the above, copy your Client ID, Client Secret and Region.
6. In BalkanID, open the CrowdStrike Falcon integration and paste those values into the corresponding fields, then click **Next**.
7. Click on next to move onto *Optional Configuration.*
8. Fill **Optional configuration,** if required.
9. Once you filled in the information, click **Save**. Your integration is now configured and you will see the status of the integration displayed alongside other integrations on the *Integrations* page. When data is available, the integration Status column will read **Connected** and the integration Message will read **Data available**.
### Integration Scopes
| **Read Only Scopes** | **Lifecycle Management Scopes** |
| --------------------------------------------------------------------------------- | ------------------------------- |
|
| N/A |
# Cisco Duo Integration Setup
#### Getting Started
Use this guide to connect Cisco Duo to your BalkanID tenant. You will need credentials from the Duo Admin Panel and access to the Integrations section in BalkanID.
**Requirements:**
Before you begin, collect the following values from Cisco Duo:
* **Integration key**
* **Secret key**
* **API hostname**
#### Configure Cisco Duo within your BalkanID tenant
1. To find the Integration key, Secret key, and API hostname, sign in to your Duo Admin Panel.
2. Navigate to Applications > Add a Application.
3. Search for Admin API, then click Add to create the application.
4. Under Permissions, enable Read under Grant administrators and under Grant resource (see [Integration Scopes](#integration-scopes) below), then click Save Changes.
5. Copy your Integration key, Secret key, and API hostname from the application's Details section.
6. In BalkanID, open the Cisco Duo integration and paste those values into the corresponding fields, then click **Next.**
7. Click Next to move onto Optional Configuration.
8. Fill **Optional Configuration**, if required.
9. Once you have filled in the information, click **Save**. Your integration is now configured and you will see the status of the integration displayed alongside other integrations on the Integrations page. When data is available, the integration Status column will read **Connected** and the integration Message will read **Data available**.
#### Integration Scopes
| Read Only Scopes | Lifecycle Management Scopes |
| ------------------------------------------------------------------------------------------------------------------------------------------------------------------------------------------------------------------------------------------------------------------------------------------------------------------------------------------------------------------------------------------------------------------------------------------------- | --------------------------- |
|
Grant resource (Read) — users, groups, MFA devices (phones, hardware tokens, passkeys/WebAuthn, desktop authenticators), bypass codes, and applications (integrations)
Grant administrators (Read) — administrators, admin roles, and administrative units
Grant Read Log (Optional) – Allows BalkanID to retrieve and display the last time an application was used.
| N/A |
# Datadog Integration Setup
### Getting Started
BalkanID requires a **service account** for this integration, rather than a personal or employee-named account. A service access token is issued from a service account, so the account is what the token's permissions come from.
#### Requirements:
* ***Service Access Token -*** The secret value generated for the access token created in Datadog service account.
* ***Site -*** The Datadog site your organization lives on, for example `datadoghq.com` or `datadoghq.eu`.
#### Getting the Configuration
1. Open your Datadog page and navigate to *Organization Settings*, then select *Service Accounts* from the left menu under IDENTITY & ACCOUNTS.
2. Click on *+ New Service Account* and give it the **Datadog Admin Role**. After creating the service account, click on this account.
3. Click *+ New Token*, enter a token name, and set an expiry. Select the scopes the integration needs. Use the *Filter Scopes* box in the *Edit Access Token Scope* dialog to find each one by name - see the table below.
4. Click to create the token, then copy the secret and save it. This will be your *Service Access Token*. It is shown once and cannot be retrieved afterwards. You will have to enter it within the BalkanID application when prompted.
5. For *Site*, copy the value shown at the top of the Organization Settings page next to your organization name - `Site: datadoghq.com`
### Required Scopes
| Scope | Unlocks |
| -------------------------------- | ---------------------------------------- |
| `user_access_read` | Users, Service Accounts, Roles, Insights |
| `teams_read` | Teams and team memberships |
| `dashboards_read` | Dashboards |
| `notebooks_read` | Notebooks |
| `security_monitoring_rules_read` | Security Rules |
| `cases_read` | Case Management Projects and Cases |
| `api_keys_read` | API Keys |
| `org_app_keys_read` | Application Keys and Access Tokens |
| `org_management` | Organizations |
| `service_account_write` | A service account's own Application Keys |
| `monitors_read` | Monitors |
| `synthetics_read` | Synthetic Tests |
### Configure integration within your BalkanID tenant
1. Login to the BalkanID application and switch to the tenant you would like to add your integration to.
2. Head to *Integrations* > **Add Integration**, select **Datadog.**
3. Set up the *Primary Application owner (mandatory)* and the *Description*, if any. Set up Secondary Application Owner(s), if any.
Select the Extraction Type. From here, you can configure your application using one of the following methods:
1. **Direct integration** - Provide your Datadog Site and Service access token obtained above to set up a direct connection with BalkanID.
2. **SCIM integration** - Provide SCIM server credentials to set up a SCIM connection with BalkanID.
3. **Manual file upload** - Upload Entity and Entity Relations through a .CSV file upload. Contact the team for assistance with this.
4. Click on next to move onto *Optional Configuration.*
5. Fill **Optional configuration,** if required.
6. Once you filled in the information, click **Save**. Your integration is now configured and you will see the status of the integration displayed alongside other integrations on the *Integrations* page. When data is available, the integration Status will read **Connected** and the integration Message will read **Data available**.
# Box Integration Setup
## Getting Started
BalkanID recommends creating a separate service account for the purposes of this integration, instead of using personal or employee named accounts.
## Requirements
* ***Enterprise ID***
* ***Client ID***
* ***Client Secret***
#### Getting the Configuration
1. You will need to setup our Box Custom Application. To create a Box Application, visit: and click the **Create New App** button as shown.
2. Once done, you’ll have to choose the app type. Select **Custom App** as shown and choose **Server Authentication**.
3. Go to the *Configuration* tab and scroll down to *App Access Level* and **enable/choose** the following **scopes**:
4. Go to the Authorization tab and click **Review and Submit**.
5. Once done, you will be able to see the enablement status.
6. To approve this, go to the box Admin Portal at [https://app.box.com/master.](https://app.box.com/master) Click **Apps** on the left menu and select **Custom Apps Manager**.
7. You can see your newly created app here. To enable it simply **hover over the app name** and click the **menu** for more options on the right. Click **Authorize App.**
8. Once done, go back to the developer portal at , select your application and copy the credentials.
## Configure Box within your BalkanID tenant
1. Login to the BalkanID application and switch to the tenant you would like to add your integration to.
2. Head to *Integrations* > *Third Party Applications* and click **Add Integration**, select **Box**. Set up the *Primary Application owner* and the D*escription*, if any.
3. *Box* would have been added to the list of applications. Click on the **Configure and Integrate** button beside the integration name, and configure the fields with the values that were noted prior. It should look like this:
4. Once you filled in the information, click **Save changes**. Your integration is now configured and you will see the status of the integration displayed alongside other integrations on the *Integrations* page. Integrations are synced daily. When data is available, the integration Status column will read **Connected** and the integration Message will read **Data available**.
# Code Climate Integration SetupPage
### Getting Started
BalkanID recommends creating a separate service account for the purposes of this integration, instead of using personal or employee named accounts.
#### Requirements
* ***Personal Access Token***
#### Get Personal Access Token
1. Assign the **Owner** role to the user. Go to *Settings* -> *People* and click on **Edit** button which will be present in front of the login user. Assign the role as **Owner.**
2. Login to Code Climate, and click on your profile photo in the top right corner of the Code Climate app. Select My **User Settings —>API Access.**
3. Click on **Generate New Token.**
4. Enter a Token Name and click on **Generate Token.**
5. Copy the value of the `TOKEN` and store it safely.
### Configure Code Climate within your BalkanID tenant
1. Login to the BalkanID application and switch to the tenant you would like to add your integration to.
2. Head to *Integrations* > *Third Party Applications* and click **Add Integration**, select **Code Climate**. Set up the *Primary Application owner* and the D*escription*, if any.
3. *Code Climate* would have been added to the list of applications. Click on the **Configure and Integrate** button beside the integration name, and configure the fields with the values that were noted prior. It should look like this:
4. Once you filled in the information, click **Save changes**. Your integration is now configured and you will see the status of the integration displayed alongside other integrations on the *Integrations* page. Integrations are synced daily. When data is available, the integration Status column will read **Connected** and the integration Message will read **Data available**.
# Datadog Integration Setup
### Getting Started
BalkanID recommends creating a separate service account for the purposes of this integration, instead of using personal or employee named accounts.
#### Requirements:
* ***API Key***
* ***Application Key***
#### Get API Key
1. Open your [**Datadog**](https://app.datadoghq.com/) Organization Page and navigate to [**Organization Settings**.](https://app.datadoghq.com/organization-settings/api-keys)
2. Click on *Access* > [*API Keys*.](https://app.datadoghq.com/organization-settings/api-keys)
3. Click on **+ New Key** button on the top right.
4. Name the key **BalkanID** (or any other name you find appropriate for this purpose).
5. Finally Click on **Create Key** and Copy the **Key.**
6. Store the *API key* securely and input it into your BalkanID tenant as required.
#### Get Application Key
1. Open your [**Datadog**](https://app.datadoghq.com/) Organization Page and navigate to [**Organization Settings**.](https://app.datadoghq.com/organization-settings/api-keys)
2. Click on *Access* >[*Application Keys*](https://app.datadoghq.com/organization-settings/application-keys)*.*
3. Click on **+ New Key** button on the top right.
4. Name the key **BalkanID** (or any other name you find appropriate for this purpose).
5. Click On **Edit Scope**.
6. Give the following Scope Permissions
* user\_access\_read
* incident\_read
* security\_monitoring\_filters\_read
* security\_monitoring\_rules\_read
* dashboards\_read
* events\_read
* monitors\_read
* slos\_read
* synthetics\_global\_variable\_read
* synthetics\_private\_location\_read
* synthetics\_read
7. Store the *Application key* securely and input it into your BalkanID tenant as required.
### Configure Datadog within your BalkanID tenant
1. Login to the BalkanID application and switch to the tenant you would like to add your integration to.
2. Head to *Integrations* > *Third Party Applications* and click **Add Integration**, select **Datadog**. Set up the *Primary Application owner* and the D*escription*, if any.
3. Datadog would have been added to the list of applications. Click on the **Configure and Integrate** button beside the integration name, and configure the fields with the values that were noted prior. It should look like this:
4. Once you filled in the information, click **Save changes**. Your integration is now configured and you will see the status of the integration displayed alongside other integrations on the *Integrations* page. Integrations are synced daily. When data is available, the integration Status column will read **Connected** and the integration Message will read **Data available**.
# Dropbox Integration Setup
### Getting Started
BalkanID recommends creating a separate service account for the purposes of this integration, instead of using personal or employee named accounts.
#### Requirements:
* ***Client ID***
* ***Client Secret***
* ***Initial Access Code***
#### Steps to obtain credentials
1. Once you have a dropbox enterprise account, you’ll need to create a scoped application. Visit and create a new app.
2. Choose options according to the images below:
3. Select the following individual scopes:
4. Select the following team scopes.
5. We have configured our dropbox app.
6. We will need to populate the `client_id`, `client_secret` and `initial_auth` fields, for `client_id` and `client_secret` we’ll need to visit the dropbox app console at [https://www.dropbox.com/developers/apps.](https://www.dropbox.com/developers/apps)
7. Now for the `initial_auth` value, we’ll need to visit an auth URL. [https://www.dropbox.com/oauth2/authorize?client\_id=\`client\_id\`\&token\_access\_type=offline\&response\_type=code.](https://www.dropbox.com/oauth2/authorize?client_id=%60client_id%60\&token_access_type=offline\&response_type=code)
8. In the above url copy the url and add your client id value and visit the url, you’ll be asked for consent and be shown the permission scopes. at the end you’ll receive an auth token which you’ll add to the `initial_auth` value.
*Note: You’re supposed to leave `refresh_token`field empty while configuring the BalkanID tenant as the script will populate it on its own*.
### Configure Dropbox within your BalkanID tenant
1. Login to the BalkanID application and switch to the tenant you would like to add your integration to.
2. Head to *Integrations* > *Third Party Applications* and click **Add Integration**, select **Dropbox**. Set up the *Primary Application owner* and the *Description*, if any.
3. *Dropbox* would have been added to the list of applications. Click on the **Configure and Integrate** button beside the integration name, and configure the fields with the values that were noted prior. It should look like this:
4. Once you filled in the information, click **Save changes**. Your integration is now configured and you will see the status of the integration displayed alongside other integrations on the *Integrations* page. Integrations are synced daily. When data is available, the integration Status column will read **Connected** and the integration Message will read **Data available**.
# Figma Integration Setup
{% hint style="info" %}
SCIM is available on the Figma Organization and Enterprise plans. Only Figma organization admins can generate a SCIM API token.
{% endhint %}
### Getting Started
Use this guide to connect Figma to your BalkanID tenant. You will need credentials from your Figma admin settings and access to the Integrations section in BalkanID.
#### Requirements:
Before you begin, collect the following values from Figma:
* **Tenant ID**
* **SCIM API token**
### Configure Figma within your BalkanID tenant
1. To find the Tenant ID and SCIM API token, open Figma in the file browser and select **Admin** in the sidebar.
2. Select the **Settings** tab and navigate to the **Login and provisioning** section.
3. Click **SAML SSO** and copy the **Tenant ID**.
4. Return to **Login and provisioning**, click **SCIM provisioning**, then click **Generate API token**. Copy the **API token** value and store it somewhere safe, because Figma displays it only once.
5. In BalkanID, open **Integrations** and click **Add integration**.
Add integration
6. Search for **Figma**, select it, and click **Next**.
Connect a new application
7. Under **Select Extraction Type**, choose **Direct Configuration** and paste your **Tenant ID** and **SCIM API token** into the matching fields. Leave **SCIM base URL** set to `https://www.figma.com/scim/v2`. If your organization is on Figma for Government, replace it with `https://figma-gov.com/scim/v2`. Click **Next.**
Direct Configuration
8. Fill **Optional Configuration**, if required.
Optional Configuration
9. Once you have filled in the information, click **Save**. Your integration is now configured and you will see the status of the integration displayed alongside other integrations on the Integrations page. When data is available, the integration Status column will read **Connected** and the integration Message will read **Data available**.
### What BalkanID extracts from Figma
| Data | Details |
| -------------- | -------------------------------------------------------------------------------------------------------------------- |
| **Users** | Every member of your Figma organization, with their name, email, job title, department and organization admin status |
| **Groups** | Your SCIM groups and the members of each |
| **Seat types** | The seat each member holds, one of Full, Dev, Collab or View |
Figma does not make team, project or file level permissions available through any API, so those are not extracted.
# GitHub Application Integration Setup
### Getting started
BalkanID recommends creating a separate service account for the purposes of this integration, instead of using personal or employee named accounts.
#### Requirements
* ***Personal Access Token***
* ***Organization Name***
### Getting your Configuration
To connect your GitHub account, you’ll need to create a **Personal Access Token (PAT)**. GitHub offers two types of tokens:
* Fine-grained tokens (Recommended)
* Classic tokens
### Option 1: Fine-Grained Personal Access Token (Recommended)
Fine-grained tokens provide better security and more control over access.
#### Steps
1. Go to **GitHub Settings → Developer Settings → Personal Access Tokens → Fine-grained tokens**
2. Click **Generate new token**
3. Select the **organization** you want to integrate
4. Under **Repository access**:
* Choose **All repositories** (recommended for complete data visibility)
* If selecting specific repositories, ensure you include *all* repositories you want reflected in the dashboard
5. Enable the following repository permissions:
| Permission | Access level |
| -------------- | ------------ |
| Metadata | Read |
| Administration | Read |
5. Enable the following Organization permissions:
| Permission | Access level |
| ---------- | ------------ |
| Members | Read |
In addition to the Permissions listed above, the following permissions must be enabled to ensure discovery of Github [Credentials](/getting-started/entitlement-data-discovery/credentials-discovery/github-credentials).
Enable the following Organization permissions:
| Permission | Access level |
| ---------- | ------------ |
| Admin | Read |
### Option 2: Classic Personal Access Token
If you prefer using a classic token:
#### Steps
1. Go to **GitHub Settings → Developer Settings → Personal Access Tokens → Tokens (classic)**
2. Click **Generate new token**
3. Select the required scopes as shown in the reference image
#### Authorizing a personal access token for use with SAML single sign-on
To use a personal access token (classic) with an organization that uses SAML single sign-on (SSO), you must first authorize the token.
For the personal access token, you'd like to authorize, click **Configure SSO**. If you don't see Configure SSO, ensure that you have authenticated at least once through your SAML IdP to access resources on GitHub.com. For more information, see "[About authentication with SAML single sign-on](https://docs.github.com/en/enterprise-cloud@latest/authentication/authenticating-with-saml-single-sign-on/about-authentication-with-saml-single-sign-on)."
More details [here](https://docs.github.com/en/enterprise-cloud@latest/authentication/authenticating-with-saml-single-sign-on/authorizing-a-personal-access-token-for-use-with-saml-single-sign-on).
### Configure GitHub in your BalkanID tenant
1. Login to the BalkanID application and switch to the tenant you would like to add your integration to.
2. Head to *Integrations* > **Add Integration**, select **Github.**
3. Set up the *Primary Application owner (mandatory)* and the *Description*, if any. Set up Secondary Application Owner(s), if any.
Select the Extraction Type. From here, you can configure your application using one of the following methods:
1. **Direct integration** - Provide your Github Personal Access Token and Organization obtained above to set up a direct connection with BalkanID.
2. **SCIM integration** - Provide SCIM server credentials to set up a SCIM connection with BalkanID.
3. **Manual file upload** - Upload Entity and Entity Relations through a .CSV file upload. Contact the team for assistance with this.
4. **Automated upload using API -** You can upload data using our [Bulk APIs](https://developer.balkan.id/) with the help of an API key which will be provided to you. Please refer to the [entity](https://developer.balkan.id/bulk-entities-upload-api-early-access-12828095e0) and [entity relation](https://developer.balkan.id/bulk-entity-relations-upload-api-early-access-12828102e0) upload docs for specific instructions on uploading your data through the API.
4. Click on next to move onto *Optional Configuration.*
5. Fill **Optional configuration,** if required.
6. Once you filled in the information, click **Save**. Your integration is now configured and you will see the status of the integration displayed alongside other integrations on the *Integrations* page. When data is available, the integration Status will read **Connected** and the integration Message will read **Data available**.
### Integration Scopes
| Read Only (Access Review) Scopes | Lifecycle Management Scopes |
| ------------------------------------- | ------------------------------------- |
| repo | repo |
| write:packages -> read:packages | write:packages -> read:packages |
| admin:org -> read:org | admin:org |
| admin:public\_key -> read:public\_key | admin:public\_key -> read:public\_key |
| admin:repo\_hook -> read:repo\_hook | admin:repo\_hook -> read:repo\_hook |
| user | user |
| admin:enterprise -> read:enterprise | admin:enterprise |
| audit\_log | audit\_log |
| project | project |
# Gitlab Integration Setup
### Getting started
BalkanID recommends creating a **service account** for this integration rather than using a personal access token tied to an employee account. A service account is a robot user owned by your group, so the integration keeps working when people change roles or leave, and its permissions are managed from the group's **Members** page like any other member.
To configure GitLab, you will need to be an **Owner** on the GitLab group you want BalkanID to read.
### Choose the role for the service account
The service account's **role in your group** decides how much BalkanID can see. Both options below give you a complete access review of your users, groups and projects — the difference is whether BalkanID can also inventory your credentials.
| | **Guest** | **Owner** |
| -------------------------------------------------------------------------------------- | --------- | --------- |
| Users, groups, projects and who has access to what | Yes | Yes |
| Security insights (expired memberships, blocked accounts with access, public projects) | Yes | Yes |
| Access tokens, deploy tokens and deploy keys | No | Yes |
**Guest** is the least-privilege option and is what most organisations start with. The service account can read your group structure and memberships and nothing else.
**Owner** additionally lets BalkanID list the machine credentials that hold access to your groups and projects. This matters because a token or deploy key is often the most privileged thing in a repository and is rarely reviewed. Note that the role controls *what* the service account can see, while the token's scope controls whether it can change anything — with the `read_api` scope below, an Owner-role service account is still strictly read-only. It cannot change members, settings or code.
### Create a service account in GitLab
1. Sign in to GitLab as an **Owner** of the top-level group you want BalkanID to read, and go to that group.
2. In the left sidebar, select **Settings > Service accounts**.
3. Select **Add service account**, give it an identifiable name such as `BalkanID Integration`, and create it. GitLab generates the underlying username and a `@noreply` email address for you.
4. On the service account you just created, select **Add token** and fill in:
1. **Token name** — something identifiable, for example `balkanid-integration`.
2. **Expiration date** — set a reminder to rotate the token before this date, because the integration stops syncing the day it expires.
3. **Scopes** — tick **`read_api`** only. BalkanID never writes to GitLab.
5. **Copy the token now.** GitLab shows it once and will not display it again. If you lose it, revoke the token and add a new one.
6. Give the service account access to your group. Go to **Manage > Members > Invite members**, search for the service account, and assign the role you chose in Choose the role for the service account — `Guest` or `Owner`.
This step is what grants the access; creating the service account on its own gives it nothing. Add it to your **top-level** group so the whole group tree is covered in one go.
### Configure GitLab with your BalkanID tenant
1. Log in to the BalkanID application and switch to the tenant you would like to add your integration to.
2. Head to **Integrations > Add Integration**, and select **GitLab**.
3. Set up the **Primary Application Owner** (mandatory) and the **Description**, if any. Set up **Secondary Application Owner(s)**, if any.
Under **Direct Configuration**, fill in:
1. **Access Token** — the group access token you copied above.
2. **GitLab URL** — leave as `https://gitlab.com` for GitLab SaaS. For a self-managed instance, enter its base URL, for example `https://gitlab.yourcompany.com`.
4. Click **Next** to move on to **Optional Configuration**.
5. Fill in the remaining optional configuration, if required.
6. Once you have filled in the information, click **Save**. Your integration is now configured, and you will see its status displayed alongside your other integrations on the **Integrations** page. When data is available, the integration **Status** will read **Connected** and the **Message** will read **Data available**.
### Adding credentials to an existing integration
If your integration is running with a Guest-role token and you now want your GitLab credentials included:
**If you used a service account**, no new token is needed. Go to **Manage > Members** on the group, find the service account, and change its role from `Guest` to `Owner`. The existing token picks up the new permission on the next sync.
# Google Cloud Platform Integration Setup
### Getting Started
BalkanID recommends creating a separate service account for the purposes of this integration, instead of using personal or employee named accounts.
#### Requirements:
* **Key:** This refers to the **Service Account Key (in JSON format)** that you will generate for the dedicated GCP service account. This key is used by BalkanID to securely authenticate and access your GCP resources programmatically.
* **Delegated:** The email address of a user in your Google Workspace domain that has been granted **domain-wide delegation**. BalkanID, through the service account, will impersonate this delegated user to access **Google Workspace directory data** (users, groups, and admin roles).
* **Domain:** This is the **primary domain name associated with your Google Workspace organization** (e.g., `yourcompany.com`). It's crucial for identifying the correct Google Workspace directory from which BalkanID will retrieve user identities, email addresses, and group access information.
* **Project:** The GCP **project ID or name** under which the dedicated service account is created.\
Although the service account resides in a project, its permissions will be **granted at the organization level** (explained below).
**Who performs this task**
1. An *identity administrator* responsible for assigning role-based access to individuals or groups within your organisation. This individual needs to be a Super Administrator for Cloud Identity or Workspace.
2. A *domain administrator* with access to the company's domain host, to see and edit domain settings such as DNS configurations.
#### Getting access permissions
**You will be required to perform the below steps:**
1. Enable required APIs
2. Create a custom role (at organization level)
3. Create a service account
4. Add domain delegation scopes to the service account
#### **Enabling required APIs**
1. Go to *Google Cloud* → *APIs and service* → *Enabled APIs and services*, search for the required APIs and enable it.
2. **Search and enable the following APIs**
```
Cloud Asset API
Identity and Access Management (IAM) API
Cloud Resource Manager API
Admin SDK API
Cloud Identity API
```
In addition to the APIs listed above, the below APIs must be enabled to ensure discovery of GCP [Credentials](/getting-started/entitlement-data-discovery/credentials-discovery/google-cloud-platform-credentials).
```
Cloud Storage API
Compute Engine API
Certificate Manager API
Policy Analyzer API
API Keys API
```
#### Create a Custom Role (at the Organization Level)
> **Important:**\
> The custom role must be created **at the organization level** (not project level).\
> This is required because BalkanID needs to pull **inherited IAM information** from both folders and the organization.\
> Without org-level scope, inherited roles and access relationships would not be visible.
**Creating a custom role and assigning permissions**
1. Go to *IAM* and *Admin* → *Roles.*
2. Click on **+ CREATE ROLE** to proceed with creating a custom role.
3. Fill in the required fields for creating the role.
4. Click on **Add Permissions** to add new permissions to the role.
5. Search for the following permissions and add them
```markup
cloudasset.assets.searchAllIamPolicies
cloudasset.assets.searchAllResources
cloudasset.assets.analyzeIamPolicy
iam.roles.get
iam.roles.list
iam.serviceAccounts.get
iam.serviceAccounts.list
resourcemanager.folders.get
resourcemanager.organizations.get
resourcemanager.projects.get
```
6. Click on **CREATE** to create the role.
#### **Creating a service account**
1. Go to *IAM* and *Admin* → *Service Accounts.*
2. Click on **Create service account** button on the top to proceed.
3. When you are in the second step, select the necessary permissions for its operation, in this case the new Custom Role. For more information - [Creating an account.](https://developers.google.com/identity/protocols/oauth2/service-account#creatinganaccount)
4. Click on the service account you just created and select the **KEYS** tab from the top.
5. Click on **ADD KEY → Create new key.**
6. Select **JSON** and click on the **CREATE** button, the wizard will create a JSON file to download with the necessary key for later use.
7. Go to **IAM and Admin** → IAM. You can view the service account and permissions granted in the IAM.
### Creating a Custom Admin Role in Google Workspace (GWS)
#### Why This Is Needed
The delegated user that service account impersonates needs permission to **read directory information** (users, groups, and customer details) through the **Admin SDK API**.\
This role does *not* need **Super Admin privileges** only the specific **read** permissions required for API access. Creating a custom “Read-Only Role” helps you follow the principle of least privilege.
* Steps to Create a Custom Admin Role
* Go to
* Log in using an account with **Super Admin** privileges.
* **Navigate to Admin Roles**
* In the left-hand menu, go to **Directory → Roles and administrators** (or simply **Admin roles**).
* Click on **Create new role**.
* **Configure Basic Role Details**
* **Name**: `Read-Only Role` (or any preferred name)
* **Description**: `Provides read-only access to users, groups, and customer organization details for BalkanID integration.`\
Click **Continue**.
* **Assign the Required Privileges**
Under **Admin API privileges**, enable only the following:
**Users**
* ✅ Read\
*(Allows viewing user profiles, emails, and metadata)*
**Groups**
* ✅ Read\
*(Allows viewing group memberships and details)*
**Customer**
* ✅ Read customer\
*(Allows viewing organization/customer profile, contact, and settings data)*
* **Save the Role**
Click **Create Role** to save the configuration.
* **Assign the Role to the Delegated User**
Once the role is created:
* Go back to **Admin roles**.
* Select the new **Read-Only Role**.
* Click **Assign users** and choose the **delegated email** (the same email used in the GCP setup).
* Click **Assign Role**.
#### Delegate Configuration
Please ensure the **same delegated email** exists in **both GCP and GWS**:
* In **GCP**:
* Assign the **custom org-level role** to the delegated email **at the organization level (not at the project level)**.
> This is required because the integration needs to pull **inherited IAM information** from folders and the organization project-level roles only allow access within a single project and won’t include inherited permissions.
* In **Google Workspace (GWS)**:
* The same email should have [**Custom (Read Only Role)**](#creating-a-custom-admin-role-in-google-workspace-gws)
* This allows the service account to access user and group data by impersonating an authorized administrator through domain-wide delegation.
#### Add Domain-Wide Delegation Scopes
1. You need to add domain delegation scopes to the service account, first get the OAuth2 client ID from the Service account.
2. Go to *IAM* and *Admin* → *Service Accounts* and copy the OAuth 2 Client ID of the service account you just created.
3. Go to [*Security* -> *API Controls* -> *Domain-wide delegation*](https://admin.google.com/u/1/ac/owl/domainwidedelegation) of your [Google Workspace](https://admin.google.com/).
4. Find the domain-wide delegation section and click on **MANAGE**.
5. Enter the copied client ID and add the following OAuth scopes.
```
https://www.googleapis.com/auth/admin.directory.user.readonly,
https://www.googleapis.com/auth/admin.directory.user,
https://www.googleapis.com/auth/admin.directory.group,
https://www.googleapis.com/auth/admin.directory.customer.readonly,
https://www.googleapis.com/auth/cloud-identity.groups.readonly,
https://www.googleapis.com/auth/cloud-identity.groups,
https://www.googleapis.com/auth/cloud-platform,
https://www.googleapis.com/auth/cloudfunctions,
https://www.googleapis.com/auth/compute
```
6. For more info please refer:
### Configuring Google Cloud Platform in your BalkanID tenant
1. Login to the BalkanID application and switch to the tenant you would like to add your integration to.
2. Head to *Integrations* > **Add Integration**, select **Google Cloud Platform.**
3. Set up the *Primary Application owner (mandatory)* and the *Description*, if any. Set up Secondary Application Owner(s), if any.
Select the Extraction Type. From here, you can configure your application using one of the following methods:
1. **Direct integration** - Provide your Service Account Key(in JSON), Email of delegate, Domain and Project ID obtained above to set up a direct connection with BalkanID.
2. **SCIM integration** - Provide SCIM server credentials to set up a SCIM connection with BalkanID.
3. **Manual file upload** - Upload Entity and Entity Relations through a .CSV file upload. Contact the team for assistance with this.
4. **Automated upload using API -** You can upload data using our [Bulk APIs](https://developer.balkan.id/) with the help of an API key which will be provided to you. Please refer to the [entity](https://developer.balkan.id/bulk-entities-upload-api-early-access-12828095e0) and [entity relation](https://developer.balkan.id/bulk-entity-relations-upload-api-early-access-12828102e0) upload docs for specific instructions on uploading your data through the API.\
\
**Note:** Use the **KEY JSON** downloaded in the 3rd step to fill in the key. Add a user’s email **with access to domain-wide delegation** in the delegated field. Fill in the domain name and the project’s ID as well.
4. Click on next to move onto *Optional Configuration.*
5. Fill **Optional configuration,** if required.
6. Once you filled in the information, click **Save**. Your integration is now configured and you will see the status of the integration displayed alongside other integrations on the *Integrations* page. When data is available, the integration Status will read **Connected** and the integration Message will read **Data available**.
# Google Drive Integration Setup Guide
### Getting Started
#### Requirements:
| Field | What it is |
| -------------------------- | ----------------------------------------------------------------------------------------------------------------------------------------------------------------------------------------------------------------- |
| Domain | Your Google Workspace primary domain (e.g. `customer.com`) |
| Delegate Email | A Google Workspace user whose identity the service account impersonates when reading data. The user should have the necessary permissions required for the integration (recommended: dedicated Super Admin user). |
| Service Account Key (JSON) | The full service-account JSON file generated in your GCP project |
### Google Cloud Setup
The service account does NOT need any IAM role in your GCP project. It is used solely for the impersonation flow. The GCP project only hosts the service account and bills the API quota.
#### Log in to Google Cloud Console
Go to the Google Cloud Console and either:
* Select an existing project
* OR create a new dedicated project (recommended)
Example project name:
`balkanid-googledrive-extractor`
***
#### Enable Required APIs
Go to: **APIs & Services > Library**
Enable the following APIs:
* Google Drive API
* Admin SDK API
***
#### **Creating a service account**
1. Go to *IAM* and *Admin* → *Service Accounts.*
2. Click on **Create service account** button on the top to proceed.
3. Click on the service account you just created and select the **KEYS** tab from the top.
4. Click on **ADD KEY → Create new key.**
5. Select **JSON** and click on the **CREATE** button, the wizard will create a JSON file to download with the necessary key for later use.
#### Configure the Delegate User
The service account will impersonate this user when reading Google Workspace data.
#### Option A Super Admin (Recommended)
Go to: **Admin Console > Directory > Users > \[delegate user] > Admin roles and privileges**
Assign:
* Super Admin
This is the recommended setup because it provides implicit visibility across all Shared Drives.
#### Option B Custom Admin Role (Least Privilege)
For security-conscious deployments, you may instead create a custom admin role with the following permissions:
#### Required Permissions
* Users > Read
* Groups > Read
* Group Members > Read
* Drive and Docs > Settings
> **Important:**\
> If using a custom role, the delegate user MUST be explicitly added to every Shared Drive that should be crawled.
>
> Shared Drives where the delegate user is not a member will be skipped by the Google Drive API.
>
> Using Super Admin avoids this limitation.
#### Add Domain Wide Delegation
1. You need to add domain delegation scopes to the service account, first get the OAuth 2 client ID from the Service account.
2. Go to *IAM* and *Admin* → *Service Accounts* and copy the OAuth 2 Client ID of the service account you just created.
3. Go to [*Security* -> *API Controls* -> *Domain-wide delegation*](https://admin.google.com/u/1/ac/owl/domainwidedelegation) of your [Google Workspace](https://admin.google.com/).
4. Find the domain-wide delegation section and click on **MANAGE**.
5. Enter the copied client ID and add the following OAuth scopes.
```
https://www.googleapis.com/auth/admin.directory.user.readonly,
https://www.googleapis.com/auth/admin.directory.group.readonly,
https://www.googleapis.com/auth/admin.directory.group.member.readonly,
https://www.googleapis.com/auth/drive.readonly
```
6. For more info please refer:
### Configure Google Drive on BalkanID Tenant
1. Login to the BalkanID application and switch to the tenant you would like to add your integration to.
2. Head to *Integrations* > **Add Integration**, select Google Drive
3. Set up the *Primary Application owner (mandatory)* and the *Description*, if any. Set up Secondary Application Owner(s), if any.
Select the Extraction Type. From here, you can configure your application using one of the following methods:
1. **Direct integration** - Provide your Service Account Key(in JSON), Email of delegate, Domain and Project ID obtained above to set up a direct connection with BalkanID.
2. **SCIM integration** - Provide SCIM server credentials to set up a SCIM connection with BalkanID.
3. **Manual file upload** - Upload Entity and Entity Relations through a .CSV file upload. Contact the team for assistance with this.
4. **Automated upload using API -** You can upload data using our [Bulk APIs](https://developer.balkan.id/) with the help of an API key which will be provided to you. Please refer to the [entity](https://developer.balkan.id/bulk-entities-upload-api-early-access-12828095e0) and [entity relation](https://developer.balkan.id/bulk-entity-relations-upload-api-early-access-12828102e0) upload docs for specific instructions on uploading your data through the API.\
\
**Note:** Use the **KEY JSON** downloaded in the 3rd step to fill in the key. Add a user’s email **with access to domain-wide delegation** in the delegated field. Fill in the domain name and the project’s ID as well.
4. Click on next to move onto *Optional Configuration.*
5. Fill **Optional configuration,** if required.
6. Once you filled in the information, click **Save**. Your integration is now configured and you will see the status of the integration displayed alongside other integrations on the *Integrations* page. When data is available, the integration Status will read **Connected** and the integration Message will read **Data available**.
# Google Workspace Integration Setup
### Getting Started
There are two kinds of information that can be pulled from Google Workspace into BalkanID - namely HRIS data (using Google as a HRIS source of truth) and Entitlement data (who has access to what, etc). The following setup applies to both.
By default, typically Google Workspace integration may be setup in your tenant in such a way that it pulls in just entitlement data. To start using Google as an HRIS source of truth, please contact and we will enable that.
BalkanID recommends creating a separate service account for the purposes of this integration, instead of using personal or employee named accounts.
#### Requirements:
* ***Domain***
* ***Super-Admin Email***
* ***Service Account***
#### Getting the configuration
**Granting Access to BalkanID**
1. This step is only needed if you would like to create a new project instead of using an existing project for the integration.
1. Create a project ().
2. You should be able to walk through the wizard after clicking **Create Project** from the [*Manage Resources*](https://console.cloud.google.com/cloud-resource-manager) section of the console. You will specify a *project name* and select an *organization.*
2. Enabling required APIs for the project that you will be using
1. Go to *Google Cloud* → *APIs and service* → *Enabled APIs and services*, search for the required APIs and enable it.
2. Search and enable the following APIs
```
Cloud Identity API
```
3. Create a service account in project created in the previous step ()
* You should be able to walk through the wizard after clicking “[*Create Service Account*](https://console.cloud.google.com/iam-admin/serviceaccounts)” from the ‘*Service Accounts*’ section of the console. You will specify a service account name, and the rest of the fields will auto-fill based on that. You can just hit **Create and Continue**. You will not need to specify any of the optional steps listed on the wizard. This step is only needed if you would like to create a new service account instead of using an existing service account for the integration.
* Copy and save the *OAuth 2* C*lient ID* as well as the *service account email address* from the main service accounts listing page (the items under the columns underlined in red below).
4. Upload existing key to the service account
* Click *Add New* > *Upload Existing Key.*
* Use the certificate received from BalkanID.
* Remember to save the email address of the service account to enter into the configuration for BalkanID from the service account listing page as stated in the previous section.
5. Enable Admin SDK API ()
* Click **Enable.**
6. Delegate domain access ()
* Click **Add New.**
* Enter the *OAuth 2 Client ID* created in the previous step.
* Add the following OAuth Scopes:
```
https://www.googleapis.com/auth/admin.directory.user.readonly,
https://www.googleapis.com/auth/admin.directory.orgunit.readonly,
https://www.googleapis.com/auth/admin.directory.group.readonly,
https://www.googleapis.com/auth/admin.directory.user.security,
https://www.googleapis.com/auth/admin.directory.rolemanagement.readonly
```
In addition to the scopes listed above, the below scopes must be enabled to ensure discovery of Google Workspace [Credentials](/getting-started/entitlement-data-discovery/credentials-discovery/google-cloud-platform-credentials).
```
https://www.googleapis.com/auth/admin.directory.customer.readonly,
https://www.googleapis.com/auth/cloud-identity.groups.readonly,
https://www.googleapis.com/auth/admin.reports.audit.readonly
```
* For additional details refer to
*
*
### Configuring Google Workspace in your BalkanID tenant
1. Login to the BalkanID application and switch to the tenant you would like to add your integration to.
2. Head to *Integrations* > **Add Integration**, select **Google Workspace.**
3. Set up the *Primary Application owner (mandatory)* and the *Description*, if any. Set up Secondary Application Owner(s), if any.
Select the Extraction Type. From here, you can configure your application using one of the following methods:
1. **Direct integration** - Provide your Google Domain, Super-Admin Email and Service Account Email obtained above to set up a direct connection with BalkanID.
2. **SCIM integration** - Provide SCIM server credentials to set up a SCIM connection with BalkanID.
3. **Manual file upload** - Upload Entity and Entity Relations through a .CSV file upload. Contact the team for assistance with this.
4. **Automated upload using API -** You can upload data using our [Bulk APIs](https://developer.balkan.id/) with the help of an API key which will be provided to you. Please refer to the [entity](https://developer.balkan.id/bulk-entities-upload-api-early-access-12828095e0) and [entity relation](https://developer.balkan.id/bulk-entity-relations-upload-api-early-access-12828102e0) upload docs for specific instructions on uploading your data through the API.
4. Click on next to move onto *Optional Configuration.*
5. Fill **Optional configuration,** if required.
6. Once you filled in the information, click **Save**. Your integration is now configured and you will see the status of the integration displayed alongside other integrations on the *Integrations* page. When data is available, the integration Status will read **Connected** and the integration Message will read **Data available**.
### Integration Scopes
| **Read Only (Access Review) Scopes** | **Lifecycle Management Scopes** |
| ------------------------------------------------------------------------------------------------------------------------------------------------------------------------------------------------------------------------------------------------------------ | ----------------------------------------------------------------------------------------------------------------------------------------------------------------------------------------------------------------------------------------------------------------------------------------------------------------- |
|
|
| `https://www.googleapis.com/auth/admin.directory.rolemanagement.readonly` | `https://www.googleapis.com/auth/admin.directory.rolemanagement` |
#### Google Certificate
{% file src="/files/fK81mqxb3mSDSs6A7I1H" %}
# Jenkins Integration Setup
### Getting Started
BalkanID recommends creating a separate service account for the purposes of this integration, instead of using personal or employee named accounts.
#### Requirements:
* ***Username***
* ***Jenkins-URL***
* ***Token***
#### Generating API Token
Jenkins provides an API token for users to authenticate and access its REST API. Follow the steps below to generate an API token for your user account. Make sure an administrator account is used for generating the token.
1. Log in to the Jenkins instance as an *administrator*.
2. Click on “*Manage Jenkins*” in the Jenkins dashboard.
3. Click on “*Manage Users*“.
4. Select the user for whom you want to generate an API token and click on their name to access their user configuration page.
5. Generate a token using the “*Add new token*” section of the user configuration page.
6. Click on the “*Copy*” button to copy the token to the clipboard.
7. *Save* the configurations.
### Configure Jenkins within your BalkanID tenant
1. Login to the BalkanID application and switch to the tenant you would like to add your integration to.
2. Head to *Integrations* > *Third Party Applications* and click **Add Integration**, select **Jenkins**. Set up the *Primary Application owner* and the *Description*, if any.
3. *Jenkins* would have been added to the list of applications. Click on the **Configure and Integrate** button beside the integration name, and configure the fields with the values that were noted prior. It should look like this:
4. Once you filled in the information, click **Save changes**. Your integration is now configured and you will see the status of the integration displayed alongside other integrations on the *Integrations* page. Integrations are synced daily. When data is available, the integration Status column will read **Connected** and the integration Message will read **Data available**.
# JumpCloud Integration Setup
### Getting Started
BalkanID recommends creating a separate service account for the purposes of this integration, instead of using personal or employee named accounts.
#### Requirements:
* ***API Key***
* ***Organization ID***
#### Obtain API Key
The API Key needs to be from an administrator account. To retrieve the API Key follow the JumpCloud instructions here: .
#### Obtain Organization ID
To retrieve the Organization ID follow the JumpCloud instructions here: .
### Configure JumpCloud within your BalkanID tenant
1. Login to the BalkanID application and switch to the tenant you would like to add your integration to.
2. Head to *Integrations* > **Add Integration**, select **JumpCloud**.
3. Set up the *Primary Application owner (mandatory)* and the *Description*, if any. Set up Secondary Application Owner(s), if any.
Select the Extraction Type. From here, you can configure your application using one of the following methods:
1. **Direct integration** - Provide your API Key and Organization ID obtained above to set up a direct connection with BalkanID.
2. **SCIM integration** - Provide SCIM server credentials to set up a SCIM connection with BalkanID.
3. **Manual file upload** - Upload Entity and Entity Relations through a .CSV file upload. Contact the team for assistance with this.
4. **Automated upload using API -** You can upload data using our [Bulk APIs](https://developer.balkan.id/) with the help of an API key which will be provided to you. Please refer to the [entity](https://developer.balkan.id/bulk-entities-upload-api-early-access-12828095e0) and [entity relation](https://developer.balkan.id/bulk-entity-relations-upload-api-early-access-12828102e0) upload docs for specific instructions on uploading your data through the API.
\
**Note:** For Last Login Days, pick the number of days you would like to monitor for last login. For example, if you select `90` then the integration will generate entitlements with a Permission named `access in last 90 days` that will have Permission Value `true` if last login was within last 90 days, and `false` otherwise.
4. Click on next to move onto *Optional Configuration.*
5. Fill **Optional configuration,** if required.
6. Once you filled in the information, click **Save**. Your integration is now configured and you will see the status of the integration displayed alongside other integrations on the *Integrations* page. When data is available, the integration Status column will read **Connected** and the integration Message will read **Data available**.
# LastPass Integration Setup
### Getting Started
Use this guide to connect LastPass to your BalkanID tenant. You will need credentials from the LastPass Admin Console and access to the Integrations section in BalkanID.
{% hint style="info" %}
The LastPass Enterprise API is available on **LastPass Business** only. User groups are not available on LastPass Teams.
{% endhint %}
#### Requirements:
Before you begin, collect the following values from LastPass:
* **CID**
* **Provisioning Hash**
### Configure LastPass within your BalkanID tenant
1. In BalkanID, go to **Integrations** and click **Add integration**.
Add integration
2. Search for LastPass, select it, and click **Next**.
Connect a new application
3. To find your **CID** and **Provisioning Hash**, sign in to the LastPass Admin Console at as a Super Admin or an Admin, and complete multifactor authentication if prompted.
4. Your **CID** is the account number shown in the Admin Console header.
5. Go to **Advanced > Enterprise API** and click **Create provisioning hash**, then **OK**. Copy the value before you leave the page — LastPass displays it only once.
6. In BalkanID, leave **Direct Configuration** selected under **Select Extraction Type**, paste your values into the **CID** and **Provisioning Hash** fields, then click **Next.**
Direct Configuration
7. Click Next to move onto Optional Configuration.
8. Fill **Optional Configuration**, if required.
Optional Configuration
9. Once you have filled in the information, click **Save**. Your integration is now configured and you will see the status of the integration displayed alongside other integrations on the Integrations page. When data is available, the integration Status column will read **Connected** and the integration Message will read **Data available**.
### What BalkanID extracts
| Data | Description |
| ------------------ | ----------------------------------------------------------------------------------------------------------------------------- |
| **Users** | Every user in your LastPass enterprise account, with status, admin flag, last login and master password details. |
| **Groups** | Your LastPass user groups and their members. |
| **Shared folders** | Your shared folders, and each user's permissions on them — read-only, the ability to share, and shared folder administration. |
Access that a user inherits from a group is recorded against that user, along with the group it came from.
{% hint style="info" %}
Keep the provisioning hash safe. It grants access to the LastPass provisioning API independently of the permissions assigned to an administrator in the Admin Console.
Using **Reset your provisioning hash** invalidates the previous value and disconnects any other integration that still uses it, including this one. If you reset it, update the **Provisioning Hash** field in BalkanID with the new value.
{% endhint %}
# MariaDB Integration Setup
### Getting Started
BalkanID recommends creating a separate service account for the purposes of this integration, instead of using personal or employee named accounts.
The following Fields are required
```
- `host`: Hostname or IP address of the MariaDB server
- `port`: Port number of the MariaDB server
- `username`: Username to connect to the MariaDB server (must have access to view users and their privileges)
- `password`: Password to connect to the MariaDB server
```
Make sure that the user provided has the permissions to read the mysql database. Given below is the command required to give adequate permissions to the user:
```jsx
GRANT SELECT ON mysql.* TO ;
```
### Configure MariaDB within your BalkanID tenant
1. Login to the BalkanID application and switch to the tenant you would like to add your integration to.
2. Head to *Integrations* > *Third Party Applications* and click **Add Integration**, select **MariaDB**. Set up the *Primary Application owner* and the *Description*, if any.
3. *MariaDB* would have been added to the list of applications. Click on the **Configure and Integrate** button beside the integration name, and configure the fields with the values that were noted prior. It should look like this:
4. Once you filled in the information, click **Save changes**. Your integration is now configured and you will see the status of the integration displayed alongside other integrations on the *Integrations* page. Integrations are synced daily. When data is available, the integration Status column will read **Connected** and the integration Message will read **Data available**.
# Microsoft Azure and Entra ID Integration Setup
## Getting Started
BalkanID recommends creating a separate service account for the purposes of this integration, instead of using personal or employee named accounts.
## Requirements:
* ***Application (client) ID***
* ***BalkanID Secret Key***
* ***Directory (tenant) ID***
*Note: The organization should possess an Entra ID Premium P1/P2 license and assign it to the user responsible for setting up the configuration. It is recommended for this user to have the Global Administrator Role.*
## Getting the configuration
### **Register the BalkanID application within Azure**
1. Within your Azure portal, from the Dashboard search and navigate to *App Registrations*.
2. Click **New Registration**.
3. Fill in the details to register the application as mentioned in the screenshot.
4. Copy the *Application (client) ID* and *Directory (tenant) ID* after app registration. You will need these values to configure Azure within BalkanID.
### Configure API permissions for the BalkanID application
1. Within your Azure portal, navigate to *API Permissions* and select **Add a permission**. Select **Microsoft Graph**.
2. Within Microsoft Graph section, you will see a choice between Delegated or Application permissions. Select **Application permissions**.
3. As shown in the screenshots below:
* From the *RoleManagement* section, select *RoleManagement.Read.All*
* From the *AuditLog* section, select *AuditLog.Read.All*.
* From the *AdministrativeUnit* section, select *AdministrativeUnit.Read.All*.
* From the *Application* section, select *Application.Read.All*.
* From the *Directory* section, select *Directory.Read.All*.
* From the *Group* section, select *Group.Read.All* and *GroupMember.ReadWrite.All.*
* From the *User* section, select *User.Read.All* and *User.ReadWrite.All.*
4. Navigate back to APIs section by clicking on *All APIs*
5. Click on *APIs my organization uses* and search for **Office 365 Exchange Online**
6. Click on Office 365 Exchange Online and select **Application permissions**. Now add these permissions: *Exchange.ManageAsApp* and *Exchange.ManageAsAppV2*
7. Click *Grant admin consent..* link for whatever permissions were assigned recently in the above steps (in example below, the directory is named “Default Directory”) as shown in the screenshot below.
8. Once granted, you will see status of each permission change from *Not granted* for your directory to *Granted* for your directory. The final list of permissions should match what is shown below.
### Configure Roles for the BalkanID application
> **Note:** The steps below are optional and only need to be completed if you want BalkanID to manage **Exchange objects** (Distribution Lists and Mail-enabled Security Groups). If these resource types are not part of your provisioning requirements, you can skip this section.
1. Navigate to *Microsoft Entra roles and administrators* and search for **Exchange Administrator**
2. Click on *Add assignments*
3. Click on *Select member(s)* and search by Client ID or enterprise application name
4. Select *Assignment type* as Active and finally *Assign*
### Generate a secret for the BalkanID application to use
1. Navigate to Certificates & secrets. Select New client secret. For description, use “BalkanID Secret Key”. For expiration, select your preferred expiration. Please note that you will need to reissue and update the client secret once this secret expires.
2. Copy the Value of the newly created BalkanID Secret Key. You will need this value to configure Azure within BalkanID.\
\
***CAUTION:** Please note that the entire Value may not be visible. You should use the copy to clipboard action next to the Value field to copy the entire value.*
## Configure Azure integration within your BalkanID tenant
1. Login to the BalkanID application and switch to the tenant you would like to add your integration to.
2. Head to *Integrations* > **Add Integration**, select **Azure.**
3. Set up the *Primary Application owner (mandatory)* and the *Description*, if any. Set up Secondary Application Owner(s), if any.
Select the Extraction Type. From here, you can configure your application using one of the following methods:
1. **Direct integration** - Provide your Application (Client) ID, Client Secret and Azure Directory ID obtained above to set up a direct connection with BalkanID.
2. **SCIM integration** - Provide SCIM server credentials to set up a SCIM connection with BalkanID.
3. **Manual file upload** - Upload Entity and Entity Relations through a .CSV file upload. Contact the team for assistance with this.
4. **Automated upload using API -** You can upload data using our [Bulk APIs](https://developer.balkan.id/) with the help of an API key which will be provided to you. Please refer to the [entity](https://developer.balkan.id/bulk-entities-upload-api-early-access-12828095e0) and [entity relation](https://developer.balkan.id/bulk-entity-relations-upload-api-early-access-12828102e0) upload docs for specific instructions on uploading your data through the API.
4. Click on next to move onto *Optional Configuration.*
5. Fill **Optional configuration,** if required.
6. Once you filled in the information, click **Save**. Your integration is now configured and you will see the status of the integration displayed alongside other integrations on the *Integrations* page. When data is available, the integration Status will read **Connected** and the integration Message will read **Data available**.
## Integration Scopes
| **Read Only (Access Review) Scopes** | **Lifecycle Management Scopes** |
| ------------------------------------------------------------------------------------------------------------------------------------------------------------------------------------------------- | ------------------------------------------------------------------------------------------------------------------------------------------------------------------------------------------------------------------------------------------------------------------------------------------------------------------------------------------------------------------------------------------------------ |
| RoleManagement.Read.All | RoleManagement.ReadWrite.Directory |
| AuditLog.Read.All | AuditLog.Read.All |
| AdministrativeUnit.Read.All | AdministrativeUnit.ReadWrite.All |
| Application.Read.All | Application.ReadWrite.All and AppRoleAssignment.ReadWrite.All |
| Directory.Read.All | Directory.ReadWrite.All |
| Group.Read.All | Group.ReadWrite.All |
| GroupMember.Read.All | GroupMember.ReadWrite.All |
| User.Read | User.ReadWrite.All |
| User.Read.All |
Additionally, the Privileged Authentication Administrator Role must be assigned to the BalkanID Application's Service Principal to allow the following - 1. Deletion of Users and Groups with Privileged Roles (like User Administrator Role). 2. Creation of Role assignable Groups.
This needs to be done from the "Roles and administrators" menu in Entra ID.
|
| IdentityRiskEvent.Read.All | |
|
User-LifeCycleInfo.ReadWrite.All
Note: This scope is required only for pulling HRIS data from Azure, specifically to retrieve the termination date of an employee.
| |
# Microsoft Office365 Integration Setup
### Getting Started
BalkanID recommends creating a separate service account for the purposes of this integration, instead of using personal or employee named accounts.
#### Requirements:
* ***Tenant ID***
* ***Client ID***
* ***Client Secret***
#### Getting the credentials
1. Log in to [**azure-portal**](https://azure.microsoft.com/en-in/get-started/azure-portal)**.**
2. Click on `App registrations`.
3. Click on `New registration`.
4. Copy the `Client-ID` and `Tenant-ID`.
5. Click on `Certificates and Secrets`.
6. Copy the Value of secret and use it as `Client Secret`.
#### API Permissions
1. Click on **`API Permissions`.**
2. Click on **`Add Permission`**.
3. Select **`Microsoft Graph`.**
4. Select **`Application Permission`.**
5. Select **`Read Permission`** for `Directory,File,Group,GroupMember,Users,Sites and Role Management`.
6. Provide **Admin Grant** to all the permissions.
### Configure Microsoft Office365 within your BalkanID tenant
1. Login to the BalkanID application and switch to the tenant you would like to add your integration to.
2. Head to *Integrations* > *Third Party Applications* and click **Add Integration**, select **Office365**. Set up the *Primary Application owner* and the *Description*, if any.
3. *Microsoft Office365* would have been added to the list of applications. Click on the **Configure and Integrate** button beside the integration name, and configure the fields with the values that were noted prior. It should look like this:
4. Once you filled in the information, click **Save changes**. Your integration is now configured and you will see the status of the integration displayed alongside other integrations on the *Integrations* page. Integrations are synced daily. When data is available, the integration Status column will read **Connected** and the integration Message will read **Data available**.
# MongoDB Integration Setup
### Getting Started
BalkanID recommends creating a separate service account for the purposes of this integration, instead of using personal or employee named accounts.
#### Requirements:
* ***Public Key***
* ***Private Key***
* ***Organisation ID***
#### Getting the Credentials
1. Sign into MongoDB and find the *Project Settings*.
2. Note down your **Organization ID.**
3. Check the left hand side menu and navigate into *Access Manager.*
4. Once inside *Access Manager*, and click the **Create API key** button. Give a description to your API Key and set the Organization Permission to `Organization Read Only`.
5. Note down the **public key** and **private key**(you will not be able to see these again so ensure you note them down)
### Configure MongoDB within your BalkanID tenant
1. Login to the BalkanID application and switch to the tenant you would like to add your integration to.
2. Head to *Integrations* > *Third Party Applications* and click **Add Integration**, select **MongoDB**. Set up the *Primary Application owner* and the *Description*, if any.
3. *MongoDB* would have been added to the list of applications. Click on the **Configure and Integrate** button beside the integration name, and configure the fields with the values that were noted prior. It should look like this:
4. Once you filled in the information, click **Save changes**. Your integration is now configured and you will see the status of the integration displayed alongside other integrations on the *Integrations* page. Integrations are synced daily. When data is available, the integration Status column will read **Connected** and the integration Message will read **Data available**.
# MySQL Integration Setup
### Getting Started
BalkanID recommends creating a separate service account for the purposes of this integration, instead of using personal or employee named accounts.
#### Requirements:
```
- `host`: Hostname or IP address of the MySQL server
- `port`: Port number of the MySQL server
- `username`: Username to connect to the MySQL server (must have access to view users and their privileges)
- `password`: Password to connect to the MySQL server
```
### Configure integration within your BalkanID tenant
1. Login to the BalkanID application and switch to the tenant you would like to add your integration to.
2. Head to *Integrations* > *Third Party Applications* and click **Add Integration**, select **MySQL**. Set up the *Primary Application owner* and the *Description*, if any.
3. *MySQL* would have been added to the list of applications. Click on the **Configure and Integrate** button beside the integration name, and configure the fields with the values that were noted prior. It should look like this:
4. Once you filled in the information, click **Save changes**. Your integration is now configured and you will see the status of the integration displayed alongside other integrations on the *Integrations* page. Integrations are synced daily. When data is available, the integration Status column will read **Connected** and the integration Message will read **Data available**.
# Netsuite Application Integration Setup
### Getting Started
BalkanID recommends creating a separate service account for the purposes of this integration, instead of using personal or employee named accounts.
#### Requirements:
* ***`Account ID`***
* ***`Account URL`***
* ***`Consumer Key`***
* ***`Consumer Secret`***
* ***`Token ID`***
* ***`Token Secret`***
Additionally, you will be asked to:
* Enable `REST Web Services`
* Enable `Token Based Authentication`
* Create an integration
* Create a role
* Assign the created role to a user
* Create a token
Let's get started.
#### Enable token based authentication and REST
1. Within Netsuite, search for `page: enable features` and click **View** on the result.
2. Click **SuiteCloud** sub tab.
3. Enable `REST Web Services` under `SuiteTalk (Web Services)` section.
4. Enable `Token Based Authentication`.
5. Save the changes.
#### Get Account ID
1. It is usually the first part of the NetSuite URL (ex: )
2. If not, follow these steps:
1. Within Netsuite, search for `page: Web Services Preferences` and click "View" on the result
2. Copy the `ACCOUNT ID` from the resulting page, this is the Account ID needed to configure BalkanID.
#### Get Account URL
1. Within Netsuite, search for `page: Company Information`.
2. Click sub tab **Company URLs.**
3. Copy the `SUITETALK (SOAP AND REST WEB SERVICES)` URL. This is the *Account URL* needed to configure BalkanID.
#### Create BalkanID integration
1. Within Netsuite, search `page:Manage Integrations` and click **View**" on the result.
2. Create a new integration:
1. Name: `BalkanID`
2. Enable `Token-Based Authentication`
3. Disable `TBA: Authorization Flow`
4. Disable `Oauth: Authorization Code Grant`
5. Hit **Save**
6. Copy `Consumer Key` and `Consumer Secret`, these are the *Consumer Key* and *Consumer Secret* needed to configure BalkanID.
#### Create a role
1. Within Netsuite, search for `page:New Role` and click **View** on the **New Role** result.
2. Enter name - `BalkanID`.
3. Center type - `Classic Center`.
4. Navigate to *Permissions* > *Setup* (sub tab at bottom of page) and add the following permissions:
* `REST Web Services`: **Full**
* `Log in using Access Tokens`: **Full**
* `Bulk Manage Roles`: **Full**
5. Navigate to *Permissions* > *Reports* (sub tab at bottom of page) and add the following permissions:
* `SuiteAnalytics Workbook`
6. Navigate to *Permissions* > *Lists* (sub tab at bottom of page) and add the following permissions:
* `Employee Record`: **View**
* `Employees`: **View**
* `Perform Search`: **View**
7. Save the changes
#### Assign role to user
1. Within Netsuite, search for `page:employees`.
2. Edit your employee record.
3. Navigate to *Access* > *Roles* (sub tab at bottom of page).
4. Add the `BalkanID` role previously created.
5. Save the changes.
#### Create a token
1. Within Netsuite, search for `page: New Access Token`
* *Application name*: `BalkanID` (previously created)
* *User*: ``
* *Role*: `BalkanID` (previously created)
2. Save the changes.
3. Copy `Token ID` and `Token Secret`, these are the *Token ID* and *Token Secret* that are required to configure BalkanID.
### Configure Netsuite within your BalkanID tenant
1. Login to the BalkanID application and switch to the tenant you would like to add your integration to.
2. Head to *Integrations* > *Third Party Applications* and click **Add Integration**, select **Netsuite**. Set up the *Primary Application owner* and the *Description*, if any.
3. *Netsuite* would have been added to the list of applications. Click on the **Configure and Integrate** button beside the integration name, and configure the fields with the values that were noted prior. It should look like this:
4. Once you filled in the information, click **Save changes**. Your integration is now configured and you will see the status of the integration displayed alongside other integrations on the *Integrations* page. Integrations are synced daily. When data is available, the integration Status column will read **Connected** and the integration Message will read **Data available**.
# New Relic Integration Setup
### Getting Started
BalkanID recommends creating a separate service account for the purposes of this integration, instead of using personal or employee named accounts.
#### Requirements:
* ***API key***
#### Get API Key
1. Login to your New Relic account. The User API key needs to be generated from a user who is a part of the admin group (has admin permissions).
2. If you need to create a new user, make sure the user is a Full Platform User and added to Admin as shown in the screenshot below.
3. Click on your user profile and go to `API keys` .
4. Either create a new key or copy the value of the *API Key* with type as *USER* and store it safely. API key example - ABCD -123456789123456789123456789. While creating a new key ensure that the *API key* is of type **USER**.
### Configure New Relic within your BalkanID tenant
1. Login to the BalkanID application and switch to the tenant you would like to add your integration to.
2. Head to *Integrations* > *Third Party Applications* and click **Add Integration**, select **New Relic**. Set up the *Primary Application owner* and the *Description*, if any.
3. *New Relic* would have been added to the list of applications. Click on the **Configure and Integrate** button beside the integration name, and configure the fields with the values that were noted prior. It should look like this:
4. Once you filled in the information, click **Save changes**. Your integration is now configured and you will see the status of the integration displayed alongside other integrations on the *Integrations* page. Integrations are synced daily. When data is available, the integration Status column will read **Connected** and the integration Message will read **Data available**.
# Okta Application Integration Setup
### Getting started
BalkanID recommends creating a separate service account for the purposes of this integration, instead of using personal or employee named accounts.
#### Requirements:
* ***Okta Token***
* ***Okta Site URL***
#### Getting the Configuration
The following permissions are required by BalkanID in order to effectively pull users, groups and applications along with their respective accesses from Okta.
* View users and their details
* View groups and their details
* Manage group membership
* Needed to get user membership to groups. Okta does not provide read only permission. This permission only allows to remove a user out of a group, but does not grant ability to add a user to a group. If this permission is not provided, anything that is granted through a group will not be connected to the user. Only applications assigned directly to the user will show up in BalkanID for that user.
* View application and their details
* View Roles and their details (Scope required **okta.roles.read**)
You can either create the token from an existing ***Super User Admin account*** or create a new service account to create this token. Creating a new service account within Okta for creating this token is out of scope of this document. This document should be assuming, you are logged into Okta account with the relevant permissions and steps involved in creating a token.\
\
**Create an Okta token:**
1. In Okta’s admin console, navigate to *Security* > *API.*
2. Click the **Create Token** button.
3. Provide a name for the token.
4. Copy the *token value* to your clipboard. Store it securely for future purposes.
### Configure Okta within your BalkanID tenant
1. Login to the BalkanID application and switch to the tenant you would like to add your integration to.
2. Head to *Integrations* > **Add Integration**, select **Okta.**
3. Set up the *Primary Application owner (mandatory)* and the *Description*, if any. Set up Secondary Application Owner(s), if any.
Select the Extraction Type. From here, you can configure your application using one of the following methods:
1. **Direct integration** - Provide your Okta Token and Site URL obtained above to set up a direct connection with BalkanID.
2. **SCIM integration** - Provide SCIM server credentials to set up a SCIM connection with BalkanID.
3. **Manual file upload** - Upload Entity and Entity Relations through a .CSV file upload. Contact the team for assistance with this.
4. **Automated upload using API -** You can upload data using our [Bulk APIs](https://developer.balkan.id/) with the help of an API key which will be provided to you. Please refer to the [entity](https://developer.balkan.id/bulk-entities-upload-api-early-access-12828095e0) and [entity relation](https://developer.balkan.id/bulk-entity-relations-upload-api-early-access-12828102e0) upload docs for specific instructions on uploading your data through the API.
4. Click on next to move onto *Optional Configuration.*
5. Fill **Optional configuration,** if required.
6. Once you filled in the information, click **Save**. Your integration is now configured and you will see the status of the integration displayed alongside other integrations on the *Integrations* page. When data is available, the integration Status will read **Connected** and the integration Message will read **Data available**.
### Integration Scopes
Read Only (Access Review) Scopes
Lifecycle Management Scopes
okta.roles.read
okta.roles.manage
okta.factors.read
okta.factors.manage
okta.groups.read
okta.groups.manage
okta.apps.read
okta.apps.manage
okta.users.read
okta.users.manage
# Onelogin Integration Setup
### Getting Started
BalkanID recommends creating a separate service account for the purposes of this integration, instead of using personal or employee named accounts.
#### Requirements:
* ***Client ID***
* ***Client Secret***
* ***Tenant Name***
#### Getting the Configuration
1. Go to your *Onelogin Tenant Administration Page*.
2. Hover over *Developers* and click *API Credentials* under it.
3. Click on **Create New Credential**, and give `Read all` as the permission.
4. Click on **Save** and copy the `Client ID` and `Client Secret`.
5. Copy and save both of them You will be prompted to enter them on the Application integration settings on Balkan ID.
6. Check the URL of your OneLogin tenant, it should be of format `https://.onelogin.com`
7. Copy the tenant-name (in this case, its `balkanid-dev` ).
8. Paste the same in Balkan ID App Integration setting
{% hint style="info" %}
**Note -** For extracting privileges, the required scope is `Manage all` instead of `Read all`. Additionally, this requires a subscription to OneLogin that includes Delegated Administration.
{% endhint %}
### Configure Onelogin within your BalkanID tenant
1. Login to the BalkanID application and switch to the tenant you would like to add your integration to.
2. Head to *Integrations* > **Add Integration**, select **OneLogin.**
3. Set up the *Primary Application owner (mandatory)* and the *Description*, if any. Set up Secondary Application Owner(s), if any.
Select the Extraction Type. From here, you can configure your application using one of the following methods:
1. **Direct integration** - Provide your Onelogin Client ID, Client Secret and Tenant Name obtained above to set up a direct connection with BalkanID.
2. **SCIM integration** - Provide SCIM server credentials to set up a SCIM connection with BalkanID.
3. **Manual file upload** - Upload Entity and Entity Relations through a .CSV file upload. Contact the team for assistance with this.
4. **Automated upload using API -** You can upload data using our [Bulk APIs](https://developer.balkan.id/) with the help of an API key which will be provided to you. Please refer to the [entity](https://developer.balkan.id/bulk-entities-upload-api-early-access-12828095e0) and [entity relation](https://developer.balkan.id/bulk-entity-relations-upload-api-early-access-12828102e0) upload docs for specific instructions on uploading your data through the API.
4. Click on next to move onto *Optional Configuration.*
5. Fill **Optional configuration,** if required.
6. Once you filled in the information, click **Save**. Your integration is now configured and you will see the status of the integration displayed alongside other integrations on the *Integrations* page. When data is available, the integration Status will read **Connected** and the integration Message will read **Data available**.
# OpenVPN Integration Setup
### Getting Started
BalkanID recommends creating a separate service account for the purposes of this integration, instead of using personal or employee named accounts.
#### Requirements:
* ***Client ID***
* ***Client Secret***
* ***Base URL***
#### Steps to obtain credentials
1. Create an account using [`CloudConnexa`](https://openvpn.net/sign-in/).
2. Go to `API(Beta)` and fill in the necessary information.
3. Click on create and generate `ClientID` and `ClientSecret`.
4. The API endpoint will be `.api.openvpn.com`.
### Configuring OpenVPN in your BalkanID tenant
1. Login to the BalkanID application and switch to the tenant you would like to add your integration to.
2. Head to *Integrations* > *Third Party Applications* and click **Add Integration**, select **OpenVPN**. Set up the *Primary Application owner* and the *Description*, if any.
3. OpenVPN would have been added to the list of applications. Click on the **Configure and Integrate** button beside the integration name, and configure the fields with the values that were noted prior. It should look like this:
4. Once you filled in the information, click **Save changes**. Your integration is now configured and you will see the status of the integration displayed alongside other integrations on the *Integrations* page. Integrations are synced daily. When data is available, the integration Status column will read **Connected** and the integration Message will read **Data available**.
# PagerDuty Integration Setup
### Getting Started
Use this guide to connect PagerDuty to your BalkanID tenant. You will need an API key from PagerDuty and access to the Integrations section in BalkanID.
Once connected, BalkanID syncs your PagerDuty users, their base roles, and your teams, along with the access between them.
BalkanID recommends creating the API key from a service account rather than a personal or employee-named account.
#### Requirements:
Before you begin, collect the following value from PagerDuty:
* **Access Token**
### Configure PagerDuty within your BalkanID tenant
1. To find the Access Token, sign in to PagerDuty as a user with the **Global Admin** or **Account Owner** role.
2. Navigate to **Integrations > Developer Tools > API Access Keys**.
3. Click **Create New API Key**, enter a description, and tick **Read-only API Key**. BalkanID only reads from PagerDuty, so a read-only key is sufficient.
4. Click **Create Key** and copy the key immediately. PagerDuty displays the full key only once; afterwards only the last four characters are shown.
5. In BalkanID, go to **Integrations** and click **Add integration**.
Integrations
6. Search for **PagerDuty**, select it, then click **Next**.
Connect a new application
7. Under **Select Extraction Type**, choose **Direct Configuration** and paste the key you copied into **Access Token**, then click **Next.**
Direct Configuration
8. Fill **Optional Configuration**, if required.
Optional Configuration
9. Once you have filled in the information, click **Save**. Your integration is now configured and you will see the status of the integration displayed alongside other integrations on the Integrations page. When data is available, the integration Status column will read **Connected** and the integration Message will read **Data available**.
{% hint style="info" %}
Teams are only extracted if your PagerDuty account includes the Teams feature. On accounts without it, users and roles are still synced and teams are skipped.
{% endhint %}
### Additional Notes
PagerDuty's API returns a different value for a user's base role than the name shown in the PagerDuty web app. BalkanID displays the name from the web app.
| Shown in PagerDuty | Returned by the API |
| ------------------- | ------------------------ |
| Account Owner | `owner` |
| Global Admin | `admin` |
| Manager | `user` |
| Responder | `limited_user` |
| Observer | `observer` |
| Restricted Access | `restricted_access` |
| Full Stakeholder | `read_only_user` |
| Limited Stakeholder | `read_only_limited_user` |
PagerDuty does not expose a last-login time for users, so last access is not reported for this integration.
# PayPal Integration Setup
### Getting Started
Use this guide to connect PayPal to your BalkanID tenant. You will need credentials from the PayPal Developer Dashboard and access to the Integrations section in BalkanID.
{% hint style="info" %}
BalkanID reads the staff users of your PayPal business account and the account roles assigned to them. Your PayPal business account must have access to PayPal's User Management API.
{% endhint %}
#### Requirements:
Before you begin, collect the following values from PayPal:
* **Client ID**
* **Client Secret**
* **Environment (production or sandbox)**
### Configure PayPal within your BalkanID tenant
1. To find the Client ID and Client Secret, sign in to the [PayPal Developer Dashboard](https://developer.paypal.com/dashboard/) using your PayPal business account.
2. Navigate to **Apps & Credentials** and select **Live**. Select **Sandbox** instead if you are connecting a test account.
3. Click **Create App**, enter an app name, select **Merchant** as the app type, then create the app.
4. Copy the **Client ID** and **Client Secret** from the app's details page.
5. In BalkanID, go to **Integrations** and click **Add integration**.
Add integration
6. Search for PayPal, select it, and click **Next**.
Connect a new application
7. Under **Select Extraction Type**, keep **Direct Configuration** selected and paste your **Client ID** and **Client Secret**. Leave **Environment (production or sandbox)** set to `production`, or change it to `sandbox` if you created your app under Sandbox. Click **Next**.
Direct Configuration
8. Fill **Optional Configuration**, if required.
Optional Configuration
9. Once you have filled in the information, click **Save**. Your integration is now configured and you will see the status of the integration displayed alongside other integrations on the Integrations page. When data is available, the integration Status column will read **Connected** and the integration Message will read **Data available**.
# Ping Identity Integration SetupPage
### Getting Started
BalkanID recommends creating a separate service account for the purposes of this integration, instead of using personal or employee named accounts.
#### Requirements:
* ***Client ID***
* ***Client Secret***
* ***Environment ID***
* ***Region Name***
#### Getting the Configuration
1. Login to Ping Identity, and navigate to *Connections >* *Applications*.
2. Use the PingOne admin console to create your first application connection. To create the application connection:
1. Click **Connections**.
2. Click the **+** icon next to *Application*.
3. In the *Application Name* field, enter an application name.
4. Under Choose Application Type, click **Worker**.
5. Click **Save**.
6. On the application's Roles page, assign the following roles to the worker app and save the changes.\
(**Note:** The roles listed below grant both read and write access to entities. If you only need to extract data for UAR and do not require lifecycle management, it is recommended to create a custom role with read-only permissions based on the built-in roles listed below.)
1. Identity Data Admin
2. Environment Admin
3. Application Owner
4. Custom Roles Admin
5. DaVinci Admin
7. On the application's Overview page, click the toggle at the upper right to enable the application.
3. Get the Credentials
1. Click the **Application's Configuration** tab.
2. Scroll down to the *General* section.
3. Copy the `client-id`, `client-secret`, `env-id`.
4. Paste these in the BalkanID tenant.
4. Get the **Region** from the following link - [PingOne Sign On](https://signon.pingidentity.com/davinci/policy/5447db4173e2cd3139ba8e633817677e/authorize?client_id=b91b7752f23e20d56c8623aca138ead8\&response_type=code\&scope=openid\&redirect_uri=https://www.pingidentity.com)
5. Select a region from one of them and accordingly use the API domain.
### Configure Ping Identity within your BalkanID tenant
1. Login to the BalkanID application and switch to the tenant you would like to add your integration to.
2. Head to *Integrations* > *Third Party Applications* and click **Add Integration**, select **Ping Identity**. Set up the *Primary Application owner* and the *Description*, if any.
3. *Ping Identity* would have been added to the list of applications. Click on the **Configure and Integrate** button beside the integration name, and configure the fields with the values that were noted prior. It should look like this:
4. Once you filled in the information, click **Save changes**. Your integration is now configured and you will see the status of the integration displayed alongside other integrations on the *Integrations* page. Integrations are synced daily. When data is available, the integration Status column will read **Connected** and the integration Message will read **Data available**.
# PostgreSQL Integration Setup
### Getting Started
BalkanID recommends creating a separate service account for the purposes of this integration, instead of using personal or employee named accounts.
#### Requirements:
* ***`host`*** - Host name or IP address of the PostgreSQL server
* ***`port`*** - Port number of the PostgreSQL server
* ***`user`*** - Username to connect to the PostgreSQL server (must be a superuser or have admin privileges)
* ***`password`*** - Password to connect to the PostgreSQL server
* ***`dbname`*** - Name of the Database to connect to the PostgreSQL server
* ***`sslmode`*** - SSL mode during connection to the PostgreSQL server
### Configure integration within your BalkanID tenant
1. Login to the BalkanID application and switch to the tenant you would like to add your integration to.
2. Head to *Integrations* > *Third Party Applications* and click **Add Integration**, select **PostgreSQL**. Set up the *Primary Application owner* and the *Description*, if any.
3. *PostgreSQL* would have been added to the list of applications. Click on the **Configure and Integrate** button beside the integration name, and configure the fields with the values that were noted prior. It should look like this:
4. Once you filled in the information, click **Save changes**. Your integration is now configured and you will see the status of the integration displayed alongside other integrations on the *Integrations* page. Integrations are synced daily. When data is available, the integration Status column will read **Connected** and the integration Message will read **Data available**.
# Ramp Integration Setup
### Getting Started
BalkanID recommends creating a separate service account for the purposes of this integration, instead of using personal or employee named accounts.
#### Requirements:
* ***Ramp Client ID***
* ***Ramp Client Secret***
#### Getting the Configuration
1. Head over to the Ramp Dashboard. Go to **Settings** in the bottom.
2. Click on **Ramp Developer** -> **Create new app.**
3. Fill in the details and click on **Create App**
4. Copy the *Client ID* and *Client Secret*
### Configure Ramp within your BalkanID tenant
1. Login to the BalkanID application and switch to the tenant you would like to add your integration to.
2. Head to *Integrations* > *Third Party Applications* and click **Add Integration**, select **Ramp**. Set up the *Primary Application owner* and the *Description*, if any.
3. *Ramp* would have been added to the list of applications. Click on the **Configure and Integrate** button beside the integration name, and configure the fields with the values that were noted prior. It should look like this:
4. Once you filled in the information, click **Save changes**. Your integration is now configured and you will see the status of the integration displayed alongside other integrations on the *Integrations* page. Integrations are synced daily. When data is available, the integration Status column will read **Connected** and the integration Message will read **Data available**.
# Salesforce Application Integration Setup
### Getting Started
BalkanID recommends creating a separate service account for the purposes of this integration, instead of using personal or employee named accounts.
#### Overview
You will:
1. Create an External Client App in Salesforce
2. Enable OAuth with JWT Bearer Flow
3. Configure OAuth policies
4. Retrieve the Consumer Key
5. Create and assign a Permission Set to the integration user
#### Prerequisites
Before starting, ensure you have:
* Salesforce **Admin access**
* An **integration user** in Salesforce
* A certificate file (`salesforce.crt`) for JWT authentication *(provided separately beforehand)*
***
#### Create a new user profile:
1. Navigate to **Setup**
* Click the **Gear Icon** → **Setup**
2. Open **Profiles** page
* In Quick Find, search for `Profiles`
* Select **Users > Profiles.**
3. Click on "Create a new profile".
4. Clone the profile from a **Standard Platform User** profile. Give it a name.
5. Click **Save.**
6. Scroll down to the **Administrative Permissions** section and ensure the following are enabled:
* `View Setup and Configuration`
* `View Roles and Role Hierarchy`
7. Save the profile with updated permissions.
#### Creating an integration user:
1. Navigate to **Setup**
* Click the **Gear Icon** → **Setup**
2. Open **Users** page
* In Quick Find, search for `Users`
* Select **Users.**
3. Click on create a new user
4. Create a new user with the **Salesforce Platform** license. If the new user option isn't available, clone an existing user. You can fill in the below fields according to your convenience or follow this.
* **Firstname**: BalkanID
* **Lastname**: BalkanID
* **Alias**: BalkanID
* **User License**: Salesforce Platform (If you are unable to see it, you might already have exhausted your user quota for this license)
* **Role**: None
* **Profile**: Use the profile we created above
* **Username**:
* **Email**:
#### Step 1: Create External Client App
1. Navigate to **Setup**
* Click the **Gear Icon** → **Setup**
2. Open **External Client App Manager**
* In *Quick Find*, search for: `External Client App`
* Select **External Client App Manager**
* Path: **Apps → External Client App Manager**
3. Click **New External Client App**
4. Fill in basic details:
| Field | Value |
| ---------------------- | --------------------------------------- |
| **Name** | `BalkanID Extractor` |
| **API Name** | Auto-filled (e.g. `BalkanID_Extractor`) |
| **Contact Email** | Your email (used for verification) |
| **Distribution State** | `Local` |
***
#### Step 2: Enable OAuth & JWT Bearer Flow
**Configure OAuth Settings**
1. Enable:
* **Enable OAuth**
2. Provide:
* **Callback URL**: `https://balkanid.app`
3. Select **OAuth Scopes** *(exactly these)*:
* `Manage user data via APIs (api)`
* `Perform requests at any time (refresh_token, offline_access)`
**Enable JWT Flow**
1. Enable:
* **Enable JWT Bearer Flow**
2. Upload certificate:
* Upload `salesforce.crt`
3. Security setting:
* Uncheck **Require Proof Key for Code Exchange (PKCE)** *(Not required for JWT flow)*
4. Click **Create**
***
#### Step 3: Configure OAuth Policies
After creating the app:
1. Open the app → **Policies** tab
2. Click **Edit**
**OAuth Policies**
| Setting | Value |
| ------------------- | ------------------------------------------------------------------------------ |
| **Permitted Users** | `Admin approved users are pre-authorized` |
| **IP Relaxation** | Configure as needed *(recommended: Relax IP restrictions for backend systems)* |
**App Policies**
* This will be configured **after creating the Permission Set (Step 5)**
3. Click **Save**
***
#### Step 4: Retrieve Consumer Key
1. Open the app → **Settings** tab
2. Expand **OAuth Settings**
3. Click **Consumer Key and Secret**
4. Complete identity verification (via email)
**Save the following:**
| Field | Usage |
| ---------------------------- | ---------------------------------------------------- |
| **Consumer Key (Client ID)** | Used as `app_consumer_key` in BalkanID configuration |
***
#### Step 5: Create Permission Set & Assign to Integration User
**5.1 Create Permission Set**
| Field | Value |
| ------------ | -------------------- |
| **Label** | `BalkanID Extractor` |
| **API Name** | `BalkanID_Extractor` |
| **License** | `None` |
**5.2 Add Required System Permissions**
| Permission | Purpose |
| ----------------- | ------------------------------------- |
| **API Enabled** | Required for API access (REST / SOQL) |
| **View All Data** | Read access to all required objects |
***
**5.3 Assign Permission Set**
* Assign this Permission Set to your **integration user**
**5.4 Link Permission Set to External Client App**
1. Go back to **External Client App → Policies**
2. Edit **App Policies**
3. Add the created **Permission Set**
4. Save changes
### Configure Salesforce in your BalkanID tenant
1. Login to the BalkanID application and switch to the tenant you would like to add your integration to.
2. Head to *Integrations* > **Add Integration**, select **Salesforce.**
3. Set up the *Primary Application owner (mandatory)* and the *Description*, if any. Set up Secondary Application Owner(s), if any.
Select the Extraction Type. From here, you can configure your application using one of the following methods:
1. **Direct integration** - Provide your Salesforce User Name and Consumer Key obtained above to set up a direct connection with BalkanID.
2. **SCIM integration** - Provide SCIM server credentials to set up a SCIM connection with BalkanID.
3. **Manual file upload** - Upload Entity and Entity Relations through a .CSV file upload. Contact the team for assistance with this.
4. **Automated upload using API -** You can upload data using our [Bulk APIs](https://developer.balkan.id/) with the help of an API key which will be provided to you. Please refer to the [entity](https://developer.balkan.id/bulk-entities-upload-api-early-access-12828095e0) and [entity relation](https://developer.balkan.id/bulk-entity-relations-upload-api-early-access-12828102e0) upload docs for specific instructions on uploading your data through the API.
4. Click on next to move onto *Optional Configuration.*
5. Fill **Optional configuration,** if required.
6. Once you filled in the information, click **Save**. Your integration is now configured and you will see the status of the integration displayed alongside other integrations on the *Integrations* page. When data is available, the integration Status will read **Connected** and the integration Message will read **Data available**.
#### Salesforce Certificate
{% file src="/files/tQvkTkMCtZP67nIXcVxA" %}
# Shopify Integration Setup
### Configure Shopify within your BalkanID tenant
1. Login to the BalkanID application and switch to the tenant you would like to add your integration to.
2. Head to *Integrations* > **Add Integration**, select **Shopify**.
3. Set up the *Primary Application owner (mandatory)* and the *Description*, if any. Set up Secondary Application Owner(s), if any. Select the Extraction Type. From here, you can configure your application using the following method:
1. **Direct integration** - Provide your Shop name and Access token to set up a direct connection with BalkanID.
4. Click on next to move onto *Optional Configuration.*
5. Fill **Optional configuration,** if required.
6. Once you filled in the information, click **Save**. Your integration is now configured and you will see the status of the integration displayed alongside other integrations on the *Integrations* page. When data is available, the integration Status column will read **Connected** and the integration Message will read **Data available**.
# SAP Integration Setup
### Getting Started
BalkanID recommends creating a separate service account for the purposes of this integration, instead of using personal or employee named accounts.
#### Requirements
* ***Auth-URL***
* ***Api-URL***
* ***Client ID***
* ***Client Secret***
* ***Org Name***
#### Getting the Configuration
1. Install the *Cloud Foundry Command Line Interface* (CLI)
Follow the readme from the link.
[V7 CLI Installation Guide](https://github.com/cloudfoundry/cli/wiki/V7-CLI-Installation-Guide)
2. Test the cli `cf` . You should see a list of Cloud Foundry commands**.**If the above screen appeared, the CLI has been installed successfully.
3. Login using CLI - `cf login -a `.
4. Navigate to the space in your subaccount to view details. Follow the below procedure to generate configurations.
5. Enter the following command in terminal. `cf target -o ** -s **` **For example**: `cf target -o my-org -s DEV`
1. In your subaccount, create a service instance with the api-access plan.
2. Enter the following command: `cf create-service xsuaa apiaccess **` For example: `cf create-service xsuaa apiaccess my-access`
This command creates an entry for the OAuth client in the database of the authorization server.
3. Create a service key. Enter the following command:
`cf create-service-key ** **`
For example:
`cf create-service-key my-access my-access-key`
The system creates the credentials for the OAuth client.
4. Get the credentials for the OAuth client
Enter the following command:
`cf service-key `
For example:
`cf service-key my-access my-access-key`
Getting key my-access-key for service instance my-access as my-user...
```json
{
"apiurl": "[]()",
"clientid": "aa-bb-cccc11c1-d222-333e-44f4-g5g55ggg555g!a6666",
"clientsecret": "aA1B2CcCCC3dDd+ee444fFF5ggG=",
"identityzone": "my-subdomain",
"identityzoneid": "a11aaaa1-22b2-33c3-dd44-5555f5555f55",
"sburl": "[]()",
"tenantid": "a11aaaa1-22b2-33c3-dd44-5555f5555f55",
"tenantmode": "dedicated",
"uaadomain": "[authentication.eu10.hana.ondemand.com]()",
"url": "[]()",
"verificationkey": "-----BEGIN PUBLIC KEY-----sadklfjdsaflja
...-----END PUBLIC KEY-----",
"xsappname": "aa-bbbb11b1-c222-333d-44e4-f5f55fff555f!a6666"
}
```
**url is equal to authUrl, org name is identityzone**
### Configure SAP within your BalkanID tenant
1. Login to the BalkanID application and switch to the tenant you would like to add your integration to.
2. Head to *Integrations* > *Third Party Applications* and click **Add Integration**, select **SAP**. Set up the *Primary Application owner* and the *Description*, if any.
3. *SAP* would have been added to the list of applications. Click on the **Configure and Integrate** button beside the integration name, and configure the fields with the values that were noted prior. It should look like this:
4. Once you filled in the information, click **Save changes**. Your integration is now configured and you will see the status of the integration displayed alongside other integrations on the *Integrations* page. Integrations are synced daily. When data is available, the integration Status column will read **Connected** and the integration Message will read **Data available**.
# SendGrid Integration Setup
### Getting Started
Use this guide to connect SendGrid to your BalkanID tenant. You will need an API key from SendGrid and access to the Integrations section in BalkanID.
#### Requirements:
Before you begin, collect the following value from SendGrid:
* **API Key**
### Configure SendGrid within your BalkanID tenant
1. To create the **API Key**, sign in to SendGrid at with an account that can manage API keys.
2. Navigate to **Settings > API Keys**, then click **Create API Key**.
3. Enter a name for the key and choose **Custom Access**. Give read access to **Teammates**, **Subusers** and **User Account** (see [Integration Scopes](#integration-scopes) below), then click **Create & View**.
4. Copy the key straight away. SendGrid shows it only once — if you lose it you will need to create a new key.
5. In BalkanID, go to **Integrations** and click **Add integration**.
Integrations page, with Add integration
6. Search for **SendGrid**, select it, then click **Next**.
SendGrid selected in Connect a new application
7. Under **Data Sync Preferences**, choose the entity types you want BalkanID to sync. Everything supported is selected by default. Users are always synced and cannot be deselected, and the relationships between the types you select are synced for you.
Data Sync Preferences and the required API scopes
8. Under **Select Extraction Type**, choose **Direct Configuration**, then paste the key you copied into **API Key**.
Direct Configuration credential field
9. Click Next to move onto Optional Configuration.
10. Fill **Optional Configuration**, if required.
Optional Configuration
11. Once you have filled in the information, click **Save**. Your integration is now configured and you will see the status of the integration displayed alongside other integrations on the Integrations page. When data is available, the integration Status column will read **Connected** and the integration Message will read **Data available**.
### Integration Scopes
| Read Only Scopes | Lifecycle Management Scopes |
| ----------------------------------------------------------------------------------------------------------------------------------------------- | --------------------------- |
| **Teammates (Read)** — the teammates on your account, the permissions each one holds, and invitations that have been sent but not yet accepted. | N/A |
| **Subusers (Read)** — your subusers, and which teammates can act on each one. | N/A |
| **User Account (Read)** — the account name, used to label the access BalkanID reads. | N/A |
BalkanID checks what the key is allowed to read before it starts, and skips anything it cannot reach. A key with fewer permissions produces a smaller picture of your account rather than a failed sync, so you can start narrow and widen it later.
A teammate's role in SendGrid is one of **Owner**, **Admin** or **Teammate**. BalkanID reviews the role alongside the individual permissions granted with it, so a teammate on a long list of custom permissions is visible as more than just "Teammate".
Teammates who have been invited but have not yet accepted are shown as inactive users rather than being left out, so a pending invitation to a sensitive account is still something you can review and revoke.
Subuser access is kept separate from account-wide access. Where a teammate can only act on particular subusers, a review shows exactly which ones.
# Sentry Integration Setup
### Getting Started
BalkanID recommends creating a separate service account for the purposes of this integration, instead of using personal or employee named accounts.
#### Requirements:
* ***Token***
* ***Organization Slug***
#### Getting the Credentials
1\. Sign into *Sentry* and go to *Settings.*
2\. Note down your Organization Slug.
3\. Follow the below steps:
1. Go to the *Integrations* tab and press **Create new integration** and select internal integration.
2. Select the scopes given in the below image
3. Save Changes
4. Scroll to the bottom and note down the token. Store the token securely for future uses.
### Configure Sentry within your BalkanID tenant
1. Login to the BalkanID application and switch to the tenant you would like to add your integration to.
2. Head to *Integrations* > *Third Party Applications* and click **Add Integration**, select **Sentry**. Set up the *Primary Application owner* and the *Description*, if any.
3. *Sentry* would have been added to the list of applications. Click on the **Configure and Integrate** button beside the integration name, and configure the fields with the values that were noted prior. It should look like this:
4. Once you filled in the information, click **Save changes**. Your integration is now configured and you will see the status of the integration displayed alongside other integrations on the *Integrations* page. Integrations are synced daily. When data is available, the integration Status column will read **Connected** and the integration Message will read **Data available**.
# Slack Application Integration Setup
### Getting started
BalkanID recommends creating a separate service account for the purposes of this integration, instead of using personal or employee named accounts.
Slack can be integrated to BalkanID directly from the UI via **OAuth**. To configure Slack, you will need to be an administrator on the organization Slack account.
### Configure Slack with your BalkanID tenant
1. Login to the BalkanID application and switch to the tenant you would like to add your integration to.
2. Head to *Integrations* > **Add Integration**, select **Slack.**
3. Set up the *Primary Application owner (mandatory)* and the *Description*, if any. Set up Secondary Application Owner(s), if any.
Under **Direct Configuration**, you will see two options:
1. **Bot Token:** Use this option if your Slack workspace is on a Free, Pro, or Business+ plan.
2. **User Token:** Use this option if your Slack workspace is on an Enterprise Grid plan and you want to enable [Slack credential discovery](/getting-started/entitlement-data-discovery/credentials-discovery/slack-credentials). Clicking on this option will populate both Bot and User OAuth tokens.
4. This will redirect you to a page asking you if you want to install the application into your workspace. If there are multiple available workspaces, select the desired one from the drop-down and click on Install.
1. Note: For Enterprise-Grid organizations, you need to navigate to your enterprise admin console at → Manage Organization → Expand the **Integrations** section on the sidebar → Installed apps → Click on the three dots next to the BalkanID App → Add to more Workspaces → and Select the workspace you want to add it to.\

5. Click on next to move onto *Optional Configuration.*
6. Fill **Optional configuration,** if required.
7. Once you filled in the information, click **Save**. Your integration is now configured and you will see the status of the integration displayed alongside other integrations on the *Integrations* page. When data is available, the integration Status will read **Connected** and the integration Message will read **Data available**.
# Smartsheet Integration Setup
### Getting Started
BalkanID recommends creating a separate service account for the purposes of this integration, instead of using personal or employee named accounts.
The steps below will guide you through configuring your Smartsheet integration.
#### Requirement:
* ***API Key***
#### Obtaining API Key from Smartsheet
1\. Log in to Smartsheet () and navigate to the profile menu.
2\. Go to **Apps & Integrations → API Access → Generate a new access token** to generate access token and give it a name. Copy the access token to your clipboard.
### Configuring Smartsheet in your BalkanID tenant
1. Login to the BalkanID application and switch to the tenant you would like to add your integration to.
2. Head to *Integrations* > *Third Party Applications* and click **Add Integration**, select **Smartsheet**. Set up the *Primary Application owner* and the *Description*, if any.
3. *Smartsheet* would have been added to the list of applications. Click on the **Configure and Integrate** button beside the integration name, and configure the fields with the values that were noted prior. It should look like this:
4. Once you filled in the information, click **Save changes**. Your integration is now configured and you will see the status of the integration displayed alongside other integrations on the *Integrations* page. Integrations are synced daily. When data is available, the integration Status column will read **Connected** and the integration Message will read **Data available**.
# Snowflake Integration setup
### Getting Started
#### Requirements:
* RSA Public Key (provided by the team)
* Account ID
* Integration User name
* Integration User role
#### Steps to obtain the necessary fields to configure snowflake
1. Login to your Snowflake account
2. Create a user by going to *Settings* > *Users & Roles* and click on **Create User**. You should be presented with the following:
Fill in the details, and make a note of the User Name:
3. Now go into `Worksheets`, create a new Worksheet, and execute the following SQL commands one by one.
* First we will create a role for this user to grant it the necessary permissions:
```
CREATE ROLE BALKANID_ROLE;
GRANT MANAGE GRANTS ON ACCOUNT TO ROLE BALKANID_ROLE;
```
* In order to avail [credential discovery](/getting-started/entitlement-data-discovery/credentials-discovery/snowflake-credentials), you need to grant these permissions as well:
```
GRANT USAGE ON WAREHOUSE COMPUTE_WH TO ROLE BALKANID_ROLE;
GRANT IMPORTED PRIVILEGES ON DATABASE SNOWFLAKE TO ROLE BALKANID_ROLE;
GRANT ROLE ACCOUNTADMIN TO ROLE BALKANID_ROLE;
```
***Note:** Replace `COMPUTE_WH` with the name of the warehouse that will be used by the integration user.*
* Then we assign it to our user:
```
GRANT ROLE BALKANID_ROLE TO USER BALKAN_ID;
```
4. Acquire the public key from our team.
5. Now open up the public key file, copy the public key without the `----BEGIN PUBLIC KEY-----` header and `----END PUBLIC KEY-----` footer, and run the following command on your snowflake notebook or shell. If it is a file, you need to escape all the newline characters.\
`ALTER USER BALKAN_ID SET RSA_PUBLIC_KEY='{PUBLIC_KEY}'`
6. Acquire your account identifier by following the instructions given here:
[Account Identifiers | Snowflake Documentation](https://docs.snowflake.com/en/user-guide/admin-account-identifier#option-2-account-locator-in-a-region)
### Configure Snowflake in your BalkanID tenant
1. Login to the BalkanID application and switch to the tenant you would like to add your integration to.
2. Head to **Integrations** > **Add Integration**, select **Snowflake**.
3. Set up the *Primary Application owner* and the *Description*, if any.\
\
Now, under Direct Configuration, fill the fields with the values that were noted prior.
1. **Account ID** will be your account identifier
2. **Username** will be the username of the user you created for the integration (BALKAN\_ID)
3. **Role** will be the name of the role which has been granted the `MANAGE GRANTS` permission and has been granted to the integration user.
4. **Warehouse** will be the name of the warehouse that the integration user is configured to use for running discovery queries (for example, `COMPUTE_WH`
4. Once you filled in the information, click **Next** to install the application. Your integration is now configured and you will see the status of the integration displayed alongside other integrations on the *Integrations* page. Integrations are synced daily. When data is available, the integration Status column will read **Connected** and the integration Message will read **Data available**.
# Splunk Integration Setup
### Getting Started
BalkanID recommends creating a separate service account for the purposes of this integration, instead of using personal or employee named accounts.
#### Requirements:
* ***The URL for the API endpoint***
* ***Access Token***
#### Getting the Credentials
1. On the *Splunk admin* login, navigate to S*ettings*.
2. Open “**Users**” and create a new user for our extractor, assign them the **admin** role, and click **Save**.
3. Now we will generate an access token for the user. Open *Settings* again, and click on **Tokens** and click on **New Token**. Enter the *username* of the extractor user, and the *audience* and *expiry* (leave it blank to use the default) and click on **Create**. The token will appear in the small box labelled as **Token**. Note the code down and keep it safe.
4. Find your Splunk Enterprise deployment’s REST API base URL. Go to *Settings* > *General Settings*. Note down the value of the **management port**. Your API will be located at `[https://[IP_ADDR]:8089]()` if `IP_ADDR` is the IP address of your Splunk deployment.
#### Authorization
* Authorization is via the account access token. It requires the `admin` role for viewing all knowledge objects and their permissions.
### Configuring Splunk within your BalkanID tenant
1. Login to the BalkanID application and switch to the tenant you would like to add your integration to.
2. Head to *Integrations* > *Third Party Applications* and click **Add Integration**, select **Splunk**. Set up the *Primary Application owner* and the *Description*, if any.
3. *Splunk* would have been added to the list of applications. Click on the **Configure and Integrate** button beside the integration name, and configure the fields with the values that were noted prior. It should look like this:
4. Once you filled in the information, click **Save changes**. Your integration is now configured and you will see the status of the integration displayed alongside other integrations on the *Integrations* page. Integrations are synced daily. When data is available, the integration Status column will read **Connected** and the integration Message will read **Data available**.
# Sumologic Integration Setup
### Getting Started
BalkanID recommends creating a separate service account for the purposes of this integration, instead of using personal or employee named accounts.
#### Requirements:
* ***Access ID***
* ***Access Key***
* ***Zone***
* ***Tenant Name***
#### Getting the Configuration
1. Login to your Sumologic account.
2. Under the `Administration` tab, select `Security`.
3. In the `Security` tab, select `Access keys` subtab and click on `Add Access Key`.
4. Add an access key name and hit `save`.
5. Copy the `Access ID` and `Access Key`
6. Visit - [Sumologic deployment region](https://help.sumologic.com/docs/api/getting-started/#aws-region-by-sumo-deployment) and select the `zone` from the table given based on your deployment.
7. Paste the copied `Access ID` and `Access Key` along with the `Zone` and your `Tenant name`(Name of the organisation) in your BalkanID App Integration Setting
### Configure Sumologic within your BalkanID tenant
1. Login to the BalkanID application and switch to the tenant you would like to add your integration to.
2. Head to *Integrations* > *Third Party Applications* and click **Add Integration**, select **Sumologic**. Set up the *Primary Application owner* and the *Description*, if any.
3. *Sumologic* would have been added to the list of applications. Click on the **Configure and Integrate** button beside the integration name, and configure the fields with the values that were noted prior. It should look like this:
4. Once you filled in the information, click **Save changes**. Your integration is now configured and you will see the status of the integration displayed alongside other integrations on the *Integrations* page. Integrations are synced daily. When data is available, the integration Status column will read **Connected** and the integration Message will read **Data available**.
# Tableau Integration Setup
### Getting Started
BalkanID recommends creating a separate service account for the purposes of this integration, instead of using personal or employee named accounts.
#### Requirements:
A token in Tableau has exactly the access of the user who created it, so its recommended to use a token belonging to a **Site or Server Administrator**.
* ***Tableau Instance URL -*** The URL of your Tableau Server or Tableau Cloud instance.
* ***Site Name -*** The name of the Tableau site to connect to.
* ***Personal Access Token Name -*** The name of the Personal Access Token created in Tableau.
* ***Personal Access Token Secret -*** The secret value generated for the Personal Access Token.
#### Getting the Configuration
1. Open your *Tableau Page*, and navigate to *Settings* and search for *Personal Access Tokens.*
2. Now enter a Token name (*Personal Access Token Name*) and click on *Create Token.*
3. Copy the token and save it. This will be your *Personal Access Token Secret.* You will have to enter it within the BalkanID application when prompted.
4. For Tableau Instance URL, copy this part of your URL:
5. For Site Name, copy this part of your URL:
### Configure integration within your BalkanID tenant
1. Login to the BalkanID application and switch to the tenant you would like to add your integration to.
2. Head to *Integrations* > **Add Integration**, select **Tableau.**
3. Set up the *Primary Application owner (mandatory)* and the *Description*, if any. Set up Secondary Application Owner(s), if any.
Select the Extraction Type. From here, you can configure your application using one of the following methods:
1. **Direct integration** - Provide your Tableau Instance URL, Site name, Personal access token name and Personal access token secret obtained above to set up a direct connection with BalkanID.
2. **SCIM integration** - Provide SCIM server credentials to set up a SCIM connection with BalkanID.
3. **Manual file upload** - Upload Entity and Entity Relations through a .CSV file upload. Contact the team for assistance with this.
4. Click on next to move onto *Optional Configuration.*
5. Fill **Optional configuration,** if required.
6. Once you filled in the information, click **Save**. Your integration is now configured and you will see the status of the integration displayed alongside other integrations on the *Integrations* page. When data is available, the integration Status will read **Connected** and the integration Message will read **Data available**.
# Twingate Integration Setup
### Getting Started
BalkanID recommends creating a separate service account for the purposes of this integration, instead of using personal or employee named accounts.
#### Requirements:
* ***Tenant Name -*** This is the same as your tenant URL `https://.twingate.com`
* ***API Token***
Create your tenant API Token with *Read only permissions.*
#### Getting the Configuration
1. Open your *Twingate Tenant Page*, and navigate to *Settings*.
2. Now go to API and click on `Generate Token` .
3. Click on **Generate and Copy** the token by clicking on the `Copy` button.
4. Copy the token and save it. You will have to enter it within the BalkanID application when prompted.
5. Copy the tenant name and save it. You will be prompted to enter it within the BalkanID application.
### Configure integration within your BalkanID tenant
1. Login to the BalkanID application and switch to the tenant you would like to add your integration to.
2. Head to *Integrations* > **Add Integration**, select **Twingate.**
3. Set up the *Primary Application owner (mandatory)* and the *Description*, if any. Set up Secondary Application Owner(s), if any.
Select the Extraction Type. From here, you can configure your application using one of the following methods:
1. **Direct integration** - Provide your Twingate Tenant Name and API Key obtained above to set up a direct connection with BalkanID.
2. **SCIM integration** - Provide SCIM server credentials to set up a SCIM connection with BalkanID.
3. **Manual file upload** - Upload Entity and Entity Relations through a .CSV file upload. Contact the team for assistance with this.
4. **Automated upload using API -** You can upload data using our [Bulk APIs](https://developer.balkan.id/) with the help of an API key which will be provided to you. Please refer to the [entity](https://developer.balkan.id/bulk-entities-upload-api-early-access-12828095e0) and [entity relation](https://developer.balkan.id/bulk-entity-relations-upload-api-early-access-12828102e0) upload docs for specific instructions on uploading your data through the API.
4. Click on next to move onto *Optional Configuration.*
5. Fill **Optional configuration,** if required.
6. Once you filled in the information, click **Save**. Your integration is now configured and you will see the status of the integration displayed alongside other integrations on the *Integrations* page. When data is available, the integration Status will read **Connected** and the integration Message will read **Data available**.
# Zoom Integration Setup
### Getting Started
BalkanID recommends creating a separate service account for the purposes of this integration, instead of using personal or employee named accounts.
#### Requirements:
* ***Client ID***
* ***Client Secret***
* ***Tenant ID(Account ID)***
#### Getting the Configuration
1\. On the Zoom Admin console, navigate to the users section and click **Add user**.
2\. Activate the user:
* Users → View
* Role Management → View
* Groups → View
* Zoom for developers → Server-to-Server OAuth app → Edit
Create a role from the roles dashboard and grant it the following permissions:
3\. Add the user you created to the role that you set up.
4\. Login as the user.
5\. Head over to the apps page and create a “**Server-To-Server OAuth**” application.
6\. Enter your details and setup your API scopes as mentioned below:
| Scope | Why it's needed | Required / Optional |
| --------------------------------------- | ------------------------------------------------------------------------------------------ | ---------------------- |
| `user:read:list_users:admin` | Read account users and key attributes. This is the core identity data for the integration. | **Required** |
| `group:read:list_groups:admin` | Read user groups in the account. | Optional (Recommended) |
| `group:read:list_members:admin` | Read group membership. | Optional (Recommended) |
| `group:read:administrator:admin` | Read group administrators. | Optional |
| `role:read:list_roles:admin` | Read account roles. | Optional (Recommended) |
| `role:read:role:admin` | Read privileges granted by each role. | Optional (Recommended) |
| `contact_group:read:list_groups:admin` | Read shared contact groups. | Optional |
| `contact_group:read:list_members:admin` | Read contact group members, including nested groups. | Optional |
| `division:read:list_divisions:admin` | Read account divisions. | Optional |
| `division:read:member:admin` | Read division membership. | Optional |
### Configure Zoom within your BalkanID tenant
1. Login to the BalkanID application and switch to the tenant you would like to add your integration to.
2. Head to *Integrations* > **Add Integration**, select **Zoom.**
3. Set up the *Primary Application owner (mandatory)* and the *Description*, if any. Set up Secondary Application Owner(s), if any.
4. Click on next to move onto *Optional Configuration.*
5. Fill **Optional configuration,** if required.
6. Once you filled in the information, click **Save**. Your integration is now configured and you will see the status of the integration displayed alongside other integrations on the *Integrations* page. When data is available, the integration Status will read **Connected** and the integration Message will read **Data available**.
# On-Premise Active Directory Agent
Integrate On-Prem AD agent
## Table of contents
1. [Overview](#overview-balkanid-active-directory-agent)
2. [Installation](/getting-started/setting-up-your-tenant/application-integrations/direct-application-integrations/on-premise-active-directory-agent/install-the-agent)
3. [Configuration](/getting-started/setting-up-your-tenant/application-integrations/direct-application-integrations/on-premise-active-directory-agent/configuration)
* [Heartbeat Mode](/getting-started/setting-up-your-tenant/application-integrations/direct-application-integrations/on-premise-active-directory-agent)
* [API-only mode](/getting-started/setting-up-your-tenant/application-integrations/direct-application-integrations/on-premise-active-directory-agent/configuration#general-configuration)
4. [Two ways to running the agent](/getting-started/setting-up-your-tenant/application-integrations/direct-application-integrations/on-premise-active-directory-agent/running-the-agent)
* [Using TUI (Terminal User Interface)](/getting-started/setting-up-your-tenant/application-integrations/direct-application-integrations/on-premise-active-directory-agent/running-the-agent#using-tui-terminal-user-interface)
* [Running as Windows Service (Headless)](/getting-started/setting-up-your-tenant/application-integrations/direct-application-integrations/on-premise-active-directory-agent/running-the-agent#running-as-windows-service-headless)
5. [Service management and troubleshooting](/getting-started/setting-up-your-tenant/application-integrations/direct-application-integrations/on-premise-active-directory-agent/service-management-and-troubleshooting)
***
### Overview: BalkanID Active Directory Agent
The BalkanID Active Directory (AD) Agent is a **high-performance, cross-platform service** designed to securely extract and manage identity data from **on-premises Active Directory environments**. Written in Go, the agent runs within the customer’s network and acts as a controlled bridge between on-prem AD and the BalkanID identity governance platform.
The agent exposes a **RESTful API** that enables BalkanID to query and manage Active Directory objects such as users, groups, group memberships, and related metadata—without requiring direct inbound access to the customer’s directory infrastructure.
***
### How the AD Agent Works
The AD Agent is deployed on a machine that has network access to the target Active Directory forest. Once configured, it communicates with BalkanID using one of two supported operating modes:
* **API-Only Mode (Recommended)**\
In API-only mode, the agent runs as a standalone REST service. BalkanID can directly invoke the agent’s APIs to retrieve or manage Active Directory data. This mode is typically used in environments where inbound access is permitted or when the agent is leveraged for custom workflows.
* **Heartbeat Mode**\
In this mode, the agent establishes an outbound connection to BalkanID at regular intervals (“heartbeats”). During each heartbeat, the agent:
* Authenticates using the configured API key
* Sends extracted data to BalkanID every 2 hours
This mode is ideal for environments with strict firewall rules, as it requires **no inbound connectivity** to the on-prem network.
# Install the agent
### Prerequisites
Before installing the AD Agent, ensure you have:
* **Administrator privileges** on the target machine
* **Network access** to your Active Directory domain controller(s) and LDAP(s) enabled on the Domain Controller(s)
* **Internet connectivity** to `https://cdn.balkanid.app/` for automatic agent updates (verify with `Test-NetConnection -ComputerName cdn.balkanid.app -Port 443`)
* Create a user account with appropriate AD permissions:\
Follow the below steps to configure permissions in AD:
* Go to individual domain controller (DC) machine >Active Directory Users and Computers App
* Go to properties of the DC (corp.example.com) > Security > Click Add.
* Add the below permission:
* "Read" Permission (Required for Application Discovery)
Kindly refer to [Configuration](/getting-started/setting-up-your-tenant/application-integrations/direct-application-integrations/on-premise-active-directory-agent/configuration#h_01j5r9r7pmaq7g0ck77yz4hxhm) for the appropriate scopes
* **(For Heartbeat Mode)** BalkanID credentials:
* Tenant ID
* Tenant Key
* Tenant Secret
* Integration ID
***
### Installation
#### Step 1: Download the Installer Script
Download the `install.ps1` script from the official BalkanID distribution URL:
* Direct link: [`install.ps1`](https://cdn.balkanid.app/files/balkanid/ad-agent/latest/install.ps1)
You can either:
* **Download via browser** and save it (e.g., to `C:\temp\` or `Downloads`), or
* **Download via PowerShell** (run in an elevated PowerShell window):
```powershell
Invoke-WebRequest `
-Uri "https://cdn.balkanid.app/files/balkanid/ad-agent/latest/install.ps1" `
-OutFile "C:\temp\install.ps1"
```
Adjust the `-OutFile` path as needed.
#### Step 2: Run the Installer
1. **Open PowerShell as Administrator**:
* Right-click on PowerShell
* Select "Run as Administrator"
2. **Run the installer**:
```powershell
.\install.ps1
```
The installer will:
* Download the latest AD Agent executable from the CDN
* Install it to `C:\Program Files\BalkanID\ad-agent\`
* Create configuration directory at `C:\ProgramData\BalkanID\ad-agent\`
* Create logs directory at `C:\ProgramData\BalkanID\ad-agent\logs\`
* Install the Windows service `BalkanIDADAgent`
#### Step 3: Verify Installation
After installation completes, verify the service is installed:
```powershell
Get-Service -Name "BalkanIDADAgent"
```
You should see the service listed. The service may be stopped initially until configuration is complete.
# Configuration
### Initial Configuration
After installation, you need to configure the agent before it can connect to your Active Directory and BalkanID.
#### Configuration File Location
The configuration file is located at:
```
C:\ProgramData\BalkanID\ad-agent\config.yaml
```
#### Use the TUI (Terminal User Interface) for Configuration
The easiest way to configure the agent is using the built-in TUI:
1. **Stop the service** (if it's running):
```powershell
Stop-Service -Name "BalkanIDADAgent" -Force
```
2. **Launch the configuration TUI**:
```powershell
& "C:\Program Files\BalkanID\ad-agent\BalkanID AD Agent.exe" --configure
```
This opens the configuration interface without starting the HTTP server.
3. **Navigate the TUI**:
* Use **Arrow Keys** to navigate menus
* Press **Enter** to select options
* Press **Tab** to move between form fields
* Press **Esc** or **Q** to go back/quit
4. **Configure Forest Domain** (First Time Setup):
* The TUI will prompt you to configure your forest domain
* Under Configuration > Manager Forest Configuration > Add new forest
* Enter the following information:
* **Forest Domain**: e.g., `corp.example.com`
* **LDAP Host**: Domain controller hostname or IP (e.g., `corp.example.com`)
* **LDAP Port**:
* `636` for LDAPS (TLS/SSL) - **Recommended**
* `389` for LDAP (non-encrypted)
* **Base DN**: e.g., `DC=corp,DC=example,DC=com`
* **Bind Username**: User account DN or Logon Name (e.g., `CN=ADAgent,CN=Users,DC=corp,DC=example,DC=com` or `CORP\ADAgent`)
* **Bind Password**: Service account password
* **Use TLS**: `true` for LDAPS, `false` for LDAP
5. **Save Configuration**:
* After filling the form, select "Save" or press Enter
* The configuration will be written to `config.yaml`
6. **Test LDAP Connection**:
* From the Configuration Menu, select "Test LDAP Connection"
* Verify the connection succeeds
#### Multi-Domain Configuration
If you have multiple domains in your forest:
1. **Enable Global Configuration** for the forest under forest configuration
2. **Configure Child Domains**:
**Using the TUI (recommended):**
* Navigate to **"Manage Child Domains"**
* Choose **"🔍 Auto-Discover Child Domains"** to automatically detect domains in the forest and pre-populate them in the config
* Review the discovered domains and save
* If you need additional domains or want to override details, you can also add them manually:
* In the same screen, choose **"➕ Add New Child Domain"**
* Enter domain details:
* Domain Name: e.g., `na.corp.example.com`
* Base DN: e.g., `DC=na,DC=corp,DC=example,DC=com`
* Host: (optional, leave empty to use main host)
* Port: (optional, 0 to use main port)
**Or manually in `config.yaml`:**
```yaml
ad:
domains:
- name: "na.corp.example.com"
base_dn: "DC=na,DC=corp,DC=example,DC=com"
host: ""
port: 0
- name: "eu.corp.example.com"
base_dn: "DC=eu,DC=corp,DC=example,DC=com"
host: ""
port: 0
```
3. **UPN Suffixes** (Optional):
```yaml
ad:
upn_suffixes:
- "@corp.example.com"
- "@na.corp.example.com"
- "@eu.corp.example.com"
```
If not specified, UPN suffixes are automatically derived from configured domains.
***
### Configure extraction mode
The AD Agent supports multiple configuration options:
* [Heartbeat mode](#initial-configuration)
* [API-only mode (Recommended)](#general-configuration)
#### I. Heartbeat Mode
**Heartbeat Mode** enables automatic synchronization with the BalkanID platform. When enabled, the agent will:
* **Extract AD data** every 2 hours and upload to BalkanID
* **Fetch and process requests** from BalkanID every 10 minutes
* Automatically handle identity lifecycle operations:
* Create identities
* Update identities
* Delete identities
* Suspend identities
* Reactivate identities
* Process access requests and manage group memberships
AD Agent Heartbeat Mode
**Setting Up Heartbeat Mode**
1. **Setup on BalkanID application:**
1. Login to the BalkanID application as an administrator in your tenant.
2. Head to *Integrations* > **Add Integration**, select Active Directory**.**
3. Set up the *Primary Application owner (mandatory)* and the *Description*, if any. Set up Secondary Application Owner(s), if any.
4. Leave all the other fields empty. If you see anything in the API URL field, ensure to clear it.
5. Click on next to move onto *Optional Configuration.*
6. Configure your [fulfilment options](https://docs.balkan.id/getting-started/setting-up-your-tenant/application-integrations/fulfillment-options) as you see fit in this page. You can configure your [multi-review settings](https://docs.balkan.id/user-access-reviews/access-review-management/configuring-access-reviews-and-campaigns/configuring-integration-specific-multi-level-review-settings) here as well.
7. Once done, click on the "*Save Changes*" button.
8. Once all this is done, please reach out to the support team to give you the integration ID, tenant ID and the tenant API key and secret. This will be required while configuring the AD agent.
2. **Launch the TUI**:
```powershell
& "C:\Program Files\BalkanID\ad-agent\BalkanID AD Agent.exe" --configure
```
3. **Navigate to Configuration Menu**:
* Select "Edit Agent Configuration" to modify settings
4. **Configure Heartbeat Mode**:
You need to configure the following in the `auth` section (contact the support team):
* **Tenant ID**: Your BalkanID tenant identifier (e.g., `01xxx`)
* **Tenant Key**: Your BalkanID tenant key
* **Tenant Secret**: Your BalkanID tenant secret
* **Integration ID**: Your BalkanID integration ID
5. **Enable Heartbeat Mode**:
In the `server` section, set:
* **Heartbeat Mode**: `true`
6. **Manual Configuration** (Alternative):
If you prefer to edit the config file directly, open:
```
C:\ProgramData\BalkanID\ad-agent\config.yaml
```
And ensure it contains:
```yaml
server:
http_port: 5000
https_port: 5001
heartbeat_mode: true # Enable heartbeat mode
auth:
tenant_id: "01xxx" # Your tenant ID
tenant_key: "your-tenant-key" # Your tenant key
tenant_secret: "your-tenant-secret" # Your tenant secret
integration_id: "integration-uuid" # Your integration ID
```
7. **Verify Network Access**:
Ensure the machine can reach:
* `api-integrators.balkanid.app` (for GraphQL API)
* `balkanid.app` (for REST API)
#### II. API-only mode
For **non-heartbeat mode** (API-only mode), configure the agent to expose a REST API for manual AD operations.
**Basic Configuration**
1. **AD Connection Settings (please edit the `corp` field based on your configuration)**:
```yaml
ad:
host: "corp.example.com"
port: 636 # 636 for LDAPS, 389 for LDAP
base_dn: "DC=corp,DC=example,DC=com"
username: "CN=ADAgent,CN=Users,DC=corp,DC=example,DC=com"
password: "your-service-account-password"
use_tls: true # true for LDAPS
```
2. **Server Settings**:
```yaml
server:
http_port: 5000
https_port: 5001
heartbeat_mode: false # Disable heartbeat mode
```
3. **Authentication**:
```yaml
auth:
api_key: "your-api-key" # Generate via TUI or manually
```
AD Agent API Mode
**HTTPS/TLS Configuration**
To enable HTTPS for the REST API:
1. **Generate Self-Signed Certificate** (via TUI):
* Navigate to "Generate Self-Signed TLS Certificate"
* The TUI will create certificates and update the config automatically
2. **Or Use Your Own Certificates**:
```yaml
server:
tls_cert: "C:\ProgramData\BalkanID\ad-agent\cert.pem"
tls_key: "C:\ProgramData\BalkanID\ad-agent\key.pem"
```
**Setup on BalkanID application:**
1. Login to the BalkanID application as an administrator in your tenant.
2. Head to *Integrations* > **Add Integration**, select Active Directory**.**
3. Set up the *Primary Application owner (mandatory)* and the *Description*, if any. Set up Secondary Application Owner(s), if any.
4. Provide the required configuration fields:
* **API URL**\
The URL of the web server or agent running on the target machine. This must be an externally accessible endpoint with an outbound IP address that is publicly reachable or accessible via the BalkanID proxy.
* **Domain**\
The Active Directory forest domain.\
*Example:* `corp.example.com`
* **API Key**\
When the integration is configured for the first time, BalkanID generates an API key automatically. The API key can be regenerated later using the **Regenerate API Key** option in the configuration settings.
5. Click on next to move onto *Optional Configuration.*
6. Configure your [fulfilment options](https://docs.balkan.id/getting-started/setting-up-your-tenant/application-integrations/fulfillment-options) as you see fit in this page. You can configure your [multi-review settings](https://docs.balkan.id/user-access-reviews/access-review-management/configuring-access-reviews-and-campaigns/configuring-integration-specific-multi-level-review-settings) here as well.
7. Once done, click on the "*Save Changes*" button. Your integration will process and extract your data in a few minutes. You can track the status of your integration from the snackbar we provide as shown in the below images.
8. You can view your application entitlement data once the status of application integration is "*Connected*" and you see the "*Data Available*" message in the table.
### Integration Scopes
Right click on the Domain Controller, and go to Properties > Security > Advanced tab and Click add, and choose the Account as the Principal, that is configured for the AD Agent
| Read Only (Access Review) Scopes under Security Tab Type: Allow, Applies to: This object and all descendant objects | Lifecycle Management Scopes under Delegate Control |
| ------------------------------------------------------------------------------------------------------------------- | -------------------------------------------------- |
| List Contents (Under Permissions Section) | Create/Delete all child objects |
| Read all properties (Under Permissions Section) | Modify permissions |
| Read permissions (Under Permissions Section) | Create/Delete InetOrgPerson objects |
| Real all properties (Under Properties Section) | Create/Delete Group objects |
| | Create/Delete Organization Unit Objects |
| | Create/Delete User Objects |
| | Under Properties, Write name |
| | Under Properties, Write Name |
| | Under Properties, Write Description |
| | Under Properties, Write msDS-PrincipalName |
# Running the agent
### Running the Agent
Before starting the service, ensure configuration is complete:
1. **Configure using TUI** (recommended):
```powershell
& "C:\Program Files\BalkanID\ad-agent\BalkanID AD Agent.exe" --configure
```
Complete all configuration steps, then exit the TUI.
2. **Or manually edit** `C:\ProgramData\BalkanID\ad-agent\config.yaml`
The agent can be run in two different ways:
#### I. Using the TUI (Terminal User Interface)
The TUI provides an interactive interface for monitoring and configuration:
1. **Launch TUI Mode**:\
Run the following command in the terminal.
```powershell
& "C:\Program Files\BalkanID\ad-agent\BalkanID AD Agent.exe" --tui
```
2. **TUI Features**:
* **Dashboard**: View service status, connection status, and logs
* **Configuration Menu**: Edit settings, test connections, regenerate API keys
* **Real-time Logs**: Monitor agent activity
* **Keyboard Shortcuts**:
* `C` - Open Configuration Menu
* `R` - Restart Server
* `Q` - Quit
* `U` - Check for Updates
3. **Exiting TUI**:
* Press `Q` to quit
* The server will stop when you exit the TUI
***
#### II. Running as Windows Service (Headless)
For production deployments, run the agent as a Windows service that operates in the background without a UI.
**Service Behavior**
When running as a service:
* The agent runs in **headless mode** (no UI)
* It automatically starts on system boot
* Logs are written to `C:\ProgramData\BalkanID\ad-agent\logs\`
* If **Heartbeat Mode** is enabled, it will:
* Extract AD data every 2 hours
* Process requests every 10 minutes
* Upload data to BalkanID automatically
**Step 1: Start the Service**
The service should already be installed by `install.ps1`. Start it:
```powershell
Start-Service -Name "BalkanIDADAgent"
```
**Step 2: Verify Service Status**
Check that the service is running:
```powershell
Get-Service -Name "BalkanIDADAgent"
```
The status should show `Running`.
**Step 3: Monitor Logs**
View the service logs:
```powershell
# View recent logs
Get-Content "C:\ProgramData\BalkanID\ad-agent\logs\*.log" -Tail 50
# View Windows Event Log
Get-EventLog -LogName Application -Source "BalkanIDADAgent" -Newest 10
```
# Service management and troubleshooting
### Service Management
#### Common Service Operations
**Check Service Status**:
```powershell
Get-Service -Name "BalkanIDADAgent"
```
**Start Service**:
```powershell
Start-Service -Name "BalkanIDADAgent"
```
**Stop Service**:
```powershell
Stop-Service -Name "BalkanIDADAgent" -Force
```
**Restart Service**:
```powershell
Restart-Service -Name "BalkanIDADAgent"
```
**View Service Details**:
```powershell
sc qc BalkanIDADAgent
sc query BalkanIDADAgent
```
#### Viewing Logs
**Application Logs** (per-day log files):
```powershell
# View latest log entries
Get-Content "C:\ProgramData\BalkanID\ad-agent\logs\*.log" -Tail 50
# Follow logs in real-time (PowerShell 7+)
Get-Content "C:\ProgramData\BalkanID\ad-agent\logs\*.log" -Wait -Tail 20
```
**Windows Event Log**:
```powershell
# View recent events
Get-EventLog -LogName Application -Source "BalkanIDADAgent" -Newest 10
# View all events
Get-EventLog -LogName Application -Source "BalkanIDADAgent"
```
#### Updating the Agent
The agent includes automatic update functionality:
1. **Check for Updates** (via TUI):
* Launch TUI: `& "C:\Program Files\BalkanID\ad-agent\BalkanID AD Agent.exe" --tui`
* Press `U` or navigate to "Check for Updates"
* Follow prompts to apply updates
2. **Manual Update**:
* Re-run `install.ps1` to download and install the latest version
* The installer will stop the service, update the binary, and restart the service
***
### Troubleshooting
#### Service Won't Start
1. **Check Event Log**:
```powershell
Get-EventLog -LogName Application -Source "BalkanIDADAgent" -Newest 10
```
2. **Verify Configuration**:
* Ensure `config.yaml` exists and is valid YAML
* Check that all required fields are populated
* Verify file permissions (service account needs read access)
3. **Test Configuration**:
```powershell
# Launch TUI to test configuration
& "C:\Program Files\BalkanID\ad-agent\BalkanID AD Agent.exe" --configure
```
* Navigate to "Test LDAP Connection"
* Verify connection succeeds
4. **Check Service Account Permissions**:
* Ensure the service account has appropriate AD permissions
* Verify the service account password is correct
#### LDAP Connection Issues
1. **Verify Network Connectivity**:
```powershell
Test-NetConnection -ComputerName "dc1.corp.example.com" -Port 636
```
2. **Test LDAP Connection Manually**:
```powershell
# Using ldapsearch (if available)
ldapsearch -H ldaps://dc1.corp.example.com:636 -x -D "CN=ADAgent,CN=Users,DC=corp,DC=example,DC=com" -w "password" -b "DC=corp,DC=example,DC=com" "(objectClass=user)"
```
3. **Check Firewall Rules**:
* Ensure ports 389 (LDAP) or 636 (LDAPS) are open
* Verify Windows Firewall allows outbound connections
4. **Verify Certificate** (for LDAPS):
* Ensure the domain controller certificate is valid
* Check certificate chain is trusted
#### Heartbeat Mode Issues
1. **Verify Credentials**:
* Check `tenant_id`, `tenant_key`, `tenant_secret`, and `integration_id` in config
* Ensure credentials are correct and not expired
2. **Test Network Connectivity**:
```powershell
Test-NetConnection -ComputerName "api-integrators.balkanid.app" -Port 443
Test-NetConnection -ComputerName "balkanid.app" -Port 443
```
3. **Check Logs**:
```powershell
Get-Content "C:\ProgramData\BalkanID\ad-agent\logs\*.log" -Tail 100
```
#### Configuration Issues
1. **Invalid YAML Syntax**:
* Use a YAML validator to check syntax
* Common issues: incorrect indentation, missing colons, unquoted special characters
2. **File Permissions**:
* Ensure the service account can read `config.yaml`
* Check file is not locked by another process
3. **Regenerate API Key**:
* Launch TUI: `& "C:\Program Files\BalkanID\ad-agent\BalkanID AD Agent.exe" --configure`
* Navigate to "Regenerate API Key"
* Save the new key securely
#### Update Issues
If automatic updates are not working:
1. **Verify Network Connectivity to Update Server**:
```powershell
# Test connectivity to CDN
Test-NetConnection -ComputerName cdn.balkanid.app -Port 443
# Test HTTPS access
Invoke-WebRequest -Uri "https://cdn.balkanid.app/" -UseBasicParsing
```
2. **Check Firewall Rules**:
* Ensure outbound HTTPS (port 443) traffic is allowed
* Verify proxy settings if your network uses a proxy
* Check if corporate firewall blocks CDN
3. **Review Update Logs**:
```powershell
Get-Content "C:\ProgramData\BalkanID\ad-agent\logs\*.log" | Select-String -Pattern "update|Update"
```
4. **Manual Update**:
* If automatic updates fail, manually download and run `install.ps1` from the [official URL](https://d3g543zyzzpcxb.cloudfront.net/files/balkanid/ad-agent/latest/install.ps1)
***
### Additional Resources
* **Configuration File Location**: `C:\ProgramData\BalkanID\ad-agent\config.yaml`
* **Logs Directory**: `C:\ProgramData\BalkanID\ad-agent\logs\`
* **Executable Location**: `C:\Program Files\BalkanID\ad-agent\BalkanID AD Agent.exe`
* **Service Name**: `BalkanIDADAgent`
For additional support, please contact your BalkanID support
# Workday admin integration setup
### Prerequisites
You will need a **Workday administrator** account with access to create Integration System Users and manage custom reports.
***
### Step 1 — Create an Integration System User (ISU) (You can skip this step if you already have an ISU for this purpose)
An ISU is a non-interactive service account used by BalkanID to authenticate with Workday. Using a dedicated ISU (rather than a personal account) ensures the integration is not disrupted if an employee leaves.
1. In Workday, search for **Create Integration System User** in the search bar.
2. Fill in:
* **User Name** — choose a descriptive name, e.g. `ISU_BalkanID_Admins`
* **Password** — set a strong password and note it down; this becomes the `password` credential
* **Do Not Allow UI Sessions** — check this box to restrict the account to API use only
3. Click **OK** to create the user.
> **Note:** The ISU username does **not** include the `@tenant` suffix when used with RaaS. Use just the username you set above (e.g. `ISU_BalkanID_Admins`) as the `username` credential.
***
### Step 2 — Grant report access to the ISU
The ISU needs permission to run the custom report that BalkanID reads.
1. Search for **Create Security Group** → select **Integration System Security Group (Unconstrained)**.
2. Name the group (e.g. `BalkanID_RaaS_Access`) and add the ISU as a member.
3. Search for the custom report (see Step 3 below) → go to **Actions → Edit** → **Share** tab.
4. Under **Authorized Workday Accounts**, add the ISU or the security group created above.
5. Click **OK**.
***
### Step 3 — Locate or create the custom report
BalkanID reads from a Workday custom report that lists active workers and their user-based security group memberships. The report must contain these three columns:
| Column name | Description |
| ------------------------------------- | -------------------------- |
| `Worker` | Worker display name |
| `Email - Work` | Work email address |
| `User-Based Security Groups for User` | Security group memberships |
If the report already exists in your tenant:
1. Search for **Custom Reports** in Workday.
2. Find the report named **CR - Audit Report - Extract User-Based Security Group Assignments for Active Workers** (or equivalent).
3. Proceed to Step 4.
If the report does not exist, create it:
1. Search for **Create Custom Report**.
2. Set **Report Type** to **Advanced**, **Data Source** to **All Active Workers**.
3. Add the three columns listed above.
4. Save the report.
***
### Step 4 — Enable the report as a Web Service (RaaS)
1. Open the custom report → **Actions → Web Service → Enable as a Web Service**.
2. Workday will display the **REST Endpoint URL**. It follows this format:
```
https:///ccx/service/customreport2///
```
3. Copy this URL — this is your `report_url` credential.
> **Do not** append `?format=csv` to the URL. BalkanID adds this automatically.
***
### Summary of credentials
| Field | Where to find it |
| ------------ | ---------------------------------------------- |
| `report_url` | REST endpoint URL from Step 4 |
| `username` | ISU username from Step 1 (no `@tenant` suffix) |
| `password` | ISU password set in Step 1 |
### Configure integration within your BalkanID tenant
1. Login to the BalkanID application and switch to the tenant you would like to add your integration to.
2. Head to *Integrations* > **Add Integration**, select **Workday Admins.**
3. Set up the *Primary Application owner (mandatory)* and the *Description*, if any. Set up Secondary Application Owner(s), if any.
Select the Extraction Type. From here, you can configure your application using one of the following methods:
1. **Direct integration** - Provide your Twingate Tenant Name and API Key obtained above to set up a direct connection with BalkanID.
2. **SCIM integration** - Provide SCIM server credentials to set up a SCIM connection with BalkanID.
3. **Manual file upload** - Upload Entity and Entity Relations through a .CSV file upload. Contact the team for assistance with this.
4. **Automated upload using API -** You can upload data using our [Bulk APIs](https://developer.balkan.id/) with the help of an API key which will be provided to you. Please refer to the [entity](https://developer.balkan.id/bulk-entities-upload-api-early-access-12828095e0) and [entity relation](https://developer.balkan.id/bulk-entity-relations-upload-api-early-access-12828102e0) upload docs for specific instructions on uploading your data through the API.
4. Click on next to move onto *Optional Configuration.*
5. Fill **Optional configuration,** if required.
6. Once you filled in the information, click **Save**. Your integration is now configured and you will see the status of the integration displayed alongside other integrations on the *Integrations* page. When data is available, the integration Status will read **Connected** and the integration Message will read **Data available**.
# Oracle E-Business Suite Integration Setup
### Overview: BalkanID Oracle E-Business Suite Agent
The BalkanID Oracle E-Business Suite (EBS) Agent is a **high-performance, cross-platform service** designed to securely extract and manage identity data from on-premise Oracle EBS deployment. Written in Go, the agent runs within the customer's network and acts as a controlled bridge between on-prem AD and the BalkanID identity governance platform.
The agent runs inside the customer network and makes only **outbound** connections, so EBS is never exposed to BalkanID. The agent connects to the EBS database and takes a\
full snapshot of users, responsibilities, and their assignments every 2 hours, and\
uploads it to BalkanID. Because the agent only initiates outbound HTTPS to BalkanID and outbound DB connections to EBS, it requires **no inbound connectivity** and fits environments with strict firewall rules. Each cycle uploads a full snapshot; the backend replaces the previous snapshot for the integration, so there is no incremental-reconciliation state to manage.
### Requirements
* **Oracle E-Business Suite R12.2** (works across R12.x; reads via `APPS` editioning views).
* Network reachability from the agent host to the EBS DB listener (default TCP `1521`, or `2484` for TCPS) and outbound HTTPS (`443`) to `api-integrators.balkanid.app` and `balkanid.app`.
* A read-only Oracle account (see below).
* BalkanID tenant credentials (`tenant_key`, `tenant_secret`) and an installed `oracle-ebs` integration on the tenant.
* A Linux (systemd) or Windows host.
# Installation & Configuration
### Requirements
* **Oracle E-Business Suite R12.2** (works across R12.x; reads via `APPS` editioning views).
* Network reachability from the agent host to the EBS DB listener (default TCP `1521`, or `2484` for TCPS) and outbound HTTPS (`443`).
* A read-only Oracle account (see below).
* BalkanID tenant credentials (`tenant_key`, `tenant_secret`) and an installed `oracle-ebs` integration on the tenant.
* A Linux (systemd) or Windows host.
***
#### Required database privileges
Create a dedicated, read-only account.
```sql
CREATE USER balkanid_ro IDENTIFIED BY "";
GRANT CREATE SESSION TO balkanid_ro;
-- Required:
GRANT SELECT ON apps.fnd_user TO balkanid_ro;
GRANT SELECT ON apps.fnd_responsibility_vl TO balkanid_ro;
GRANT SELECT ON apps.fnd_application_vl TO balkanid_ro;
GRANT SELECT ON apps.fnd_user_resp_groups_direct TO balkanid_ro;
GRANT SELECT ON apps.fnd_user_resp_groups_indirect TO balkanid_ro;
-- Recommended (reliable last-login; falls back to FND_USER.LAST_LOGON_DATE):
GRANT SELECT ON apps.fnd_logins TO balkanid_ro;
-- Recommended (FND_INIT_SQL session-SQL insight; skipped if not granted):
GRANT SELECT ON apps.fnd_profile_options TO balkanid_ro;
GRANT SELECT ON apps.fnd_profile_option_values TO balkanid_ro;
-- Optional (enriches users with full name / employee number; degrades gracefully):
GRANT SELECT ON apps.per_all_people_f TO balkanid_ro;
```
If your read account uses a schema other than `APPS`, set `schema:` in the config accordingly; the value is validated against `^[A-Za-z0-9_$#]{1,30}$` before use.
Verify from the agent host: `balkanid-ebs-agent --test-connection` pings the database, runs `SELECT 1 FROM DUAL`, and reports the visible `FND_USER` count.
### Installation
You can install the EBS Agent by using the following steps:
#### Linux (systemd)
```sh
curl -fsSL https://d3g543zyzzpcxb.cloudfront.net/files/balkanid/ebs-agent/latest/install.sh | sudo sh
sudo balkanid-ebs-agent --configure # enter tenant keys + DB connection
sudo systemctl enable --now balkanid-ebs-agent
```
The installer creates a dedicated `balkanid` service user, drops the static binary in `/usr/local/bin`, and registers + starts the hardened systemd unit.
| Path | Location |
| ------ | ------------------------------------------------------------------------------------------------ |
| Binary | `/usr/local/bin/balkanid-ebs-agent` |
| Config | `/etc/balkanid/ebs-agent/config.yaml` |
| Output | `/var/lib/balkanid/ebs-agent/` |
| Logs | journald (`journalctl -u balkanid-ebs-agent`) + per-day files `/var/log/balkanid/YYYY-MM-DD.log` |
#### Windows (service)
From an **elevated PowerShell**:
```powershell
Invoke-WebRequest -Uri "https://d3g543zyzzpcxb.cloudfront.net/files/balkanid/ebs-agent/latest/install.ps1" -OutFile "C:\temp\install.ps1"
.\install.ps1
& "C:\Program Files\BalkanID\ebs-agent\balkanid-ebs-agent.exe" --configure
Get-Service BalkanIDEBSAgent
```
| Path | Location |
| ------- | --------------------------------------------------------------------- |
| Binary | `C:\Program Files\BalkanID\ebs-agent\balkanid-ebs-agent.exe` |
| Config | `C:\ProgramData\BalkanID\ebs-agent\config.yaml` |
| Logs | per-day files `C:\ProgramData\BalkanID\ebs-agent\logs\YYYY-MM-DD.log` |
| Service | `BalkanIDEBSAgent` (auto-start, LocalSystem) |
### Configuration
The agent resolves its config path in this order: the `BALKAN_CONFIG_PATH` environment variable; then by platform — Linux root `/etc/balkanid/ebs-agent/config.yaml`, Linux non-root `~/.config/balkan-cli/config.yaml`, Windows `C:\ProgramData\BalkanID\ebs-agent\config.yaml`. Override with `--config `.
The easiest way to configure is the **wizard** (`--configure`), which prompts for the EBS connection and BalkanID credentials, runs a live **Test Connection**, and writes `config.yaml` only on success. Get the tenant ID/key/secret and integration ID from your BalkanID administrator (Integrations → Add Integration → Oracle E-Business Suite).
A complete `config.yaml`:
```yaml
server:
heartbeat_mode: true # run the periodic extract-and-upload loop
provisioning_enabled: false
ebs:
instances:
- name: prod-ebs # logical name; becomes the source system on rows
host: ebs-db.internal.example.com
port: 1521 # 1521 for TCP, 2484 for TCPS
service_name: VIS # Oracle SERVICE_NAME (or set `sid:` instead)
db_username: BALKANID_RO # dedicated read-only account
db_password: "CHANGE_ME"
schema: APPS # owner of the FND_* views (default APPS)
version: "12.2" # target EBS release
# use_tls: true # connect over Oracle TCPS (encrypted)
# wallet_path: "" # Oracle wallet dir with the TLS trust anchors
# Add more instances here; each is extracted and merged into one upload.
auth:
tenant_id: "01xxx"
tenant_key: "" # from the BalkanID platform
tenant_secret: "" # from the BalkanID platform
integration_id: "" # optional; resolved automatically if empty
```
**Connecting over TLS (optional).** For an encrypted DB connection (Oracle TCPS), set `use_tls: true` and point `wallet_path` at an Oracle wallet directory holding the trust anchors. Server-certificate verification stays on. Most on-prem EBS deployments use plain TCP on `1521`, in which case leave both unset.
***
### Running the agent
The same binary supports several run modes:
| Flag | Mode |
| ------------------------------------------- | ---------------------------------------------------------------- |
| *(none, in a TTY)* | Opens the dashboard TUI. Non-interactive → headless service. |
| `--configure` | Interactive setup form with a live Test Connection, then saves. |
| `--tui` | Dashboard TUI (status, configure, test, run, live logs). |
| `--headless` | Run the heartbeat loop in the foreground (used by the services). |
| `--test-connection` | Verify the EBS connection and exit (prints visible user count). |
| `--dry-run --output ` | Extract to CSVs locally; do **not** upload. |
| `--install-service` / `--uninstall-service` | Register / remove the OS service. |
| `--config ` | Use a specific config file. |
| `--version` | Print version and exit. |
In service mode the agent runs **headless**: no UI, starts on boot, extracts every 2 hours, and writes **per-day log files** (`YYYY-MM-DD.log`). The first cycle runs immediately on start.
**Verify without uploading.** `balkanid-ebs-agent --dry-run --output ./out` writes `entities.csv` and `entity_relations.csv` locally and uploads nothing — useful for inspection or CI.
A healthy cycle logs the fetched and emitted counts and `heartbeat cycle complete`:
```
level=info msg="instance \"\": fetched 4213 users, 612 responsibilities, 9871 assignments"
level=info msg="instance \"\": emitted 4836 entities (11 insights), 10128 relations"
level=info msg="uploaded entities+relations bundle"
level=info msg="heartbeat cycle complete"
```
# Service management and troubleshooting
You can use the following commands to configure and maintain the agent:
| Action | Linux | Windows |
| ------------- | ------------------------------------------------- | ------------------------------------------------- |
| Status | `systemctl status balkanid-ebs-agent` | `Get-Service BalkanIDEBSAgent` |
| Start / stop | `systemctl start\|stop balkanid-ebs-agent` | `Start-Service\|Stop-Service BalkanIDEBSAgent` |
| Restart | `systemctl restart balkanid-ebs-agent` | `Restart-Service BalkanIDEBSAgent` |
| Logs (follow) | `journalctl -u balkanid-ebs-agent -f` | `Get-Content ...\logs\.log -Tail 50 -Wait` |
| Run now | `balkanid-ebs-agent --tui` → "Run extraction now" | same |
### Common Error Codes
| Symptom | Likely cause | Fix |
| -------------------------------------------------------- | ----------------------------------------------------------- | ---------------------------------------------------------------------- |
| `ORA-01017` invalid username/password | Wrong DB creds | Re-run `--configure`; verify `db_username`/`db_password`. |
| `ORA-01045: ... does not have CREATE SESSION` | Account lacks login | `GRANT CREATE SESSION TO balkanid_ro;` |
| `counting .FND_USER failed (check SELECT grant)` | Missing / wrong schema grant | Grant `SELECT` on the FND views; check `schema:`. |
| `lastLoginTime` missing on most users | `FND_LOGINS` not granted and `LAST_LOGON_DATE` unmaintained | `GRANT SELECT ON apps.fnd_logins TO balkanid_ro;` |
| No `FND_INIT_SQL` insight | Profile tables not granted | Grant `SELECT` on `fnd_profile_options` + `fnd_profile_option_values`. |
| `oracle-ebs integration not found for tenant` | Integration not installed, or wrong `appId` | Install the `oracle-ebs` integration; or set `auth.integration_id`. |
| Upload returns 401/403 | Bad tenant key/secret | Re-copy `tenant_key`/`tenant_secret` from the platform. |
| `invalid schema/owner` | Disallowed `schema:` value | Use a plain identifier (`^[A-Za-z0-9_$#]{1,30}$`). |
| Connection hangs / times out | Host/port/firewall | Confirm reachability to the DB listener; check `use_tls`. |
# ADP Workforce Now - How do I send HRIS data via SFTP?
## Overview
ADP Workforce Now support is enabled via our HRIS partner integration Merge. Details on how to integrate ADP Workforce via Merge on BalkanID platform [here](https://docs.balkan.id/getting-started/setting-up-your-tenant/integrate-employee-data/integration-with-hris-system#integrating-your-hris-system-via-merge).
SFTP (secure file transfer protocol) is a secure and private service for sending files over the internet. You can also securely upload reports on a one-time basis via a manual CSV upload. We resync the entire file and delete rows that are not present in each transfer.
In this guide, you will be given instructions on how to create a custom report in ADP with fields that you want to include for your use case.
This guide is tailored to ADP Workforce Now. If you have another product, like RUN, DECIDUM, or Vantage the following steps may still apply but the many look a little different.
## Step 1: Create a custom report in ADP
1. Log into ADP and click **Reports & Analytics**
2. Click **Set Up New** under the Custom Reports

3. In **Set Up New Report** page, set the report title to **Employee-Census.csv**
1. **Note:** Please make sure the report is name ***Employee-Census.csv*** exactly. No additional text, such as date.

4. Then click **Select Fields** to continue
### Step 1.1: Add fields to your custom report
Please work with your vendor (who you are sending this report to) on what fields are required for the report. You can find all the fields required for your use case in our [SFTP Report Template](https://docs.google.com/spreadsheets/d/1Ollxrv36s_hrNJV8lxOuGEp6cLrpzfC8YHe06yFV2BM/edit?usp=sharing). Please note that the fields must **\*exactly\* match** how they appear in that file.
**Note:** We highly recommend that you **do not** ask ADP to create this report for you as we've observed this incurs additional fees.
**To add a field:**
1. Search for a field name under **ADD FIELDS**
2. Click the **+** button to add it to the report on the right
#### **CHECKPOINT**:
* **Associate ID** and **First Name** are required to sync Employees
* **Effective Date** (or [other acceptable ADP Fields that represent an Employment Effective Date](https://docs.google.com/spreadsheets/d/1Ollxrv36s_hrNJV8lxOuGEp6cLrpzfC8YHe06yFV2BM/edit?gid=0#gid=0)) is required to sync Employments
* **Reports To Associate ID, Manager ID, or Manager Employee ID** is required to sync Manager data
3\. When you are done, click **Save + Run**
4\. This will take you to a View Report screen where you can choose to export as csv
5\. Click Run to finalize this report

#### **CHECKPOINT**
1. Did you name the report **Employee-Census.csv?** This is required!
2. Did you add the **ASSOCIATE ID** field to your report? This is required to sync Employees!
3. Sometimes ADP will append a Report Totals to your custom report. If that is the case, please also delete this row.

## Step 2: Share your custom report
There are two ways to send your report that you created above:
1. You can use a **one-time manual csv upload**, see [option-1](#option-1-one-time-manual-csv-upload).
2. You can also **schedule a recurring transfer via ADP's Automatic Export Service** (AES). Recurring transfers via AES will incur a monthly fee paid to ADP, see [option-2](#option-2-recurring-report-transfers-using-automatic-export-service).
### Option 1: One-time manual CSV upload
If you want to update your employee data with a one-time csv upload simply download the report that you created in Step 2 as a csv. Then upload it into your Linking modal.

### Option 2: Recurring report transfers using Automatic Export Service
To automatically send your report on a recurring basis you will need to contact your ADP representative. They will charge a recurring fee to set up report automation that can be used across one or multiple reports. For more information on pricing, please refer to your ADP representative. *Charges may vary but anecdotally we have heard prices range from $30-$50/month.*
To set up the automation, you'll need to complete a Statement of Work with ADP to initiate the recurring file transfers (see the example below). Once finalized, ADP will apply the automation to the custom report you previously created. The process typically takes 3-4 weeks to complete.

#### **How to fill out the SOW:**
1. Please fill out the fields in Client Supplied Information:
1. **WFN Client ID:** the characters to the right of the @ symbol in your ADP login name
2. **WFN Security Master:** the person you chose as the Security Master in your ADP instance, this is likely your ADP Admin
3. **Authentication Level:** SSH Key (ADP Provided)
4. **Date Stamp Required:** No
5. **Require PGP Encryption:** Either option is acceptable depending on your preferences
* If you require PGP encryption, you may use either PGP key format below depending on your preference.
[MergeAPIKey.asc](https://assets.usepylon.com/f49877ed-d3d7-46e1-834d-1ddef64edf14%2F1773152242276-MergeAPIKey.asc?Expires=253370764800\&Signature=GWIb1-aHXxeffZ-8SID2Be~4m37I6GXhOWwfV0Cvx~EFv2oJP9-MdPHh2U-I~WXb7AAaTblmDc~O41c7ZJYN8b7UqILo3z5nv50mS6mXXU42JTdnkbN-INEpj2lppuACxle9rG~fvSVDwBa~ItWpD2fuGQ4M0jSlNBttX580av~Mumqi2jj8zJEQjY8g0eytp3AYD8wcK69kD0N-73uNJLDe-I8QPv1ckrwQbP70I5ucDDn6xY2o8BSC0BI~wUZnGnxhnd5gO2JlpmrPvW-6Lw~JoeoyJUGk3l4ka2GAMAujLpJ-a9Ncwn-dTVZ2~wX2p5xhDPwOHT8wjdDfkNhdiw__\&Key-Pair-Id=K3NV4LZ47N8M46) [MergeAPIKeyRSA.asc](https://assets.usepylon.com/f49877ed-d3d7-46e1-834d-1ddef64edf14%2F1773152259035-MergeAPIKeyRSA.asc?Expires=253370764800\&Signature=n7dlTXQneMJKlfCX766BcbFi72iiHCXYEcaS1ff7bNIDwk0TAM3N-PgQlKAn3hu7zxt7O~N9WrrsxFn6aaGCb4vD9Ozdmifkc2DPtWEHncuwgDzT3UUj3mHhLItaNBGfRibVWXqq2F~pM4KM6PRj53Eu4QYWFZ9-9TaVrKoKRrgsoIR964Y4LCL~Lqb50ivoIrfCUI3Q~B3I6VomfFkr8oO0ASKfj2LhQl0wexTqop~ygqZ2DXSMgFUEYlCrsUFCb~5IbsMpTbYTbgPJ7KKe6JxpV7s08jNET4TireGqGNc1zUA~IBYFzWH3BtPmYW9oNL13wcudEsqEFr-jfq9QvQ__\&Key-Pair-Id=K3NV4LZ47N8M46)
2. You will find all other required information for the Statement of Work in your linking modal:
1. **FTP Username**
2. **Directory**
3. **Host Name**
4. **Port**

Once the SOW is completed, ADP will typically respond in 3-4 weeks with confirmation on when the report is to be scheduled and the required SSH Key to authenticate the connection.
#### Scheduling the report:
ADP may schedule the reports themselves based on your preferences, but if you would prefer to schedule the report:
1. Head over to **Report & Analytics** -> **All Custom Reports.**

2. From the **Reports** main page, find the custom report that you configured and open up the menu. Then select **Schedule To Run.**

3. You'll then be in the **Schedule and Distribution** page. From here you are able to set up a recurring schedule for when your report will be sent. When you're ready, click **Apply**.

#### Authorizing the Connection via SSH Key:
**\*Required\*** ADP will then provide you an SSH Key which you will need to input into the linking flow:

## Step 4: Connection complete
You're done! Once the connection has been established, we will verify that the report has been properly formatted. From there, your data will be synced on the schedule that you configured through ADP!
## \*Troubleshooting\*
If you are having difficulties sending or receiving the data please first check the following common requirements.
1. Your report name must be exactly "Employee-Census.csv" or "Employee\_Census.csv"
2. Your report must have the column "ASSOCIATE ID"
3. Your report must be in .csv format
Note: We accept files up to 250MB. Please message your support representative if you need to increase this limit.
# Justworks - How do I link my account?
To authenticate your Justworks account, you will need to login to Justworks and authorize the integration in the linking flow.
### Prerequisites
Please ensure you fulfill all the requirements to set up the integration:
* You are an Administrator in your company's Justworks instance, or someone has shared their access with you.
* Your company is on an active paid plan with Justworks
### Instructions
1. Open window to the Justworks login screen
2. Log into Justworks
3. Click next on first screen
4. Click on checkbox if applicable and click Authorize
The checkbox is only relevant if the company you're connecting to requires access to Sex or Date of Birth information. If they do not, you will not see this checkbox.
# Lucca - How do I link my account?
To authenticate Lucca using an API Key, you will need to provide the following information: Tenant URL and API key. This guide will walk you through finding or creating those credentials within Lucca.
### Prerequisites
* You must be an Administrator in your company's Lucca instance, or someone has shared their access with you.
### Instructions
### Step 1: Locate your Lucca tenant URL
1. Log into your Lucca tenant
2. Copy the base URL of your Lucca instance and input it in the linking flow
### Step 2: Create an API Key
1. In the top right, under the Settings gear icon, select API Keys.
2. Choose Generate a new API Key.
3. Name your API Key.
4. Add the following permissions: Consult / create / modify users (REQUIRED), Consult leaves (OPTIONAL), Make absence requests (OPTIONAL)
5. Enter in your email address as the Technical contact.
6. Select the API key usage of Third-party publisher.
7. Click Generate a new API key.
### Step 3: Configure Role Permissions
1. You should now see your API key created on the API Keys page. Select role administration.
2. Under the Co-workers tab, add the following permissions to the pre-existing set of default permissions: See future employees, See former employees, View employee jobs (OPTIONAL), View employee managers (OPTIONAL), View employee qualifications (OPTIONAL)
3. Save your role configuration.
### Step 4: Enter your API into the linking flow
1. Back on the API Keys page, copy your new API Key.
2. Input your API Key into the linking flow.
# PayFit - How do I link using an API key?
To authenticate PayFit using an API Key, you will need to provide an API key. This guide will walk you through finding or creating those credentials within PayFit.
### Prerequisites
* You must be an admin in PayFit in order to generate an API Key.
### Instructions
### Step 1: Navigate to API Access
1. Navigate to Integrations on the left side panel
2. Click on API Access
### Step 2: Create an API Key
1. Name your API Key
2. Select Access to contracts and Access to collaborators read scopes
3. Click Create
4. Copy the API Key that appears, and add it to the linking flow
# Darwinbox - How do I link using an API Key?
# Breathe - How do I link my account?
# Namely - How do I link my account?
# SAP SuccessFactors - How do I send HRIS data via SFTP?
# HiBob - How do I send HRIS data via SFTP?
# CyberArk - How do I link my account?
# ChartHop - How do I link my account?
To authenticate ChartHop, you will need to provide the following information: ChartHop subdomain and API key. This guide will walk you through finding or creating those credentials within ChartHop.
### Prerequisites
* Please ensure you have Admin permissions in your company's ChartHop instance or someone has shared their access with you.
### Instructions
### Step 1: Locate your ChartHop subdomain
If your ChartHop URL is "", add acme.
### Step 2: Find your ChartHop API key
1. Go to Settings > Apps > All apps. Install the Merge app.
2. Generate an API Token with the Access Level "Owner."
3. Save the API Token
### Step 3: Enter your API key into the linking flow
# Paylocity - How do I link to a partnered organization?
To authenticate Paylocity to a partnered organization, you will need to provide your Company ID. This guide will walk you through finding or creating those credentials within Paylocity.
### Prerequisites
* You have Administrator permissions in your company's Paylocity instance, or someone has shared their access with you.
### Instructions
1. Sign in to Paylocity
2. Navigate to the Integrations Marketplace: HR & Payroll > Web App > Web Services > Integrations > "Browse Marketplace"
3. Browse to find the specific Organization you are trying to connect to
4. Click "Begin Integration" and sign the PADE ("Paylocity Automated Data Exchange") form
5. Submit the form and wait for Paylocity to confirm. It can take a few days for Paylocity to confirm the PADE request. It is not an instant approval.
6. Once Paylocity confirms your request, input your Company ID into the linking flow
**Note:** There may be a cost associated with the API setup & gathering of credentials from Paylocity.
# Paycor - How do I link my account?
To authenticate Paycor, you will need your Company ID, Username, and Password. This guide walks you through finding those credentials.
### Prerequisites
* You have a Paycor username and password with access to AppCreator. The Developer Portal is available to all Paycor clients; however, an HR/Payroll/Company Admin must create an App Creator account to use the API. There may be a cost associated with retrieving API Credentials from Paycor.
### Instructions
### Step 1: Log in to your Paycor Portal
1. Go to developers.paycor.com and sign in.
2. Select "Get Started" under "Are you an existing Paycor Client".
3. Select the Client IDs you want eligible for this App Creator account.
### Step 2: Find your Company ID
1. Click the menu icon, then go to Company > Departments.
2. Retrieve your Company ID from the top left (e.g., "385423").
### Step 3: Enter information in the linking flow
1. In the linking flow, select Paycor Sandbox or Paycor Production Account.
2. Enter the Company ID from Step 2.
3. Click Open window, log in with your Paycor credentials, review access, select a Client ID, agree to terms, and click Integrate.
**Note:** Paycor does not allow multiple company IDs in a single connection. Create a separate connection for each company ID you want to integrate with.
# Charlie - How do I link my account?
This guide will walk you through retrieving your Client ID and Secret in Charlie to complete your linking flow.
### Prerequisites
* You are an Administrator in your company's Charlie instance, or someone has shared their access with you.
### Instructions
### Step 1: Accessing your Client ID and Secret
1. Click on Integrations on the left hand corner
2. Click on API Keys to navigate to the Client ID and Secret
3. Generate the Client ID and Client Secret for your CharlieHR account
4. IMPORTANT: Copy and safely store both the Client ID and Client Secret. If you've already generated these in the past, retrieve the Client Secret from your HR or IT Team.
### Step 2: Copy and paste the Client ID and Secret into the linking flow
# BambooHR - How do I configure a custom access level for user provisioThis guide walks you throuning?
### Prerequisites
* You have a Custom Access Level that you want to update permissions for
* Your use case is user provisioning. Compensation, pay, and/or time off data will not be accessible after following these steps.
### Instructions
### Step 1: Edit the access level for other employees
1. Click the settings icon in the top right > Access Levels > select the access level to edit > Access Level Settings
2. Select "ALL EMPLOYEES" for whom this access level applies.
3. Under Personal section, enable View access for: Basic Information (Status, Employee Number, First Name, Last Name, Preferred Name), Address (Address Line 1, 2, City, State, Zip Code, Country), Contact (Mobile Phone, Work Phone, Work Email, Home Email)
4. Under Job section, enable View access for: Hire Date, Original Hire Date, Direct Reports, Team, Employment Status, Employment Status Date, Termination Type, Job Title, Department, Division, Location, Job Information Date, Reporting To
5. (Optional) Under Benefits section, enable View access for Dependents if needed.
### Step 2: Edit the access level for your information
1. Select the "See About Themselves" option
2. Choose "Yes, Allow Access" for employees to see their own information
3. Choose "Full Access" for the access level to apply to themselves
# Okta - How do I link my account?
To authenticate Okta, you will need to provide an API key. This guide walks you through finding or creating those credentials within Okta.
### Prerequisites
* In Okta, API tokens are generated with the permissions of the user that created the token. Only super admins, org admins, and group admins may create tokens. Okta recommends generating API tokens using a service account with Super Admin permissions.
### Instructions
### Step 1: Find your domain
1. Login to Okta. Click on your Profile in the top right corner, copy the domain (including .okta.com) below your email.
2. Enter the domain into the linking window.
### Step 2: Create your API token
1. Click on Security in the left hand column, select API from the dropdown. Navigate to Tokens, and click "Create token". Name your token, then copy it to input into the linking window.
### Step 3: Enter the created token into the linking flow
# TriNet HR Platform - How do I link with my API key?
This guide walks you through creating an API key within TriNet HR Platform and entering it into the linking flow.
### Prerequisites
* You have Admin permissions in your company's TriNet instance or someone has shared their access with you.
* Note: This guide is for TriNet HR Platform (formerly Zenefits). If you see zenefits in the URL, you're in the right place. If the UI looks different, you may be using TriNet PEO — go back and select the TriNet option in the linking flow.
### Instructions
### Step 1: Generating your API key
1. Open Company Profile under Admin Apps
2. Click on Custom Integrations
3. Under Rest API Access, select Add Token
4. Configure the Permissions you'd like to grant and press Save
### Step 2: Copy and Paste API Token into Link
1. Click on the "eye" icon to reveal the API Token, then copy and paste it into the linking flow.
**Permissions:** Make sure the specific items you want to grant access to under People are checked off. These are subject to the specific use case of the company you are connecting to.
# Dayforce HCM - How do I link my account for HRIS?
To authenticate Dayforce HCM (formerly Ceridian Dayforce HCM), you will need your Company ID and Credentials. This guide walks you through finding or creating those credentials within Dayforce.
### Prerequisites
* Please ensure that the Role configured for this integration is set as the Default role. Go to System Admin > User, find the User, click on it, and select the "Is Default" checkbox for the Role.
### Instructions
### Step 1: Configure Feature Access
1. From the hamburger menu in the top left, click System Admin > Roles
2. Navigate to Features. Ensure HCM Anywhere and Web Services are checked
3. Expand Web Services and make sure Read Data is checked. For PATCH/POST data, mark the associated checkboxes as well
### Step 2: Configure Authorizations
Navigate to Authorizations and select Can Read for the following (depending on your use case): Employee Contact Information, Employee Financial Information, Employee Key Information, Employee Historic Pay Information, Employee Pay Information, Employee Personal Information, Employee Status Information, Employee Work Assignment records, User Information.
### Step 3: Configure Web Services Field-level Access
Navigate to Web Services Field-level Access, then RESTful Services > Human Resources > Employee. Enable EffectiveStart, EffectiveEnd, and XRefCode. Then enable additional fields based on your use case (names, managers, employment status, location, pay info, contact info, etc.).
### Step 4: Configure Org-Level Access
1. Navigate to System Admin > User. The authenticating user needs "Can See Self" enabled. Expand the User, click Location Access, + Add Location, and add the Company Level Location.
### Step 6: Authenticate with your credentials in the linking flow
1. Gather your Company ID, User Name, and Password. Enter them into the linking flow and click Submit.
# Microsoft Entra ID - How do I link my account?
To authenticate Microsoft Entra ID, you will need your Tenant ID. This guide walks you through finding those credentials within Microsoft Entra ID.
### Instructions
### Step 1: Click into Azure Entra ID
1. Log into your Azure Portal and look for the "Azure services" section. Click on "Azure Entra ID".
### Step 2: Find Tenant ID under "Basic Information"
1. After clicking on Microsoft Entra ID, navigate to the Overview Page which has all the "Basic Information" for your Organization.
### Step 3: Input Tenant ID into the linking flow
1. Copy and paste the Tenant ID into the linking flow and click submit.
# PeopleHR - How do I link my account?
This guide walks you through creating an API key within PeopleHR and entering it into the linking flow.
### Prerequisites
* You are an Administrator in your company's PeopleHR instance, or someone has shared their access with you.
### Instructions
### Step 1: Generating your API key
1. In your PeopleHR account, click Access in the top left hand corner and select HR Admin.
2. Go to Settings on the left sidebar, select API, and click the + icon.
3. On the API Key Management screen, type in a name for the key.
4. For application actions, select all for Employee, Salary, Absence, and/or Holiday depending on your use case.
5. Press Save. Copy and store your Key in a safe place.
### Step 2: Enter your API key in the linking flow
---
[Next Page](https://docs.balkan.id/llms-full.txt/1)