# Snowflake Integration setup
### Getting Started
#### Requirements:
* RSA Public Key (provided by the team)
* Account ID
* Integration User name
* Integration User role
#### Steps to obtain the necessary fields to configure snowflake
1. Login to your snowflake account
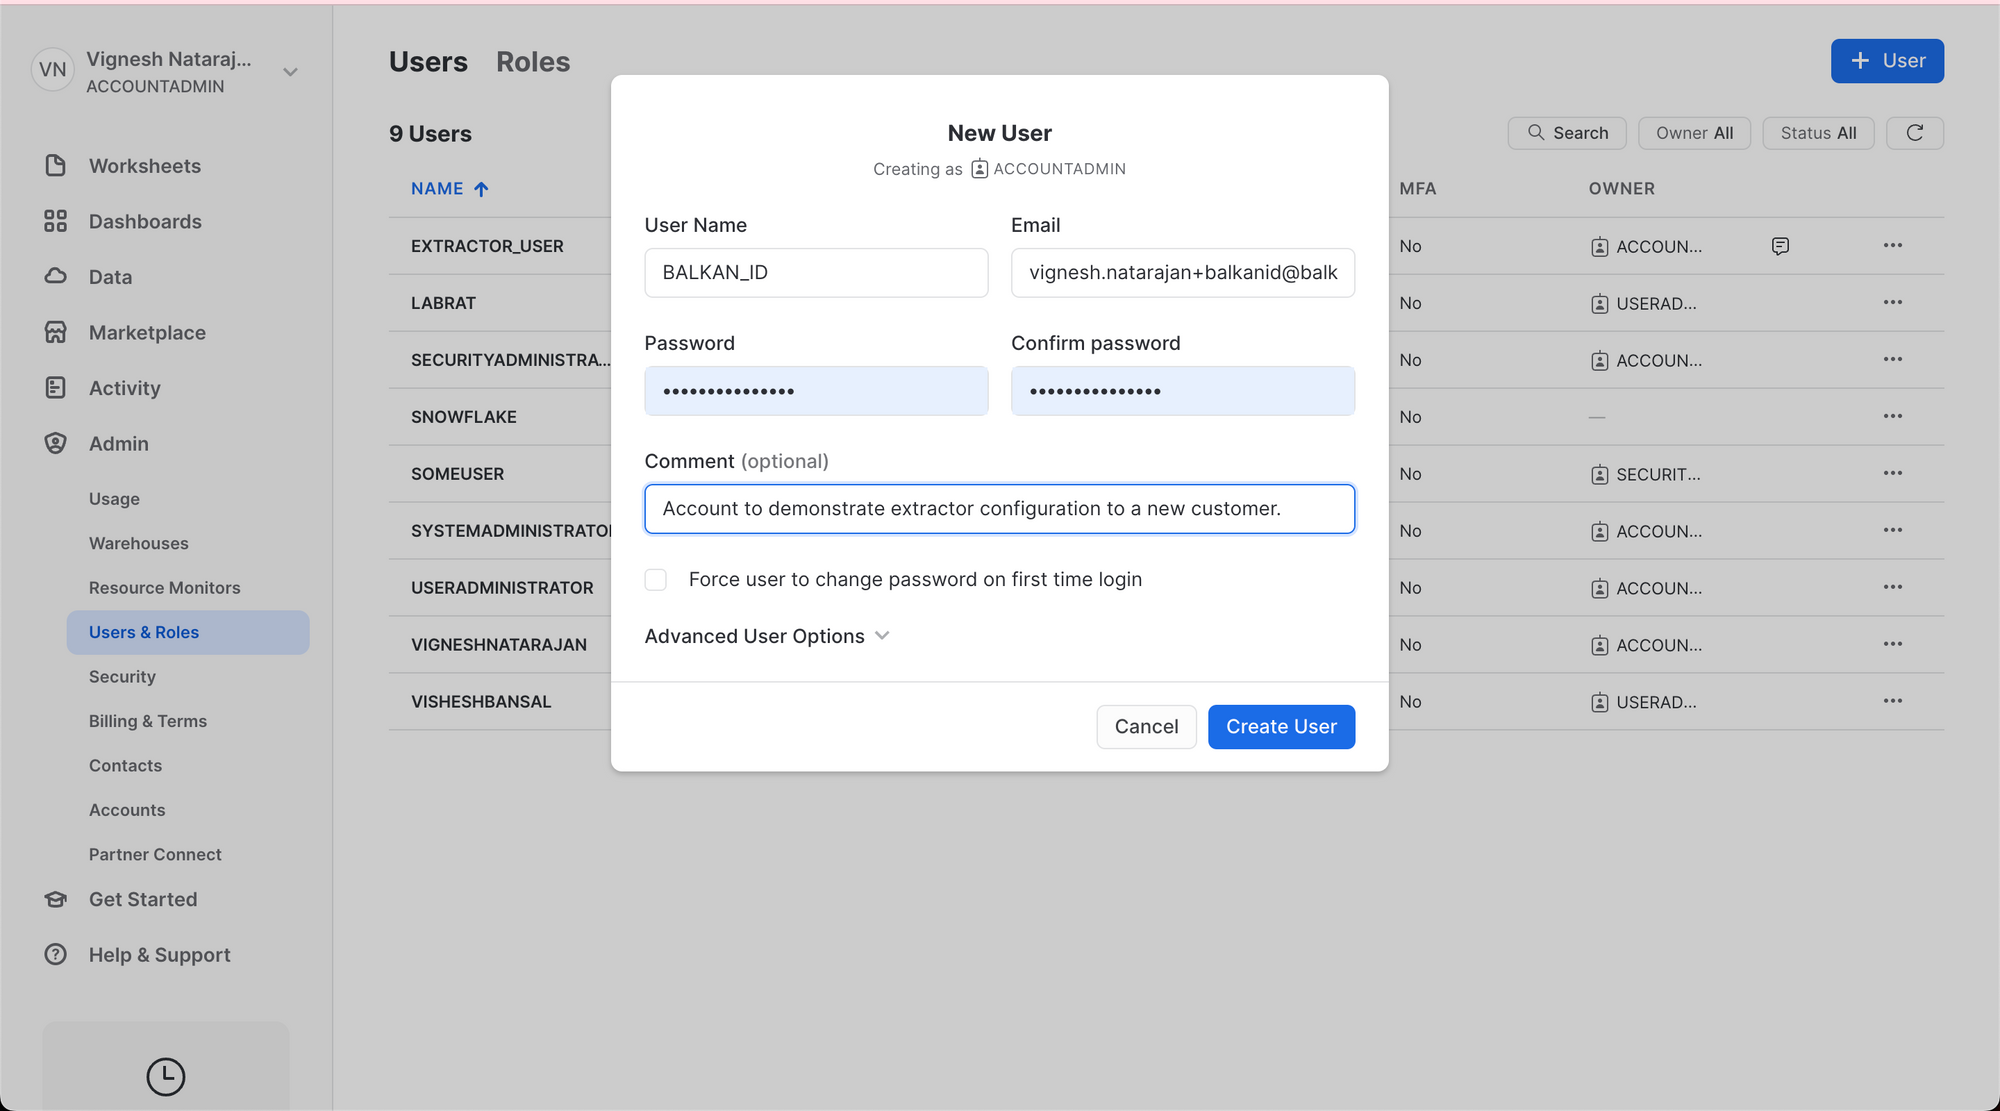
2. Create a user by going to *Settings* > *Users & Roles* and click on **Create User**. You should be presented with the following:
Fill in the details, and make a note of the User Name.
3. Now go into `Worksheets`, create a new Worksheet, and execute the following SQL commands one by one.
* First we will create a role for this user to grant it the necessary permissions:
```
CREATE ROLE BALKANID_ROLE;
GRANT MANAGE GRANTS ON ACCOUNT TO ROLE BALKANID_ROLE;
```
* Then we assign it to our user:
```
GRANT ROLE BALKANID_ROLE TO USER BALKAN_ID;
```
4. Acquire the public key from our team.
5. Now open up the public key file, copy the public key without the `----BEGIN PUBLIC KEY-----` header and `----END PUBLIC KEY-----` footer, and run the following command on your snowflake notebook or shell. If it is a file, you need to escape all the newline characters.\
ALTER USER BALKAN\_ID SET RSA\_PUBLIC\_KEY='{PUBLIC\_KEY}'
6. Acquire your account identifier by following the instructions given here:
[Account Identifiers | Snowflake Documentation](https://docs.snowflake.com/en/user-guide/admin-account-identifier#option-2-account-locator-in-a-region)
### Configure Snowflake in your BalkanID tenant
1. Login to the BalkanID application and switch to the tenant you would like to add your integration to.
2. Head to *Integrations* > *Third Party Applications* and click **Add Integration**, select **Snowflake**. Set up the *Primary Application owner* and the *Description*, if any.
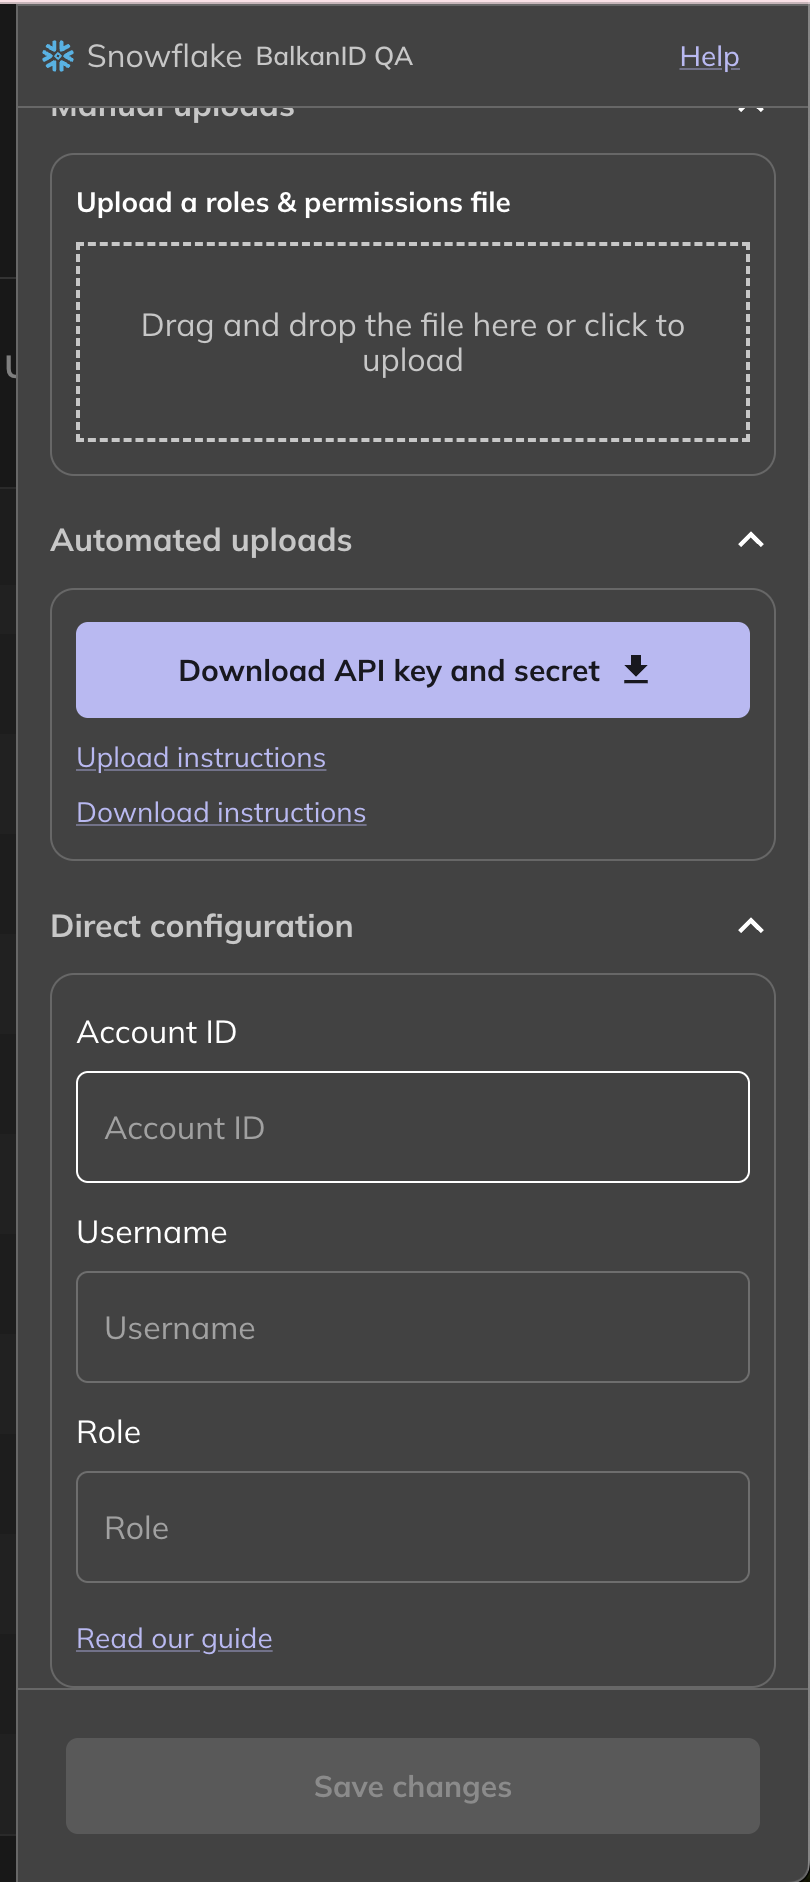
3. Snowflake would have been added to the list of applications. Click on the **Configure and Integrate** button beside the integration name, and configure the fields with the values that were noted prior. It should look like this:**Account ID** will be your account identifier, **username** will be the username of the user you created for the integration, and **Role** will be the name of the role which has been granted the `MANAGE GRANTS` permission and has been granted to the integration user.
4. Once you filled in the information, click **Save changes**. Your integration is now configured and you will see the status of the integration displayed alongside other integrations on the *Integrations* page. Integrations are synced daily. When data is available, the integration Status column will read **Connected** and the integration Message will read **Data available**.